Your cart is currently empty!
Simple Pho Recipe: Easy Step-by-Step Guide
Introduction to Simple Pho
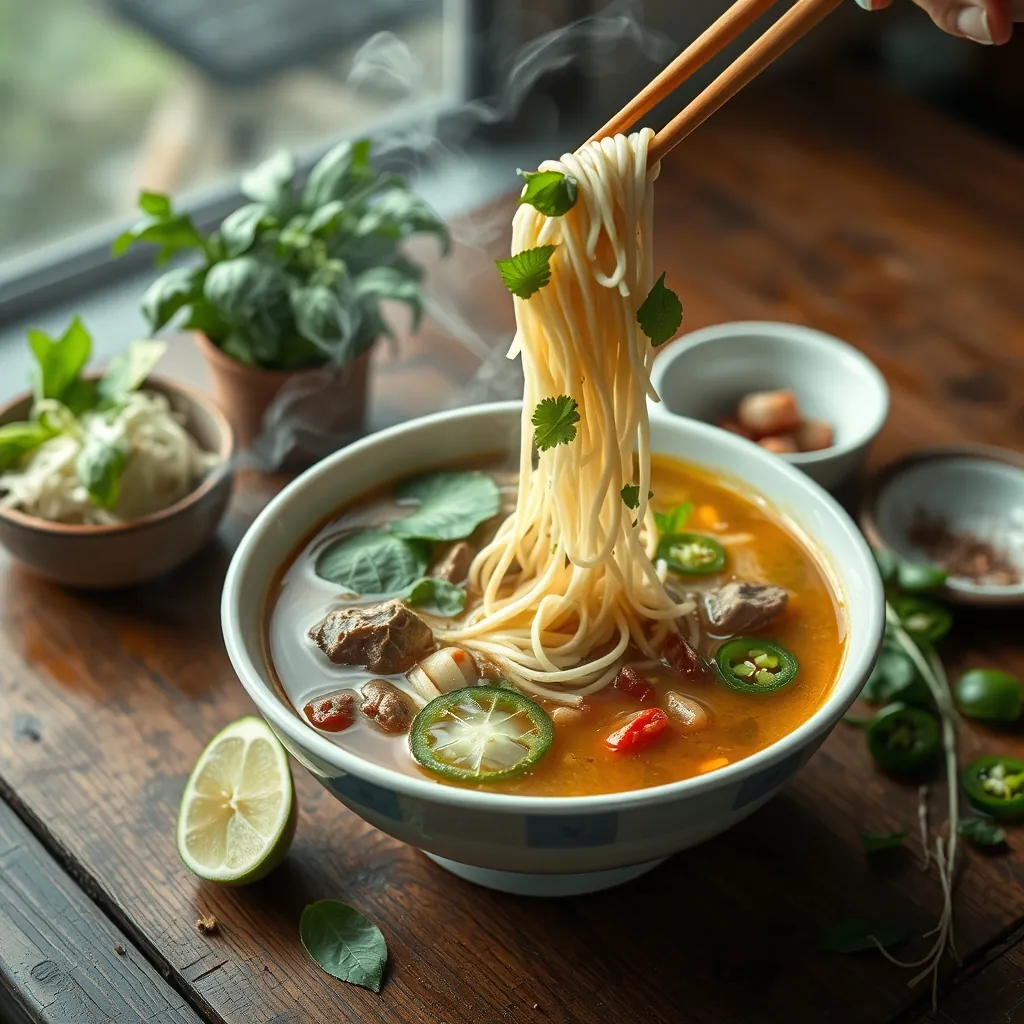
Pho has a reputation that precedes it. The Vietnamese noodle soup commands respect, often associated with grandmothers tending massive pots of broth for an entire day. That version is real, and it is magnificent. But it is not the only path to a satisfying bowl.
The truth is that a deeply flavorful pho can come together in under an hour, sometimes in under 30 minutes, using techniques that prioritize efficiency without sacrificing the essential character of the dish. This is not about cutting corners. It is about working smarter with the ingredients available to you.
This article walks through a simple pho recipe designed for weeknight cooking. You will learn which ingredients matter most, how to build a quick broth that still tastes layered and complex, and how to achieve a clear broth rather than a murky one. We cover noodle preparation, protein choices, and the assembly that turns individual components into a cohesive, steaming bowl.
You will also find guidance on customizing the dish. Whether you need a gluten-free version, a low-sodium adaptation, or a fully vegetarian take, the framework here bends to your needs. The goal is a bowl of pho that satisfies both your cravings and your schedule.
What Is Pho? A Quick Overview
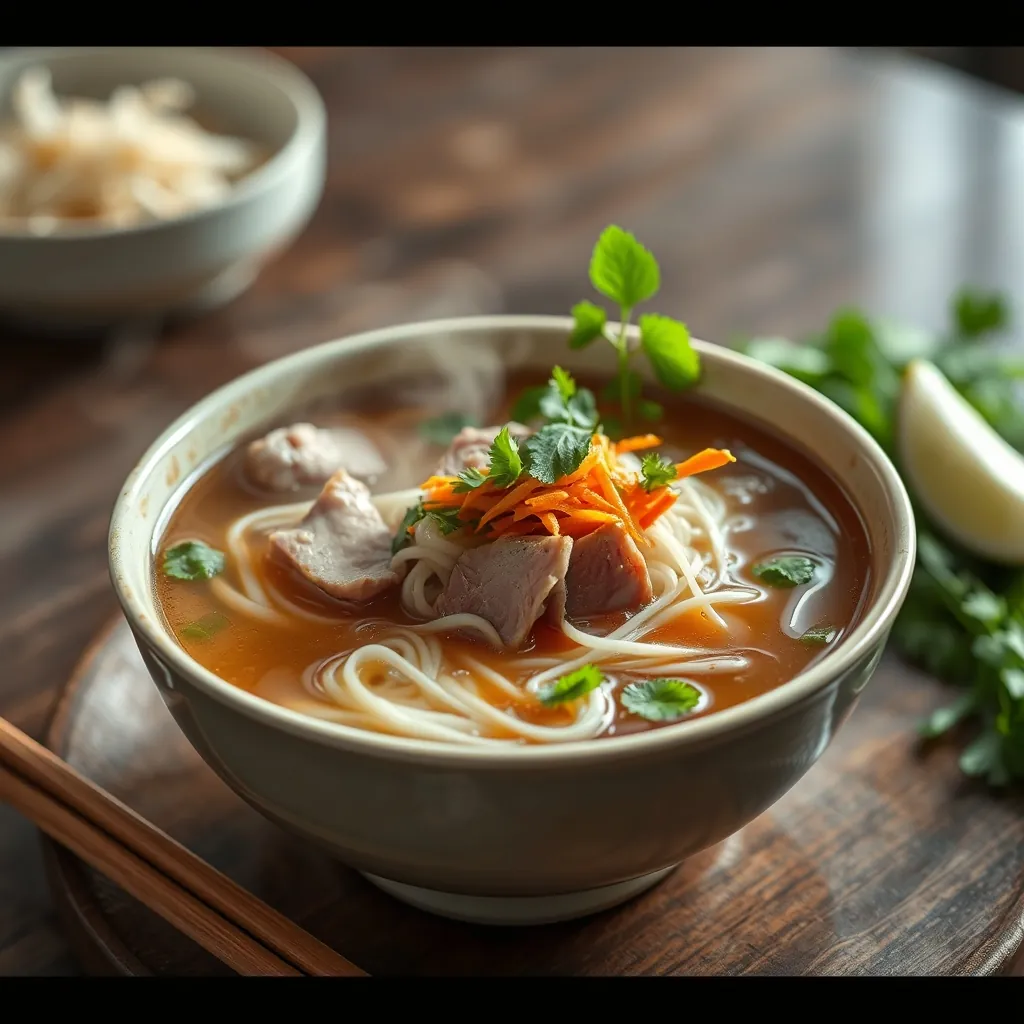
Pho is a Vietnamese noodle soup built on a simple formula: a fragrant broth, flat rice noodles, fresh herbs, and a protein. The magic lies in how those four elements interact. The broth carries the deep, spiced flavor. The noodles provide a soft, chewy base. The herbs cut through the richness with brightness. The meat adds substance and savor.
The dish originated in northern Vietnam in the early 20th century, emerging in and around Hanoi. It began as a street food, sold from portable carts and served to laborers who needed a cheap, filling meal. The name itself is a matter of debate. Some linguists trace it to the French dish “pot-au-feu,” while others point to the Cantonese word for rice noodles. Either way, pho spread south after 1954, when Vietnamese people migrated following the partition of the country.
That migration created two distinct regional styles. Northern pho, the original, keeps things restrained. The broth is clearer and lighter, seasoned primarily with fish sauce and shallots. The garnishes are minimal, often just lime and chili. Southern pho, which most Western restaurants serve, goes bolder. The broth is sweeter and darker, and the table becomes a playground of bean sprouts, Thai basil, hoisin sauce, and sriracha.
Both styles share a common backbone. The broth relies on beef bones simmered with charred onion and ginger, plus warm spices like star anise, cinnamon, and cloves. That aromatic combination is what separates pho from other noodle soups. It is savory, slightly sweet, and unmistakably fragrant.
For the purposes of this article, we work within the Southern tradition. It is more forgiving for beginners, and its robust flavor profile tolerates shortcuts better than the delicate Northern version. The simple pho you will build in the following sections captures the soul of the dish without demanding a full day of simmering.
Understanding what pho is, and where it comes from, makes the cooking process more meaningful. You are not just assembling ingredients. You are participating in a tradition that has fed millions of people for over a century.
Essential Ingredients for a Simple Pho
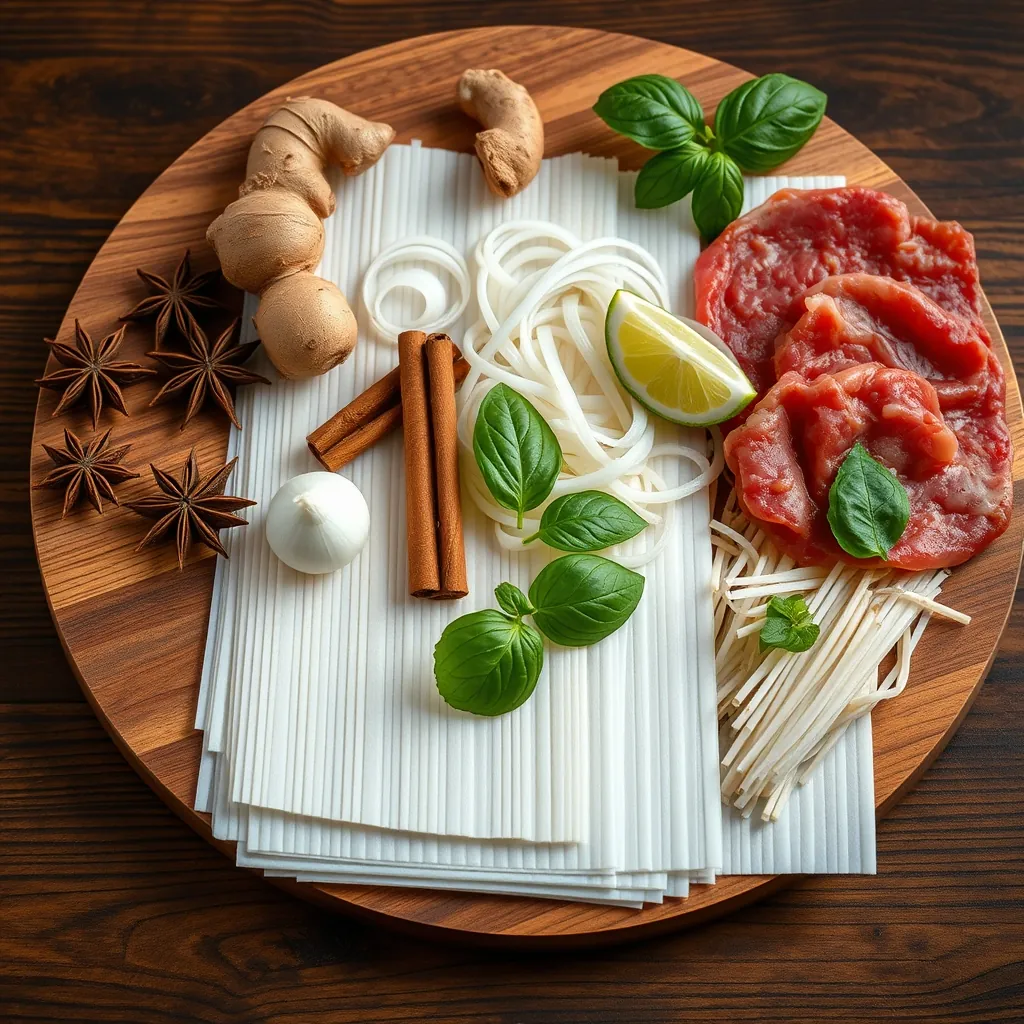
Building a simple pho starts with the right shopping list. You do not need every ingredient a traditional recipe demands. But you do need the core components that define the dish. Break the list into four groups: the broth base, the noodles, the protein, and the garnishes.
The Broth Base
The broth is the heart of pho. For a simplified version, you have two paths. The first is a quick homemade broth using store-bought beef stock as your foundation. The second is a concentrated pho spice packet that does the aromatic work for you.
Here is what you need for the quick homemade route:
- Beef stock (6 to 8 cups): Choose a good-quality low-sodium brand. The stock is your flavor canvas, so do not skimp here.
- Onion (1 large) and ginger (a 3-inch knob): These get charred under a broiler or over an open flame. Charring adds a smoky depth that makes the broth taste like it simmered for hours.
- Star anise (3 whole pods): This is the signature flavor of pho. It brings a sweet, licorice-like warmth.
- Cinnamon stick (1) and cloves (4 to 5): These add a gentle spice backbone. Together with star anise, they create that unmistakable pho aroma.
- Coriander seeds (1 tablespoon): They contribute a citrusy, earthy note that rounds out the spice blend.
- Fish sauce (2 to 3 tablespoons): This is non-negotiable. It delivers the salty, umami depth that makes pho taste authentic.
- Sugar (1 to 2 teaspoons): Use rock sugar if you can find it, but white sugar works fine. It balances the salt and the spices.
If you want the fastest possible route, buy a pho spice packet from an Asian grocery store or online. These packets contain the exact blend of star anise, cinnamon, cloves, and coriander seeds pre-measured for one pot of broth. You just drop the sachet into your simmering stock and remove it when the flavor is right. It is a legitimate shortcut that saves both time and money, especially if you do not want to buy whole spices you will rarely use.
The Noodles
Pho uses flat rice noodles called bánh phở. They come in various widths, but the medium width is the standard for beef pho. Look for them in the Asian foods aisle of your supermarket, typically dried in packages. Some larger grocers carry fresh rice noodles in the refrigerated section, which cook in under a minute.
Dried rice noodles need a soak in warm water before boiling. Fresh ones just need a quick dip in hot water to warm through. Either way, cook them separately from the broth. Noodles left sitting in hot broth turn mushy and cloud the soup.
The Protein
Traditional beef pho uses thinly sliced raw sirloin or eye round. The paper-thin slices cook in seconds when the boiling broth is poured over them. This is the classic presentation, and it is worth trying at least once.
For a simpler approach, use leftover cooked protein. Shredded rotisserie chicken works beautifully. So does thinly sliced steak from last night’s dinner. You simply add the cooked meat to the bowl and let the hot broth warm it through. This is the weeknight move that makes pho accessible on a Tuesday.
If you cannot find thinly sliced beef at your butcher counter, ask them to slice it for you. Most will oblige. Or pop a partially frozen steak into a food processor and pulse it into thin shavings. Freezing firms the meat so it slices cleanly.
The Garnishes
Garnishes are not optional decoration. They are functional components that balance the broth’s richness. The standard pho garnish lineup includes:
- Bean sprouts: They add crunch and a fresh, vegetal bite.
- Thai basil: Its anise-like flavor complements the broth’s spices. Regular sweet basil works in a pinch.
- Lime wedges: A squeeze of lime brightens the entire bowl.
- Jalapeño or serrano slices: They bring heat. Remove the seeds for a milder kick.
- Cilantro and green onion: These add freshness and color.
- Hoisin sauce and sriracha: These are table condiments in Southern-style pho. Add them to taste, not to the pot.
Most of these garnishes are easy to find. Thai basil is the one that might require a trip to an Asian market, but standard basil or even mint makes an acceptable substitute. The key is to have something fresh, something crunchy, and something acidic on the table.
You now have everything you need to build a simple pho. The next section walks through the quick broth method that brings these ingredients together in under 30 minutes.
The Quick Broth Method: Building Flavor Fast
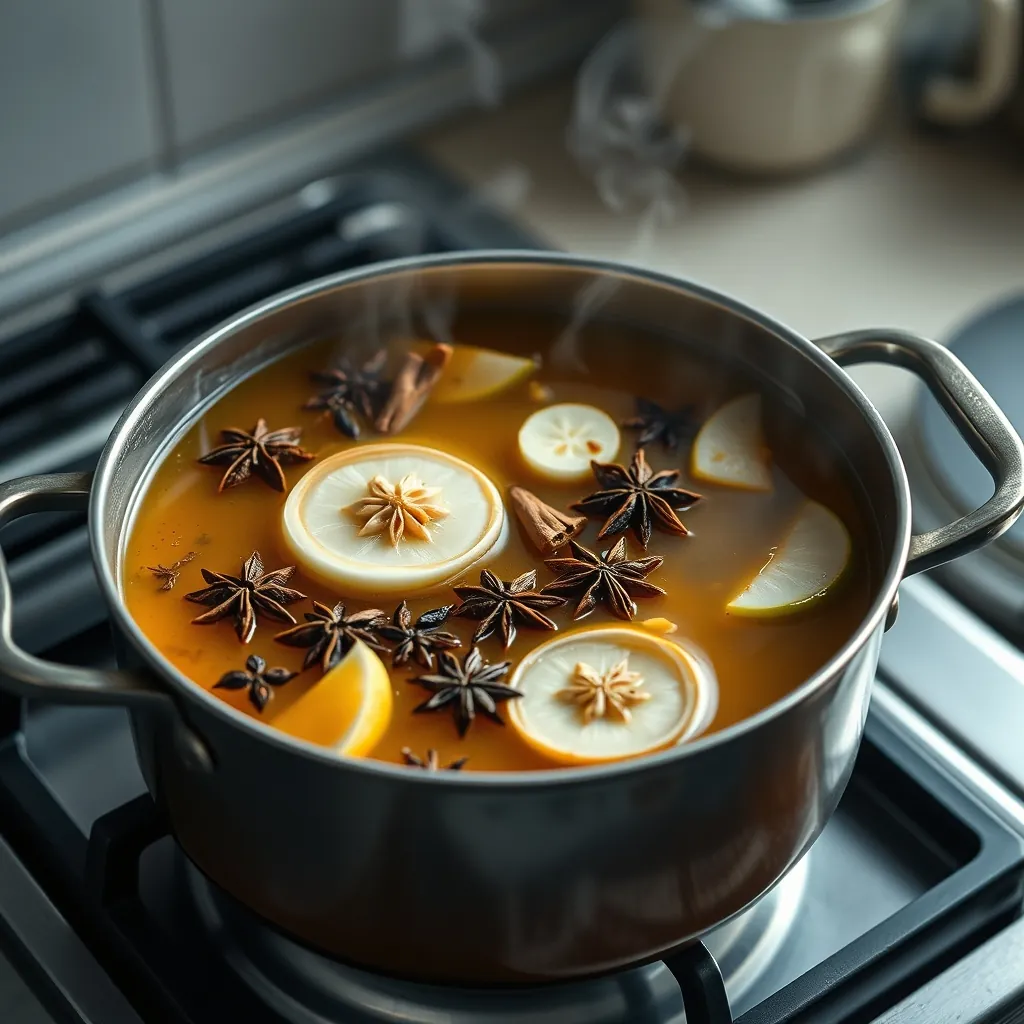
A proper pho broth traditionally simmers for four to six hours. That slow extraction pulls collagen from beef bones and coaxes every bit of aroma from the spices. But you can capture most of that flavor in under 30 minutes. The trick is to start with a quality stock and then turbocharge it with charred aromatics and briefly simmered spices.
Step 1: Char the Onion and Ginger
This step does more heavy lifting than any other in the quick method. Charring transforms the onion and ginger from mild aromatics into smoky, caramelized flavor bombs. The high heat triggers the Maillard reaction, creating compounds that mimic the complexity of a long-simmered broth.
Halve one large onion and slice a 3-inch knob of ginger into thick coins. No need to peel either one. Place them cut-side up on a baking sheet and run them under a hot broiler for 8 to 10 minutes. You want deep char marks and softened flesh. The edges should look almost burnt. That blackening is where the flavor lives.
No broiler? Use a dry cast-iron skillet over high heat. Press the onion halves and ginger flat against the pan and let them sit undisturbed for 5 to 6 minutes per side. Open flame works too, if you have a gas stove. Hold each piece with tongs directly over the burner until charred. The goal is the same: serious color, serious flavor.
Step 2: Bloom the Spices
Spices release their essential oils when heated. Toasting them briefly in a dry pan before adding them to the broth intensifies their aroma dramatically. This is a small step that pays off in a big way.
Add your star anise, cinnamon stick, cloves, and coriander seeds to a dry skillet over medium heat. Shake the pan gently for 60 to 90 seconds. You will smell the spices become fragrant almost immediately. Remove them from the heat before they smoke or burn. Burnt spices turn bitter, and that bitterness will ruin your broth.
Step 3: Build the Broth Base
Pour 6 to 8 cups of store-bought beef stock into a large pot. Bring it to a boil over high heat. While it heats, scrape the charred bits off the onion and ginger if they look excessively black. A little char is good, but large burnt flakes will muddy the broth. Add the onion halves and ginger coins to the pot.
Here is where the quick method diverges from tradition. You are not simmering for hours. You are infusing for 20 minutes. Drop in the toasted spices and let everything bubble at a gentle simmer, not a rolling boil. A vigorous boil will emulsify fats and make the broth cloudy.
Step 4: Season with Fish Sauce and Sugar
After 15 minutes of simmering, the stock should carry a noticeable aroma of the spices and charred aromatics. Now it is time to season. Add 2 to 3 tablespoons of fish sauce and 1 to 2 teaspoons of sugar. Stir to dissolve.
Taste the broth. It should be savory, slightly sweet, and aromatic. If it tastes flat, add another tablespoon of fish sauce. If it tastes too salty, add a pinch more sugar. The balance between salty and sweet is what makes pho broth sing. Remember that the broth will be diluted slightly when you add noodles and toppings, so aim for a flavor that is slightly more intense than you want in the final bowl.
Step 5: Strain and Hold
When the broth has reached its flavor peak, strain out the solids. Use a fine-mesh strainer lined with cheesecloth for the clearest result. The onion, ginger, and spices have done their job and should be discarded. What remains is a concentrated, aromatic broth that tastes like it simmered all day.
Keep the broth at a low simmer while you prepare the noodles and protein. A gentle heat keeps it ready for assembly. If you are making the broth ahead, let it cool completely before refrigerating. The flavor will continue to develop overnight, which is a bonus worth planning for.
Why This Works
The quick method succeeds because it targets the three pillars of pho flavor: umami from the stock, aromatics from the charred onion and ginger, and warmth from the toasted spices. Each element is accelerated without being skipped. The stock provides the body that would normally come from hours of bone simmering. The charring creates depth in minutes. The toasting releases spice oils instantly.
One warning: do not skip the charring step. It is the difference between a broth that tastes like seasoned stock and one that tastes like pho. The smoky, caramelized notes from the onion and ginger are what bridge the gap between a 30-minute meal and a 6-hour tradition.
Your broth is now ready. The next section covers the pro tips for keeping it crystal clear, so your finished bowl looks as good as it tastes.
Achieving a Clear Broth: Pro Tips for Beginners
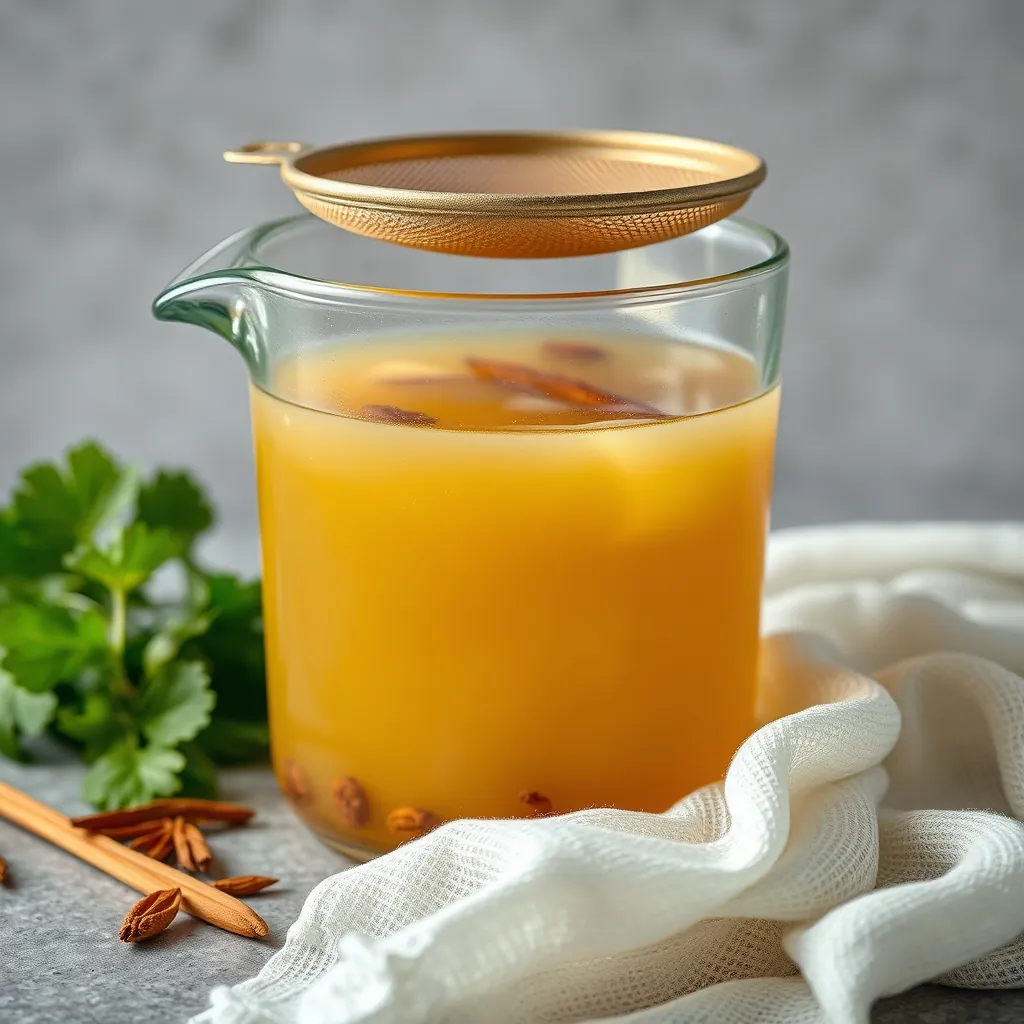
A cloudy broth does not ruin the flavor. But it does change the experience. Clear pho broth looks clean, tastes lighter, and feels more refined. The good news is that clarity is not about skill. It is about technique. A few simple habits will keep your broth transparent, even with the quick 30-minute method.
Why Cloudiness Happens
Cloudy broth comes from suspended particles. These are tiny bits of protein, fat, and impurities that break loose from bones and meat during simmering. When the liquid bubbles aggressively, these particles get churned into the broth and stay suspended. A gentle simmer keeps them settled at the bottom, where they are easy to remove.
The second culprit is fat. When fat emulsifies into the broth, it creates a milky appearance. A rolling boil causes this emulsification. A gentle bubble does not. This is why the temperature of your simmer matters more than almost anything else.
Skim, Skim, Skim
The most effective tool for clear broth is a shallow spoon and a few minutes of attention. As the broth first comes to a simmer, foam and scum will rise to the surface. This grayish foam is coagulated protein and impurities. It looks unappealing, but it is harmless. Remove it with a spoon or a fine-mesh skimmer.
Do this during the first 10 minutes of simmering. This is when the majority of impurities surface. After that, the foam will be minimal. Set a timer if you need to. The difference between a broth that is skimmed and one that is not is dramatic. Skimmed broth stays clear. Unskimmed broth turns murky.
The Fine-Mesh Strainer Trick
Even with careful skimming, some particles will remain. This is where the strainer saves you. After the broth has finished simmering, pour it through a fine-mesh strainer lined with cheesecloth. The double layer catches even the smallest particles.
For the clearest possible result, strain the broth twice. The first pass removes the bulk of the solids. The second pass catches anything that slipped through. Do not press on the solids in the strainer. Squeezing them forces cloudy sediment into your broth. Let the liquid drip naturally.
The Parboiling Technique for Fresh Bones
If you are using fresh beef bones instead of store-bought stock, parboiling is your secret weapon. This technique removes the blood and impurities that cause cloudiness before they ever enter your final broth.
Place the bones in a large pot and cover them with cold water. Bring the pot to a boil and let it bubble for 3 to 5 minutes. You will see a substantial amount of gray foam rise to the surface. Drain the bones and rinse them thoroughly under cold running water. Discard the parboiling water entirely.
Then start your real broth with fresh water and the cleaned bones. This single step eliminates most of the cloudiness before the long simmer even begins. It also produces a cleaner, more neutral flavor that lets the spices shine through.
Let the Broth Rest
Patience plays a role in clarity. After straining, let the broth sit undisturbed for 5 minutes. Any remaining particles will settle to the bottom of the pot. When you ladle the broth into bowls, use a gentle scoop from the top. Avoid stirring the pot or reaching into the bottom layer where the sediment collects.
This resting period also allows excess fat to rise to the surface. Skim it off with a spoon for a lighter, cleaner broth. If you have time, refrigerate the broth overnight. The fat solidifies into a firm layer on top, making it trivially easy to remove. The broth underneath will be remarkably clear.
What to Do If Your Broth Turns Cloudy
Cloudy broth is not a failure. It still tastes delicious. But if you want to rescue it, there is one more trick. Whisk one egg white into the simmering broth. The egg white will trap suspended particles as it cooks, forming a raft on the surface. Strain the broth through cheesecloth afterward. This classic clarifying technique works, though it is rarely necessary for home cooking.
For most home cooks, the combination of gentle simmering, consistent skimming, and a fine-mesh strainer will produce a broth that is clear enough to be proud of. The techniques take only a few extra minutes, and the visual payoff is substantial. A clear broth signals care and attention. It makes the finished bowl look professional, even when the recipe took just 30 minutes from start to finish.
Your broth is now clear, aromatic, and ready for the next step. The following section covers preparing the noodles and protein so every component of your pho bowl is ready at the same moment.
Preparing the Noodles and Protein
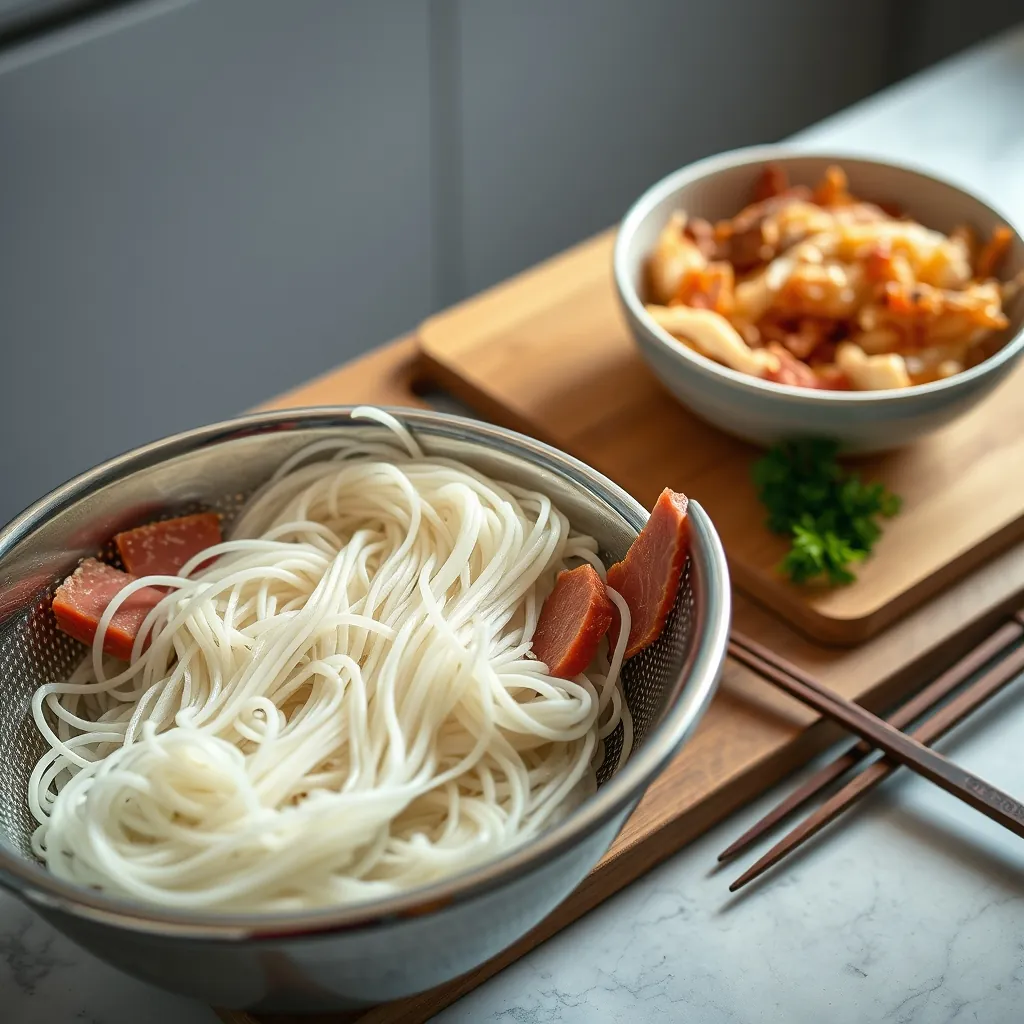
The broth carries the soul of pho, but the noodles and protein carry the meal itself. Each component needs its own preparation. Get these right, and assembly becomes a simple matter of stacking ingredients in a bowl. Get them wrong, and even the best broth cannot save the dish.
Choosing Your Rice Noodles
Pho uses flat rice noodles called bánh phở. They come in two forms: dried and fresh. Both work well. The difference is in preparation time and texture.
Dried noodles are the most accessible option. They are shelf-stable and easy to find in most grocery stores. Fresh noodles, often sold in sealed plastic bags in Asian markets, have a softer, more delicate texture. They cook in seconds rather than minutes.
For a simple pho, either option works. The key is cooking them separately from the broth. Noodles left in hot liquid continue to absorb moisture. They turn mushy and bloated. Cooking them separately and adding them to the bowl just before serving keeps them firm and springy.
How to Cook Dried Noodles
Bring a pot of water to a rolling boil. Add the dried noodles and cook according to the package directions, usually 4 to 6 minutes. Stir occasionally to prevent sticking. Taste one noodle at the 4-minute mark. It should be tender but still have a slight chew. This texture, known as al dente, is the goal.
Drain the noodles immediately. Rinse them under cold running water to stop the cooking process. This also washes away excess starch, which prevents the noodles from clumping together. Toss them with a few drops of neutral oil, such as vegetable or canola oil, to keep them separate.
How to Cook Fresh Noodles
Fresh noodles are even easier. They are already hydrated and only need a quick warm-up. Drop them into boiling water for 15 to 30 seconds. The moment they loosen and become pliable, they are done. Overcooking turns them into a sticky paste.
Drain and rinse with cold water just like dried noodles. A light coating of oil keeps them from sticking together while you prepare the other components.
Slicing Beef for Pho
The classic pho protein is raw beef, sliced paper-thin. It cooks in seconds when the hot broth hits it in the bowl. The key to this technique is the thickness of the slice. Too thick, and the beef stays raw in the center. Too thin, and it disintegrates.
The best way to achieve thin slices at home is to partially freeze the beef first. Place the steak in the freezer for 30 to 45 minutes. It should be firm but not frozen solid. A semi-frozen piece of meat slices much more cleanly than a room-temperature one. Use a sharp knife and cut against the grain. This means slicing perpendicular to the muscle fibers. It produces tender pieces that are easy to chew.
Aim for slices about 1/8 inch thick. If you can see light through the slice when you hold it up, you have done it right. Sirloin, ribeye, and flank steak all work well for this purpose.
Pre-Cooked Chicken: The Weeknight Shortcut
Not every night calls for raw beef. A rotisserie chicken from the grocery store transforms pho into a 20-minute weeknight meal. Shred the meat with your hands or two forks, discarding the skin and bones. The chicken is already cooked and seasoned, so it only needs to be warmed through.
Add the shredded chicken to the bowl before ladling in the broth. The hot liquid reheats it perfectly. This approach cuts out the slicing step entirely and produces a satisfying bowl with minimal effort. Dark meat from the thighs stays moister than breast meat, so include both if you can.
Tofu for a Vegetarian Version
Tofu absorbs the aromatic broth beautifully and provides a hearty texture. Use extra-firm or firm tofu, not silken. Silken tofu will crumble in the hot liquid.
Press the tofu to remove excess water. Wrap it in a clean kitchen towel and place a heavy object on top for 15 minutes. Then cut it into 1/2 inch cubes. For extra flavor, sear the cubes in a hot pan with a splash of oil until golden brown on all sides. This adds a pleasant crispness that contrasts with the soft noodles. Alternatively, you can add the tofu directly to the broth to warm it through without searing.
Timing Your Preparation
The noodles and protein should be ready at the same time as the broth. Cook the noodles last, right before you are ready to assemble. They hold for about 30 minutes when tossed with oil, but they are best fresh. Slice the beef and prepare the chicken or tofu in advance. Keep everything covered in the refrigerator until assembly time.
A simple rhythm works well. Start the broth. While it simmers, slice the beef and prepare the protein. Cook the noodles just before serving. Then assemble each bowl immediately. This flow keeps every component at its peak. The noodles stay firm, the beef stays tender, and the broth stays hot enough to cook everything in the bowl.
How to Assemble Your Pho Bowl
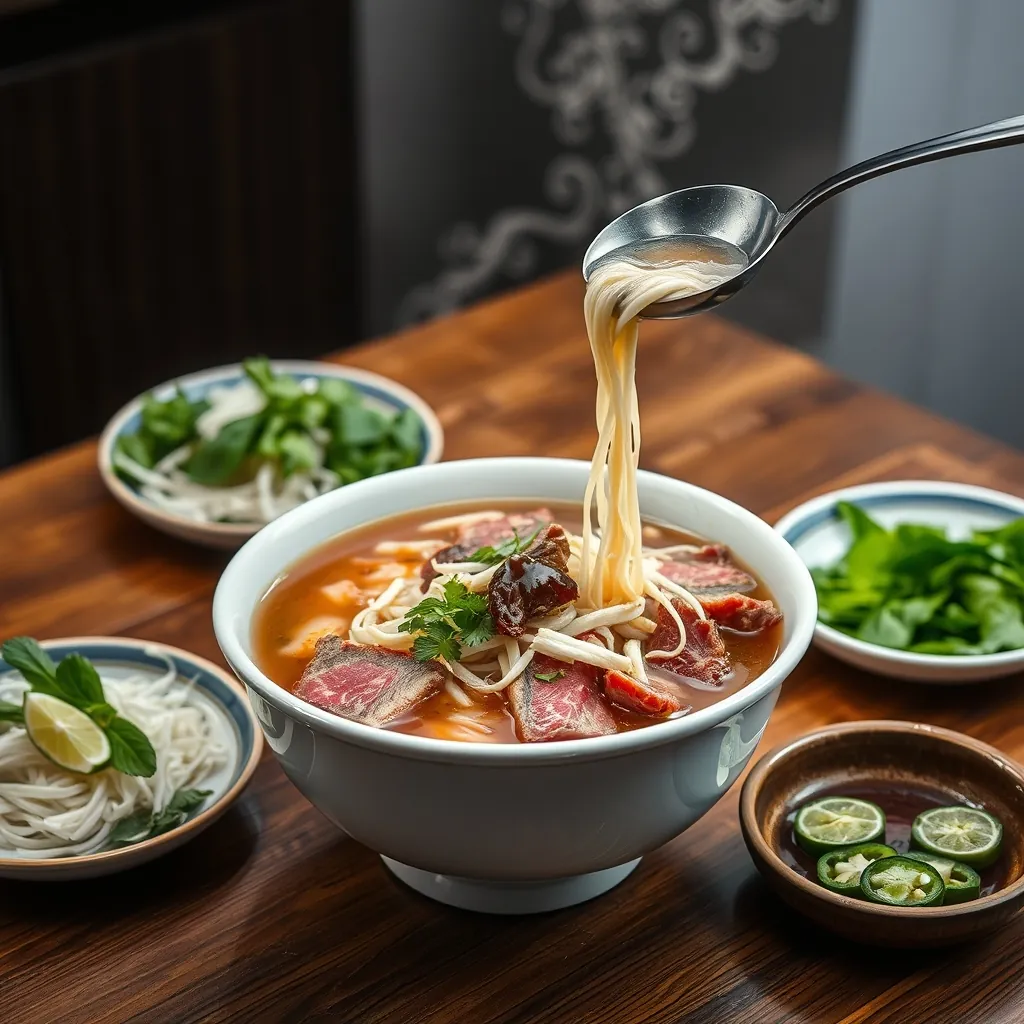
Assembly is where everything comes together. The order of operations matters more than you might think. Each layer serves a purpose. Noodles go first. Protein goes second. Broth goes last. This sequence ensures the raw beef cooks properly and the noodles stay firm.
Warm Your Bowls First
Cold bowls steal heat from the broth. A bowl that is too cold will drop the broth temperature below the point where it can cook raw beef. Warm your bowls before assembly.
Fill each bowl with hot tap water and let it sit for a minute. Pour out the water and dry the bowl with a towel. Alternatively, stack the bowls in a 200°F oven for 5 minutes. This small step makes a noticeable difference in the final temperature of your soup.
The Layering Sequence
Start with the noodles. Place a generous handful of cooked noodles in the bottom of each warm bowl. The portion should fill about one third of the bowl. Too many noodles crowd out the broth and toppings. Too few leave you with a watery soup that lacks substance.
Add the protein next. Arrange the raw beef slices flat over the noodles in a single layer. Do not pile them. The hot broth needs to reach every surface of the meat to cook it evenly. If you are using shredded chicken, place it in a small mound in the center. For tofu, scatter the cubes evenly across the noodles.
Ladle the Broth Over Everything
This is the moment the dish comes alive. Bring the broth to a rolling boil on the stove. Ladle it directly over the raw beef and noodles. The heat of the liquid, typically around 200°F, cooks the thin slices of beef in seconds. You will see the color change from red to brown right before your eyes.
Pour the broth in a circular motion around the bowl rather than dumping it all in one spot. This distributes the heat evenly and prevents the noodles from clumping together. Fill the bowl about three quarters full. Leave room for the toppings and garnishes.
The broth should be deep enough to cover the noodles and most of the protein. If you are using chicken or tofu, the broth only needs to warm them through, not cook them. They are already cooked. The hot liquid brings them back to serving temperature.
Garnish on the Side, Not in the Bowl
Traditional pho is served with a plate of garnishes on the side. This is not an accident. It gives each person control over their own bowl. Some people want a squeeze of lime. Others want a pile of bean sprouts. Some prefer no herbs at all.
Serve the garnishes in small bowls or on a shared platter. Include bean sprouts, Thai basil leaves, lime wedges, and sliced jalapeños. Each person adds what they want, when they want it. The garnishes go in at the table, not in the kitchen.
This approach also keeps the garnishes fresh. Bean sprouts stay crunchy. Thai basil stays fragrant. Lime wedges stay juicy. If they sat in the hot broth, they would wilt and lose their character within minutes.
What to Add First
A sensible order exists for adding garnishes. Start with the bean sprouts. They add crunch and texture. Push them down into the broth so they soften slightly. Next, tear the Thai basil leaves from their stems and scatter them over the top. The heat releases their aromatic oils.
Squeeze the lime wedge over the bowl. The acidity brightens the rich broth and balances the savory notes. Finally, add the jalapeños if you want heat. The spice level builds as the slices sit in the broth, so start with one or two and add more as you go.
Hoisin and Sriracha at the Table
These two sauces are the classic pho condiments. Hoisin is sweet and thick. Sriracha is spicy and bright. They are not traditionally mixed into the broth. Instead, they are used as a dipping sauce for the beef.
Place a small amount of each sauce on a small plate or directly on the side of your bowl. Dip each piece of beef into the sauce before eating. This preserves the delicate flavor of the broth while adding a punch of flavor to the meat.
Some people prefer to stir a spoonful of hoisin directly into the broth. This is acceptable, though it changes the character of the soup. The broth becomes sweeter and cloudier. Try it both ways and decide which you prefer.
Assembling Multiple Bowls
If you are serving several people, assemble the bowls in batches. Keep the broth at a rolling boil between batches. The noodles and protein can be portioned out ahead of time. Place them in each bowl and cover with plastic wrap if you need to wait. Ladle the broth over each bowl just before serving.
This staggered approach keeps every bowl at the right temperature. The first bowl does not get cold while you assemble the fourth. It also lets each person add their own garnishes at the table, which is the way pho is meant to be eaten.
The assembled bowl should be eaten immediately. The noodles begin to soften the moment they touch the broth. The beef continues to cook. The herbs wilt. Pho is a dish that rewards prompt attention. Sit down, pick up your chopsticks and spoon, and enjoy it while it is at its peak.
Essential Pho Toppings and Garnishes
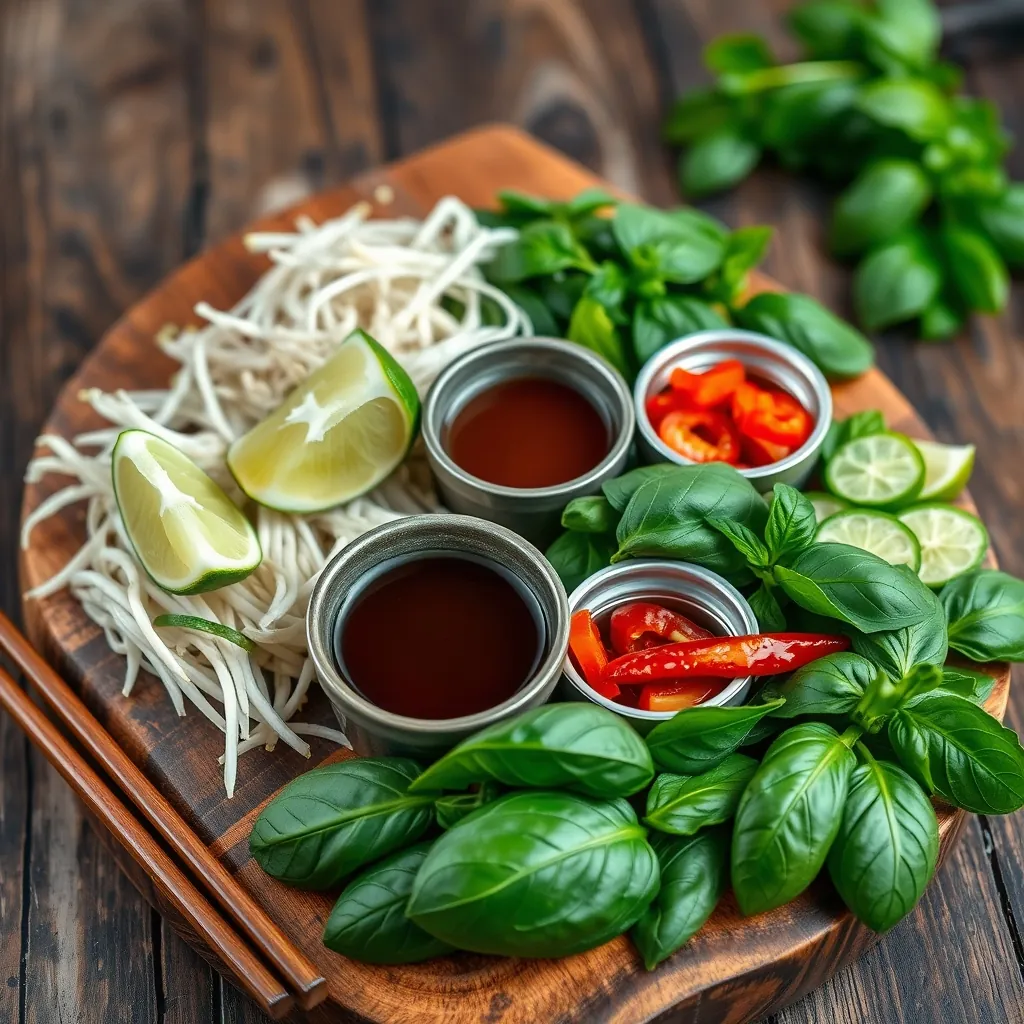
The garnishes are not an afterthought. They are the counterpoint to the rich, savory broth. Each topping serves a specific purpose. Together, they transform a simple bowl of noodles into a balanced, complex meal. The broth provides the foundation. The toppings provide the contrast.
The Core Four: Bean Sprouts, Thai Basil, Lime, and Jalapeños
These four garnishes appear on nearly every pho table in Vietnam. They are the standard for good reason. Each one addresses a different aspect of the broth’s flavor profile.
Bean sprouts bring crunch and freshness. Their mild, slightly sweet flavor does not compete with the broth. Instead, they add textural contrast to the soft noodles and tender meat. The sprouts also provide a subtle vegetal note that cuts through the richness of the beef broth. Use them generously. A handful per bowl is a reasonable starting point.
Thai basil is different from the sweet basil you find in Italian cooking. Its leaves are smaller, the stems are purple, and the flavor carries a distinct anise note. This herbal quality echoes the star anise already in the broth, reinforcing the dish’s signature aroma. Tear the leaves from the stems before adding them to the bowl. The heat of the broth releases their essential oils, filling the air with fragrance.
Lime wedges provide acidity. The broth is savory and sweet from the fish sauce and sugar. The lime cuts through that richness, brightening every spoonful. Squeeze the juice over the bowl just before eating. The acidity also helps balance the heat from the jalapeños, making the overall experience more rounded.
Jalapeños add heat, but they do more than that. Their fresh, grassy flavor complements the other aromatics. The heat builds slowly as the slices sit in the broth. Start with one or two slices and add more to taste. For those who want extra heat without the vegetal flavor, a small spoonful of sriracha works well.
The Sauces: Hoisin and Sriracha
Hoisin sauce is thick, dark, and sweet. It is made from soybeans, sugar, vinegar, and a blend of spices. Sriracha is a hot sauce made from chili peppers, vinegar, garlic, and sugar. Together, they represent the sweet and spicy poles of the pho condiment spectrum.
These sauces are not meant to be dumped into the broth. The traditional approach is to use them as a dipping sauce for the meat. Place a small amount of each on a small plate. Dip each piece of beef into the sauce before eating. This preserves the delicate flavor of the broth while adding a punch of flavor to the meat.
Some people prefer to stir a spoonful of hoisin or sriracha directly into the broth. This is a matter of personal preference. It changes the character of the soup, making it sweeter or spicier, but it is not wrong. Try the traditional method first. Then experiment with adding a small amount of sauce to the broth to see which you prefer.
Additional Toppings to Consider
The core four are just the beginning. Many pho restaurants offer additional garnishes, and you should feel free to customize your bowl.
Thinly sliced onions add a sharp bite and a pleasant crunch. They are often served raw and scattered over the top of the bowl. Scallions, both white and green parts, provide a milder onion flavor and a pop of color.
Cilantro is a common addition. Its bright, citrusy flavor complements the other herbs. Some people add mint as well, which brings a cooling sensation that balances the heat from the jalapeños.
Sliced chili peppers like Thai bird’s eye chilies offer a more intense heat than jalapeños. Use them sparingly. Fried shallots or garlic add a crispy texture and a savory, slightly sweet flavor that enhances the broth.
For a heartier bowl, consider adding sliced mushrooms, particularly shiitake or enoki. They absorb the broth’s flavor and add an earthy note. Soft-boiled eggs, cut in half, are another option. The runny yolk enriches the broth and adds a luxurious texture.
Balancing the Bowl: How Toppings Work Together
The magic of pho lies in the balance. The broth is savory and rich. The noodles are neutral and filling. The meat is hearty. The toppings provide the contrast that keeps every spoonful interesting.
The crunch of bean sprouts and the fragrance of Thai basil offer freshness. The lime provides acidity. The jalapeños add heat. The hoisin and sriracha deliver sweet and spicy notes. Each element plays a role. Remove one, and the bowl becomes less complex. Add them all, and you have a symphony of flavors and textures.
Start with the traditional toppings. Learn how they work together. Then experiment with the additional options to find your perfect bowl. The beauty of pho is its flexibility. There is no single right way to garnish it, only the way that tastes best to you.
Adjusting Pho for Dietary Needs
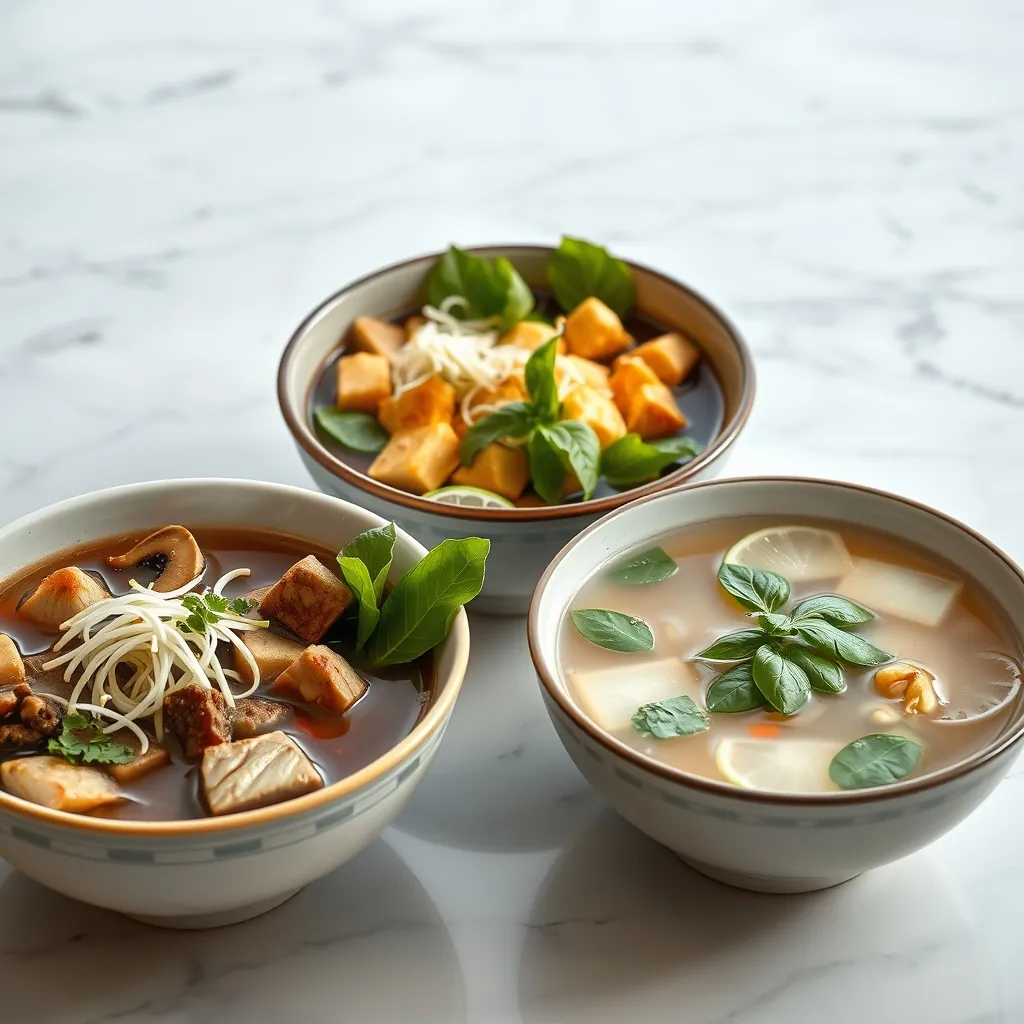
The classic pho recipe is flexible. With a few targeted substitutions, you can adapt it to nearly any dietary requirement without sacrificing the soul of the dish. The broth remains the star. The aromatics stay the same. Only the supporting players change.
Low-Sodium Pho: Cutting Salt Without Cutting Flavor
The main sources of sodium in pho are the broth and the fish sauce. Store-bought beef or chicken stock can contain surprising amounts of salt. A single cup can deliver 600 to 800 milligrams of sodium. That adds up quickly across a large bowl.
Choose a low-sodium or no-salt-added broth as your base. Many brands now offer these options, and they perform admirably in pho. The flavor will be less developed at first, but the aromatics will compensate. The charred onion, ginger, and spices provide depth that masks the missing salt.
Use fish sauce sparingly. Fish sauce is naturally high in sodium, with about 1,500 milligrams per tablespoon. Reduce the amount in the recipe by half, then taste and adjust. You can also look for reduced-sodium fish sauce, though these are less common and can be harder to find.
The other seasonings work in your favor. Sugar balances the salt perception. Lime juice, added at the table, brightens the broth and makes it taste more savory than it actually is. The acidity tricks the palate into perceiving more salt than is present.
For those watching sodium closely, consider a final adjustment at the table. Offer a small dish of fish sauce on the side. Each person can add a few drops to their own bowl, controlling their intake precisely.
Gluten-Free Pho: What to Check and What to Swap
Pho is naturally gluten-free in its core components. Rice noodles contain no wheat. The spices are all gluten-free. The broth, if made from scratch, contains nothing problematic. The issues arise in the condiments and sauces.
Fish sauce is traditionally made from just anchovies and salt. Many brands are naturally gluten-free. However, some manufacturers add wheat-based ingredients as a stabilizer or flavor enhancer. Check the label carefully. Look for brands that explicitly state “gluten-free” to be safe.
Hoisin sauce is the bigger concern. Most commercial hoisin sauces contain wheat flour as a thickening agent. The good news is that gluten-free versions exist. Brands like San-J and Lee Kum Kee offer gluten-free hoisin that performs well in this application. The flavor is comparable to the original.
Sriracha is generally safe. The classic rooster brand contains chili, sugar, salt, garlic, and vinegar, with no wheat ingredients. Still, it is worth checking the label, as some varieties add stabilizers that may contain gluten.
Soy sauce, if you use it as a condiment, is a major gluten source. Swap it for tamari or a certified gluten-free soy sauce. Coconut aminos also work well, though they add a slightly sweeter note.
The broth itself can be made gluten-free without any effort. Just ensure that any store-bought stock you use is certified gluten-free. Some commercial stocks use wheat-based thickeners or flavorings.
Vegetarian and Vegan Pho: Building Umami Without Meat
A vegetarian pho is not a compromise. It is a distinct dish with its own character. The key is building the same depth of flavor that beef bones provide through other means.
Start with a rich vegetable broth. Mushroom stock is an excellent base, as it provides a savory, earthy foundation. If you cannot find mushroom stock, use a high-quality vegetable broth and enhance it with dried mushrooms. Shiitake mushrooms, in particular, are packed with glutamates, the compounds responsible for the savory umami taste.
Add the same aromatics. The charred onion and ginger are essential. They provide the same sweet, smoky notes that they do in the beef version. The star anise, cinnamon, cloves, and coriander seeds are all naturally vegan. They do not need any adjustment.
Use soy sauce or tamari instead of fish sauce. Fish sauce is made from anchovies, so it is not vegetarian. Soy sauce provides a similar salty, savory punch. For a closer match to fish sauce’s complexity, add a small piece of kombu, a type of seaweed, to the broth. It adds a subtle oceanic note that mimics the depth of fish sauce.
Choose your protein. Firm or extra-firm tofu is the most common choice. Cut it into cubes and pan-fry it until golden before adding it to the bowl. This gives the tofu a crisp exterior that holds up well in the hot broth. Mushrooms are another excellent option. Shiitake, oyster, or enoki mushrooms add texture and absorb the broth’s flavor. For a heartier option, consider seitan or tempeh, though these have stronger flavors that may compete with the delicate broth.
Do not skip the toppings. The bean sprouts, Thai basil, lime, and jalapeños are all naturally vegan. They provide the same contrast and freshness that they do in the beef version. The hoisin and sriracha are also vegan, so the full range of condiments remains available.
Substitution Reference Table
Use this quick reference when adapting the recipe to your needs:
- Low-sodium broth: Replace regular stock with no-salt-added or low-sodium stock. Reduce fish sauce by half and season to taste.
- Reduced-sodium fish sauce: Use half the amount and supplement with a splash of lime juice at the table.
- Gluten-free fish sauce: Choose a brand certified gluten-free, such as Red Boat or Three Crabs.
- Gluten-free hoisin: Use San-J or Lee Kum Kee gluten-free hoisin sauce.
- Gluten-free soy sauce: Swap for tamari or coconut aminos.
- Vegetarian fish sauce substitute: Use soy sauce or tamari, plus a piece of kombu in the broth.
- Vegetarian protein: Pan-fried tofu cubes, shiitake mushrooms, oyster mushrooms, or seitan.
- Vegan broth base: Mushroom stock or vegetable broth enhanced with dried shiitake mushrooms.
Adjusting Without Losing the Essence
The beauty of pho is its adaptability. The core structure, broth, noodles, herbs, and garnishes, remains intact regardless of dietary restrictions. What changes are the specific ingredients, not the experience.
A low-sodium pho still delivers the aromatic complexity of star anise and charred ginger. A gluten-free pho still offers the satisfying chew of rice noodles and the brightness of lime. A vegetarian pho still provides the warmth and comfort of a deeply flavored broth.
The key is to make one adjustment at a time. Taste the broth after each change. Trust your palate. If something tastes flat, add a small amount of acid or sweetness. If it tastes too salty, add more broth or a squeeze of lime. The broth is forgiving, and small corrections go a long way.
With these substitutions, everyone at the table can enjoy a bowl of pho that meets their needs without compromising on flavor. The recipe is a starting point, not a rigid set of rules. Adjust it to fit your life, and it will reward you with a meal that is both nourishing and deeply satisfying.
How to Store and Reheat Pho Properly
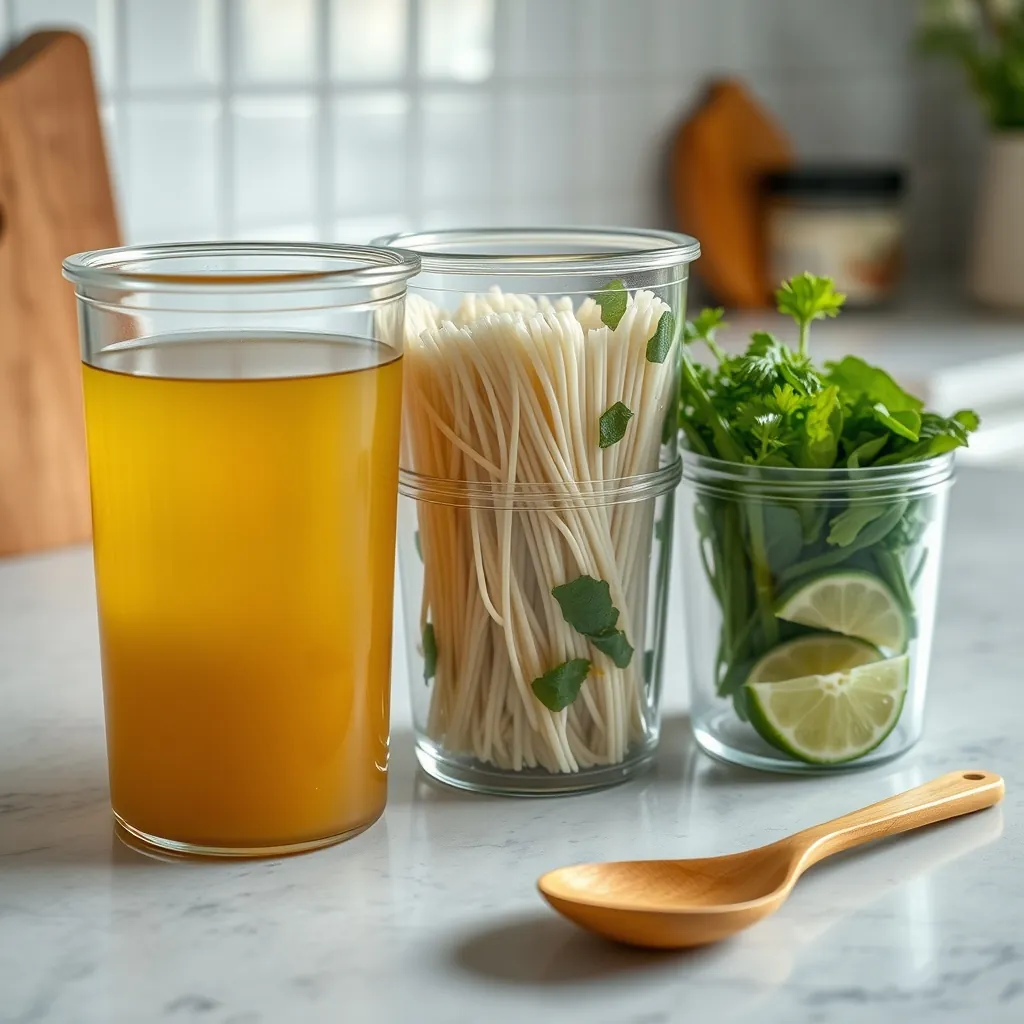
Pho leftovers present a unique challenge. The broth, noodles, and toppings each have different storage requirements. Handle them correctly, and you can enjoy a second bowl that rivals the first. Handle them poorly, and you get mushy noodles in a cloudy soup.
Why Separation Matters
The single most important rule for pho storage is this: keep the components apart. Rice noodles absorb liquid continuously. Left submerged in broth, they swell, soften, and eventually turn to paste. The broth itself suffers too. Starches from the noodles leach into the liquid, turning it cloudy and thickening its texture.
The same logic applies to your toppings. Bean sprouts lose their crunch when stored in liquid. Thai basil wilts and discolors. Lime slices become bitter as the oils in their peel degrade. Even the meat, whether cooked or raw, continues to change texture when left in hot liquid that has since cooled.
Store each element in its own airtight container. This takes a few extra minutes at cleanup time, but it preserves the quality of every component.
Storing the Broth
The broth is the most durable component. It stores exceptionally well, and some argue that it improves overnight as the flavors meld.
Cool the broth completely before refrigerating. Placing hot liquid in the refrigerator raises the internal temperature of the fridge, which can compromise other foods. It also causes condensation, which dilutes the broth. Leave it on the counter for 30 to 60 minutes, stirring occasionally to release heat, until it reaches room temperature.
Remove the solids. Strain out the bones, charred onion, ginger, and spice sachet before storing. These ingredients have already given their flavor to the liquid. Leaving them in the broth will cause it to become bitter and overly spiced over time.
Skim the fat. As the broth cools, fat will rise to the surface and solidify. You can remove this before refrigerating or after. Either way, removing it prevents the broth from tasting greasy when reheated. Some people prefer to leave a thin layer, as it adds richness. The choice is yours.
Store the broth in an airtight container. It will keep for 3 to 4 days in the refrigerator. For longer storage, freeze it. The broth freezes beautifully and will keep for up to 3 months. Freeze it in portion-sized containers or ice cube trays for easy defrosting.
Storing the Noodles
Rice noodles are the most fragile component. They require the most care.
Rinse the noodles in cold water. After cooking, the noodles continue to cook from their own residual heat. A cold water rinse stops the cooking process immediately and washes away excess starch. This prevents them from sticking together as they cool.
Toss with a small amount of oil. A teaspoon of neutral oil, such as vegetable or canola, coats the noodles and prevents clumping. Use your hands to distribute it evenly.
Store in an airtight container. Properly prepared noodles will keep for 2 to 3 days in the refrigerator. They will not be as springy as fresh, but they will remain serviceable.
Do not freeze cooked rice noodles. The freezing process damages their structure, and they become mushy and break apart when thawed.
Storing the Protein and Toppings
Cooked meat stores well when kept separate from the broth. Place it in its own container. It will keep for the same 3 to 4 days as the broth. Do not store raw meat with the intention of cooking it later in the broth. The raw meat will not cook properly in reheated liquid, and it poses a food safety risk.
Fresh herbs and vegetables have shorter lifespans. Thai basil and cilantro will last 2 to 3 days in the refrigerator if stored in a slightly damp paper towel inside a plastic bag. Bean sprouts are best consumed within 1 to 2 days. Lime wedges will dry out, so wrap them tightly or store them in a small container with a lid.
Reheating the Broth
The broth should always be reheated separately from the noodles. This is the key to avoiding a cloudy, starchy soup.
Reheat the broth on the stovetop. This is the preferred method. Bring it to a rolling boil in a saucepan. The high heat revitalizes the flavors and ensures the broth is piping hot, which is essential for the final assembly. If the broth has been refrigerated, it will have a layer of solidified fat on top. Skim this off before reheating.
Microwave as a backup. If you are short on time, the microwave works. Heat the broth in a microwave-safe bowl for 2 to 3 minutes, stirring halfway through. Make sure it reaches a full boil before proceeding. A thermometer should read at least 200°F (93°C).
Do not reheat the broth more than once. Each reheating cycle degrades the flavor and texture. If you have a large batch, portion it out before storing. Reheat only what you plan to consume.
Reheating the Noodles
The noodles require a gentler touch. They are already cooked, so the goal is simply to warm them without further cooking.
Method one: boiling water dip. Place the noodles in a strainer or colander. Dip them into a pot of boiling water for 15 to 20 seconds. This warms them through without turning them to mush. Shake off the excess water and place them in your bowl.
Method two: microwave. Place the noodles in a microwave-safe bowl with a tablespoon of water. Cover with a damp paper towel and heat for 30 to 45 seconds. Stir and check. The noodles should be warm and pliable, not steaming hot.
Method three: hot tap water. This is the gentlest option. Place the noodles in a bowl and cover them with hot tap water. Let them sit for 2 to 3 minutes. Drain and use. This method works best for noodles that have been stored for only a day.
Assembling the Reheated Pho
The assembly process mirrors the fresh version, with one key difference: the noodles go in the bowl first, and the broth should be aggressively hot.
- Place the warmed noodles in the bottom of your bowl.
- Arrange the reheated meat on top of the noodles.
- Pour the boiling broth over everything. The heat from the broth will warm the meat and noodles further.
- Add your fresh toppings: bean sprouts, Thai basil, lime wedges, and jalapeños.
- Finish with hoisin and sriracha to taste.
The broth must be boiling when you pour it. If it is merely warm, the dish will be lukewarm and unsatisfying. The contrast between the hot broth and the cool, fresh herbs is part of what makes pho so compelling.
Food Safety Considerations
Pho follows standard food safety guidelines. Refrigerate leftovers within 2 hours of cooking. Discard any broth that has been left at room temperature longer than that. When reheating, ensure the broth reaches a full boil. This kills any bacteria that may have developed during storage.
The 3 to 4 day rule applies to the broth and meat. If you are unsure whether something is still good, trust your senses. A sour smell, a slimy texture, or an off color are all signs that the food should be discarded. When in doubt, throw it out.
Freezing Pho for Later
Freezing extends the life of your pho significantly, but only for certain components.
The broth freezes perfectly. Freeze it in individual portions for easy meal prep. It will keep for up to 3 months. Thaw it overnight in the refrigerator, then reheat as described above.
Cooked meat freezes acceptably. It will lose some moisture, but it remains usable. Freeze it separately from the broth. Thaw and reheat gently.
Noodles do not freeze well. Skip them. Cook fresh noodles when you are ready to eat.
Herbs and vegetables do not freeze. They lose their texture and become limp. Always use fresh ones.
With this system, you can cook a large batch of broth on the weekend and enjoy fresh pho throughout the week. The broth is the workhorse. The rest is assembly.
Recipe Tips and Troubleshooting
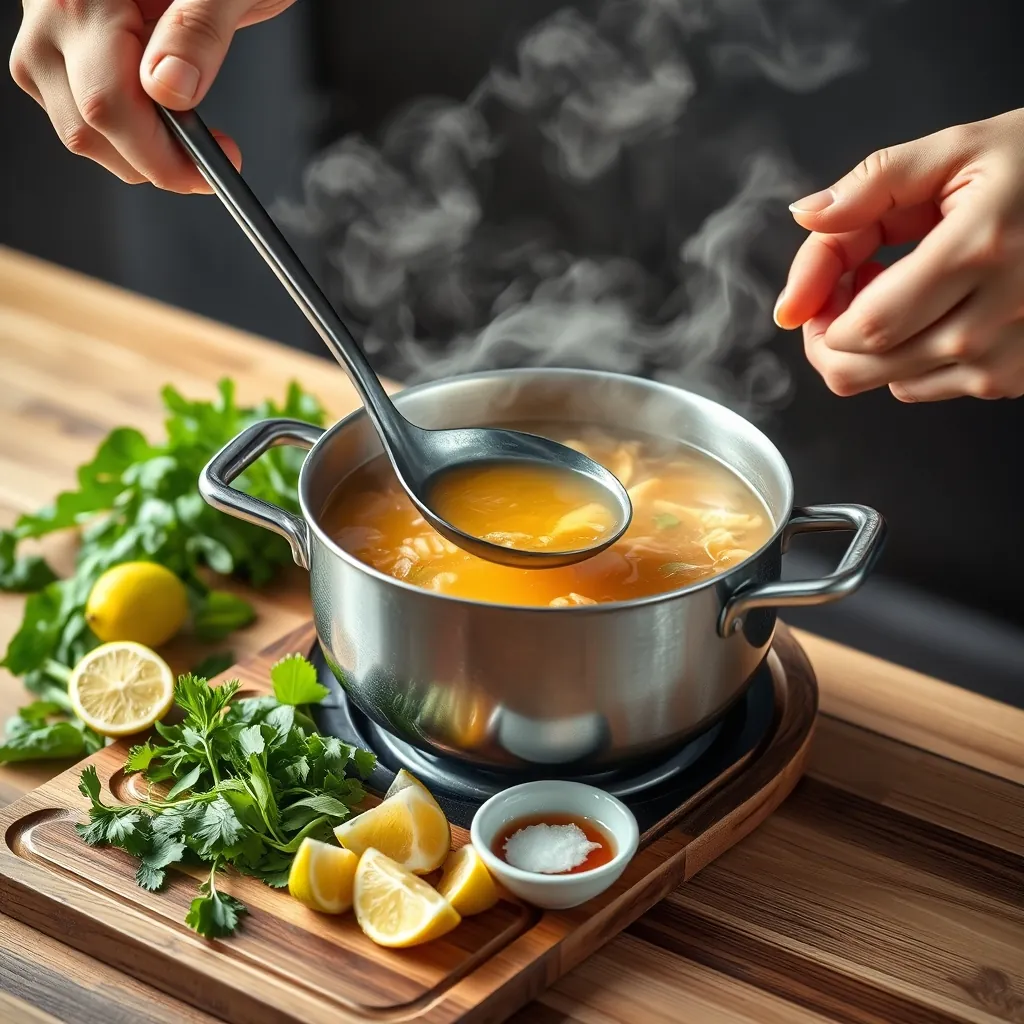
A bowl of pho rewards attention to detail. Small adjustments at each stage separate a good bowl from a memorable one. These tips address the most common pitfalls and show you how to fix them when they appear.
Tips for Success Every Time
Taste as you go. The broth is a living thing. It changes as it simmers, concentrating and deepening. Taste it at the 20-minute mark, then again at 40 minutes, then just before serving. Your palate is the most reliable tool in the kitchen. Trust it.
Season in layers. Add salt, fish sauce, and sugar in small increments rather than all at once. This gives you control. You can always add more, but you cannot take it away. A broth that is slightly under-seasoned at the 30-minute mark will often be perfectly seasoned by the time it finishes simmering.
Do not overcook the noodles. Rice noodles cook quickly, usually in 1 to 2 minutes. The moment they turn tender and opaque, they are done. Overcooked noodles turn soft, mushy, and unappealing. When in doubt, pull them a few seconds early. The hot broth will finish the job in the bowl.
Serve the broth aggressively hot. Pho is a dish of contrasts. The broth should be at a rolling boil when you pour it over the noodles and raw meat. This heat cooks the meat, warms the noodles, and releases the aromatics from the herbs. A lukewarm bowl of pho is a disappointment. Keep the pot simmering until the moment you are ready to assemble.
Let the broth rest before serving. After simmering, turn off the heat and let the broth sit for 10 minutes. This allows the flavors to meld and the solids to settle. Skim any foam or impurities that rise to the surface. The result is a cleaner, more refined broth.
Troubleshooting Bland Broth
A bland broth is the most common complaint among home cooks. The solution is usually simple: the broth lacks salt or acid.
Add fish sauce in small increments. Fish sauce is the backbone of pho’s savory depth. Add a teaspoon, stir, taste, and repeat. The broth should taste savory and slightly funky, but not fishy.
Check your salt level. If the broth tastes flat, it likely needs salt. Add a pinch at a time and stir. Remember that the noodles and toppings will dilute the seasoning, so the broth should taste slightly saltier than you want the final bowl to be.
Add a touch of sugar. A small amount of sugar, whether white, brown, or rock sugar, rounds out the savory flavors and balances the salt. Add a teaspoon, stir, and taste. The broth should not taste sweet; the sugar should simply round off the sharp edges.
Consider acid. A squeeze of lime at the table brightens the entire bowl. If the broth tastes heavy or one-dimensional, the lime wedge is your friend. Some cooks also add a splash of rice vinegar to the broth itself, though this is not traditional.
Simmer longer. If the broth still lacks depth, it may simply need more time. The bones and aromatics release their flavors gradually. Let it simmer for another 30 minutes and taste again.
Troubleshooting Cloudy Broth
A cloudy broth is a visual issue, not a flavor issue. The broth will still taste good, but it will lack the crystal-clear appearance of restaurant pho. Cloudiness comes from impurities and starches suspended in the liquid.
Skim the foam. During the first 20 minutes of simmering, foam and scum rise to the surface. Skim it off with a ladle or fine-mesh strainer. This is the single most effective step for achieving a clear broth.
Do not boil aggressively. A rolling, violent boil churns the liquid and breaks apart the solids, releasing starches and fats into the broth. Keep the pot at a gentle simmer, with small bubbles rising to the surface. This gentle agitation allows impurities to settle rather than disperse.
Strain through a fine-mesh sieve. Before serving, strain the broth through a fine-mesh strainer lined with cheesecloth or a coffee filter. This catches any remaining solids and clarifies the liquid.
Let it settle. After straining, let the broth sit for 5 to 10 minutes. Any remaining particles will sink to the bottom. Ladle the clear broth from the top, leaving the sediment behind.
Do not stir the broth. Stirring suspends the solids back into the liquid. Let the pot sit undisturbed, and the broth will clarify on its own.
Troubleshooting Tough Meat
Tough meat in pho is usually the result of overcooking or using the wrong cut.
Use the right cut. For tender slices of beef, choose a cut that is naturally tender, such as sirloin, ribeye, or flank steak. These cuts have less connective tissue and cook quickly. Tougher cuts like chuck or brisket require long, slow cooking to break down their collagen.
Slice against the grain. The grain of the meat refers to the direction of the muscle fibers. Slicing against the grain shortens those fibers, making the meat easier to chew. Look at the raw meat and identify the lines running through it. Slice perpendicular to those lines.
Slice thinly. The thinner the slice, the faster it cooks. A slice that is 1/8 inch thick will cook in seconds in boiling broth. A thick slice will remain chewy in the center. If you struggle to slice thinly, place the meat in the freezer for 20 minutes before slicing. The cold firms it up and makes it easier to cut.
Do not overcook the meat in the bowl. The raw beef slices cook in the hot broth. They should be added just before serving and removed from the broth as soon as they lose their pink color. Leaving them in the broth while you eat will continue to cook them, turning them tough.
For chicken, use thighs. Chicken breast dries out quickly in hot broth. Thigh meat stays moist and flavorful. If you prefer breast, slice it thinly and add it to the bowl just before serving.
Troubleshooting Other Common Issues
Broth tastes too sweet. This usually comes from too much sugar or sweet spices like star anise and cinnamon. Balance it with more salt or fish sauce. If the sweetness persists, add a splash of lime juice at the table.
Broth tastes too spicy. The heat in pho comes from the chiles, either in the broth or in the toppings. If the broth itself is too spicy, you can temper it with a touch of sugar or a splash of coconut milk, though this changes the character of the dish. The simpler fix is to serve the chiles on the side and let each person add their own heat.
Noodles stick together. This happens when the noodles are not rinsed after cooking or when they sit too long before serving. Rinse them in cold water immediately after cooking and toss with a small amount of oil. Serve them promptly.
Broth tastes flat or one-dimensional. This is a seasoning issue. The broth likely needs more salt, fish sauce, or sugar. Taste it and adjust. If it still lacks depth, consider adding a splash of soy sauce or a pinch of MSG, which enhances savory flavors without adding a distinct taste of its own.
The pho lacks aroma. The fragrance of pho comes from the spices and charred aromatics. If the broth smells flat, the spices may be old or under-toasted. Toast the star anise, cinnamon, and cloves in a dry pan for 30 seconds before adding them to the broth. This releases their essential oils and intensifies their aroma.
Final Adjustments Before Serving
Before you assemble your bowls, do a final taste test. The broth should be savory, slightly sweet, and deeply aromatic. It should be saltier than you want the final bowl to be, because the noodles and toppings will dilute it.
Adjust the seasoning one last time. Add a pinch of salt, a splash of fish sauce, or a touch of sugar. Stir and taste again. This final adjustment is what separates a good broth from a great one.
Prepare your toppings in advance. Have everything ready before you start assembling. The broth waits for no one. Slice the herbs, cut the lime wedges, arrange the bean sprouts, and set out the hoisin and sriracha. When the broth is ready, you can assemble the bowls in minutes.
Serve immediately. Pho is best enjoyed the moment it is assembled. The noodles soften, the herbs wilt, and the broth cools as it sits. Gather everyone at the table before you pour the broth, so no one waits for their bowl.
With these tips and troubleshooting solutions, you have everything you need to make a simple pho that rivals your favorite restaurant. The process is forgiving, the ingredients are flexible, and the reward is a steaming bowl of comfort that you made yourself.
Conclusion: Your Simple Pho Awaits
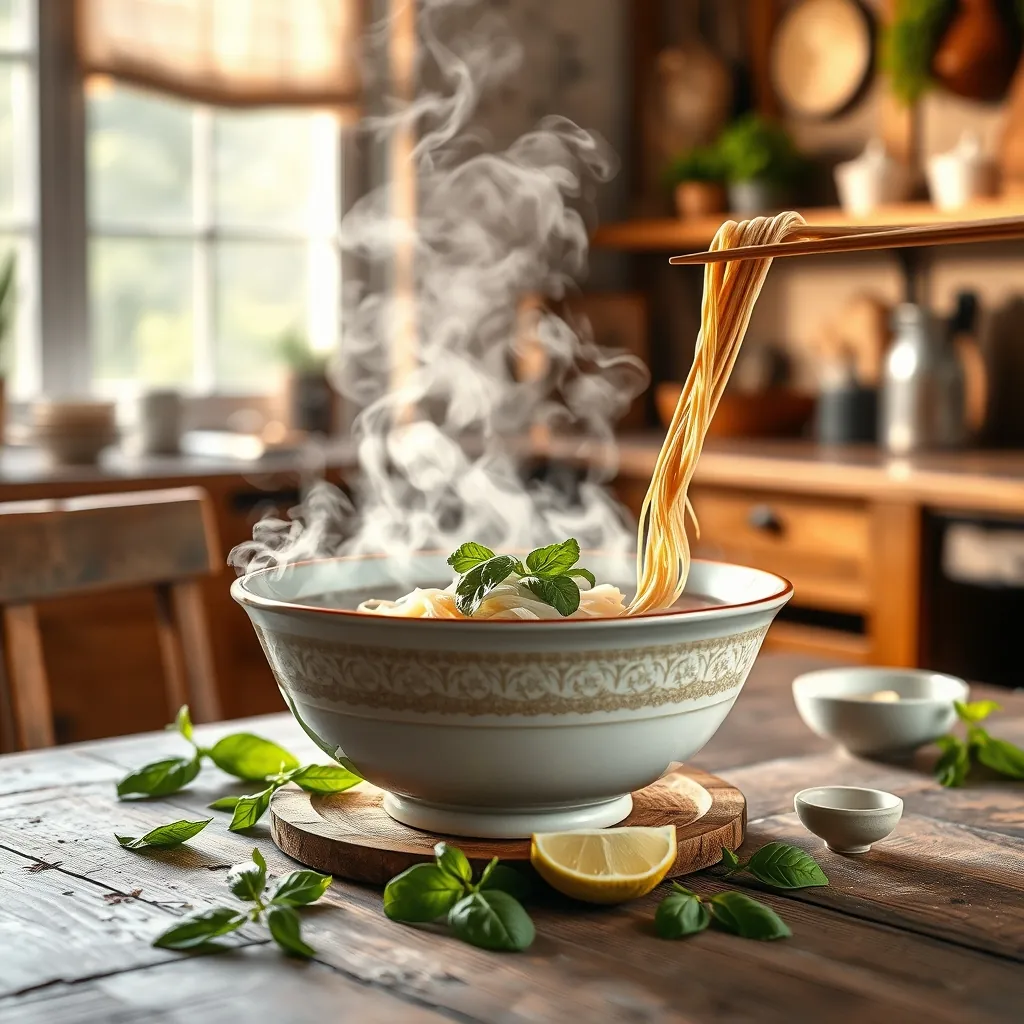
You now have everything you need to make a simple pho that rivals your favorite restaurant. The process is forgiving, the ingredients are flexible, and the reward is a steaming bowl of comfort that you made yourself.
The Path You Have Mastered
Start with a quality broth. Whether you simmer bones for hours or build a quick version with store-bought stock, the broth is the soul of the dish. Char the onion and ginger, toast the spices, and season with fish sauce and sugar in careful layers.
Cook the noodles separately. Rinse them in cold water and toss with a touch of oil. Slice your protein thinly against the grain, whether you choose beef, chicken, or tofu. Prepare your toppings in advance so everything is ready when the broth reaches its peak.
Assemble with intention. Place the noodles in the bowl, arrange the protein on top, and pour the boiling broth over everything. The heat does the work, cooking the meat and releasing the aromatics. Finish with bean sprouts, Thai basil, lime, and a squeeze of sriracha or hoisin.
Make It Your Own
The beauty of simple pho is its adaptability. The recipe is a starting point, not a rigid formula. Adjust the spice level to your preference. Swap beef for chicken or make it entirely vegetarian. Add mushrooms, bok choy, or a soft-boiled egg. The broth welcomes experimentation.
Your toppings are your signature. Some prefer a heavy hand with sriracha. Others favor a bright squeeze of lime and nothing else. There is no wrong answer. Each bowl you make teaches you something about your own taste, and each adjustment brings you closer to your perfect version.
A Bowl of Comfort, Made by You
There is a particular satisfaction in pulling a steaming bowl of pho from your own kitchen. The aroma of star anise and cinnamon fills the air. The broth warms you from the inside out. The noodles are exactly the way you like them, and the toppings are precisely to your taste.
This is food that nourishes on every level. It feeds the body with warmth and protein. It feeds the senses with fragrance and color. And it feeds the soul with the quiet pride of having created something beautiful and delicious from simple ingredients.
The next time the craving strikes, you do not need to wait for takeout. Your kitchen is ready. Your ingredients are waiting. Your simple pho awaits.
Gather your bowls, slice your herbs, and let the broth simmer. Your perfect bowl of pho is closer than you think.
Simple Pho Recipe: Easy Step-by-Step Guide
Learn how to make a simple pho recipe at home with this easy step-by-step guide. Discover key ingredients, quick substitutions, and pro tips for a flavorful broth.
Ingredients
For the Broth:
- 6 to 8 cups low-sodium beef stock
- 1 large onion, halved
- 3-inch knob of ginger, sliced into thick coins
- 3 whole star anise pods
- 1 cinnamon stick
- 4 to 5 whole cloves
- 1 tablespoon coriander seeds
- 2 to 3 tablespoons fish sauce
- 1 to 2 teaspoons sugar (rock sugar preferred)
For the Noodles and Protein:
- 8 ounces dried flat rice noodles (bánh phở)
- 1/2 pound raw sirloin or eye round, thinly sliced (or 2 cups shredded rotisserie chicken)
- 1 block extra-firm tofu, pressed and cubed (for vegetarian version)
For the Garnishes:
- 2 cups bean sprouts
- 1 cup Thai basil leaves
- 2 limes, cut into wedges
- 2 jalapeños, sliced
- 1/2 cup cilantro leaves
- 2 green onions, sliced
- Hoisin sauce and sriracha, for serving
Instructions
- Char the onion and ginger: Place halved onion and ginger coins cut-side up on a baking sheet. Broil for 8-10 minutes until deeply charred. Alternatively, char in a dry cast-iron skillet over high heat.
- Bloom the spices: In a dry skillet over medium heat, toast star anise, cinnamon, cloves, and coriander seeds for 60-90 seconds until fragrant. Remove from heat immediately.
- Build the broth: Bring beef stock to a boil in a large pot. Add charred onion and ginger. Reduce to a gentle simmer and add toasted spices. Simmer for 20 minutes.
- Season: Add fish sauce and sugar. Stir to dissolve. Taste and adjust seasoning, aiming for a slightly more intense flavor than desired in the final bowl.
- Strain: Remove solids with a fine-mesh strainer lined with cheesecloth. Keep broth at a low simmer while preparing other components.
- Cook the noodles: Bring a pot of water to a boil. Cook dried noodles according to package directions (4-6 minutes) until al dente. Drain, rinse with cold water, and toss with a few drops of oil.
- Prepare the protein: If using raw beef, slice paper-thin against the grain. If using chicken, shred the meat. If using tofu, pan-fry cubes until golden on all sides.
- Assemble the bowls: Warm serving bowls. Place a generous handful of noodles in each bowl. Arrange protein over the noodles in a single layer.
- Ladle the broth: Bring broth to a rolling boil. Ladle over the noodles and protein, pouring in a circular motion to distribute heat evenly. Fill bowls about three-quarters full.
- Serve with garnishes: Serve immediately with bean sprouts, Thai basil, lime wedges, jalapeños, cilantro, green onions, hoisin sauce, and sriracha on the side for each person to add to taste.
Pro Tips for a Clear Broth
- Skim foam and impurities from the surface during the first 10 minutes of simmering.
- Keep the broth at a gentle simmer, not a rolling boil, to prevent cloudiness.
- Strain the broth through a fine-mesh strainer lined with cheesecloth for the clearest result.
- Let the broth rest for 5 minutes after straining, then ladle from the top to avoid sediment.
Dietary Adaptations
- Low-sodium: Use no-salt-added stock and reduce fish sauce by half. Add lime juice at the table to enhance savory perception.
- Gluten-free: Use certified gluten-free fish sauce, hoisin sauce, and stock. Use tamari instead of soy sauce.
- Vegetarian/Vegan: Use mushroom stock or vegetable broth enhanced with dried shiitake mushrooms. Substitute fish sauce with soy sauce or tamari plus a piece of kombu. Use pan-fried tofu or mushrooms as the protein.
Storage Instructions
- Store broth, noodles, and protein separately in airtight containers.
- Broth keeps for 3-4 days refrigerated or up to 3 months frozen.
- Cooked noodles keep for 2-3 days refrigerated. Do not freeze.
- Reheat broth to a rolling boil before serving. Warm noodles by dipping in boiling water for 15-20 seconds.
Leave a Reply