Your cart is currently empty!
Simple Pho Recipe: Easy Step-by-Step Guide
Introduction
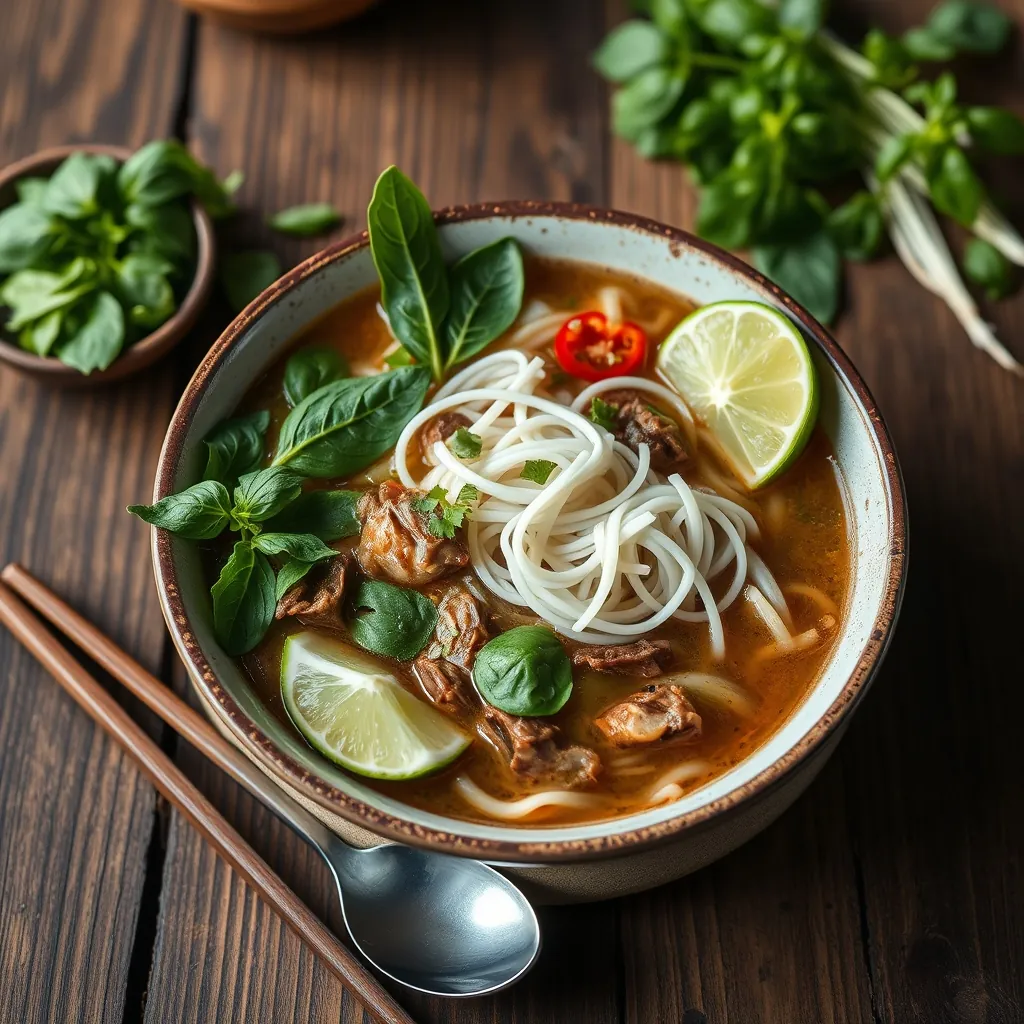
That deep, aromatic bowl of pho from your favorite Vietnamese restaurant feels like a warm hug in liquid form. The rich broth, the silky noodles, the fresh herbs scattered on top. It is pure comfort.
But here is the honest truth: traditional pho demands time. Beef bones simmer for six to eight hours. Charred ginger and onions need careful attention. The process is rewarding, but it is not realistic for a Tuesday night.
This article changes that. You can build a deeply flavorful pho at home using a streamlined approach that cuts the active cooking time dramatically. No overnight simmers. No specialty equipment. Just smart techniques and quality ingredients doing the heavy lifting.
You will learn the essential components of a great bowl, from the broth to the noodles to the toppings. We cover a pressure cooker shortcut for those who want results in under an hour. We also tackle common mistakes, dietary swaps, and storage tips so your homemade pho tastes just as good on day three as it does fresh.
By the end, you will have a reliable, simple pho recipe that fits your schedule without sacrificing the soul of this beloved Vietnamese staple.
What Is Pho?
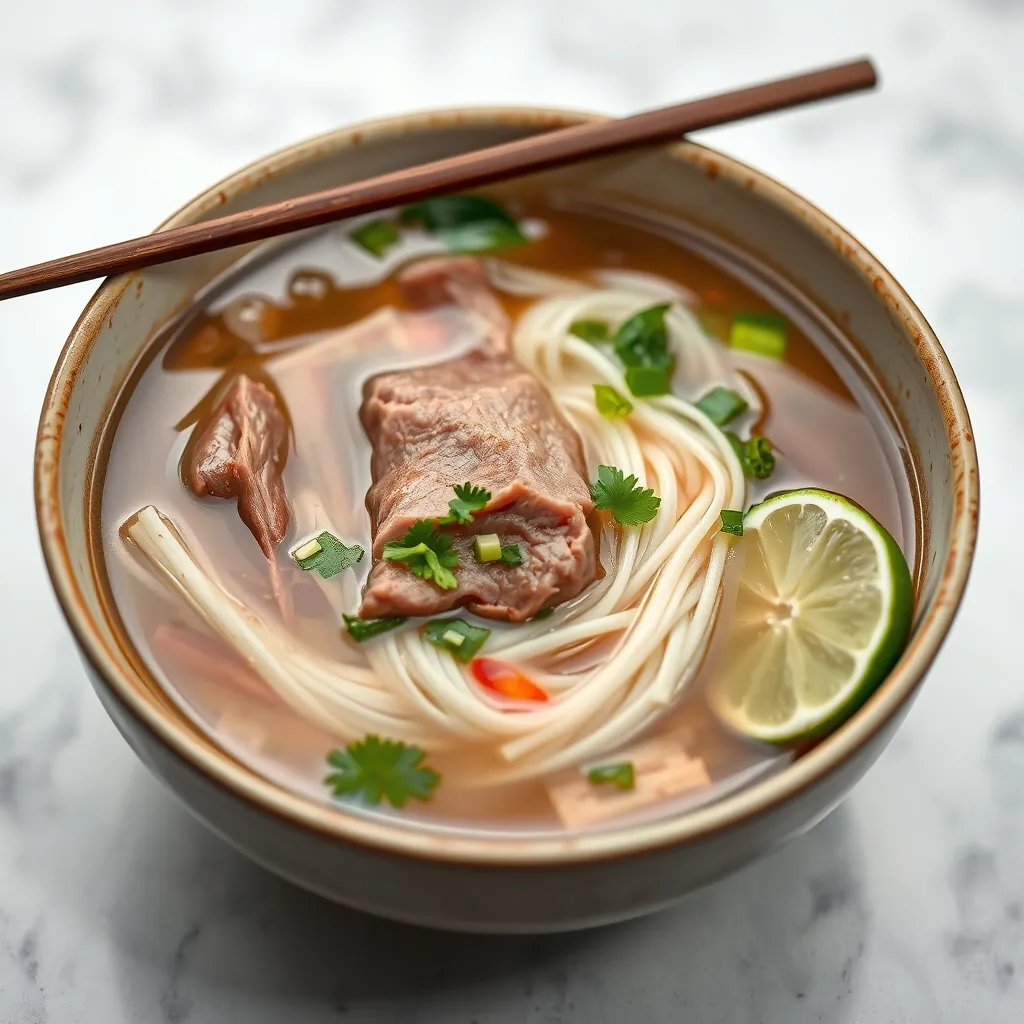
Pho (pronounced “fuh”) is Vietnam’s iconic noodle soup. It arrived on the global food scene decades ago and has since earned a permanent place in kitchens and restaurant menus worldwide. At its core, pho is a study in contrasts: a fragrant, deeply savory broth paired with delicate rice noodles and bright, fresh herbs.
The dish traces its roots to northern Vietnam, where it began as a street food staple. Vendors would simmer beef bones overnight and serve the steaming broth with flat rice noodles called bánh phở. The recipe spread south over time, picking up new ingredients and regional variations. Today, pho comes in two dominant styles: beef pho (phở bò) and chicken pho (phở gà).
Every bowl of pho rests on four essential pillars:
- The broth: This is the heart of the dish. A proper broth gets its depth from simmered bones, charred ginger and onion, and warm spices like star anise, cinnamon, and cloves. Fish sauce adds the signature umami punch.
- The noodles: Flat, soft rice noodles provide a gentle chew that soaks up the broth without overpowering it. They cook quickly and should stay slightly firm to hold their texture.
- The protein: Thinly sliced beef is the classic choice. The hot broth cooks the raw slices right in the bowl. Chicken works equally well for a lighter version.
- The toppings: Bean sprouts, Thai basil, lime wedges, and sliced chili add freshness and brightness. Hoisin sauce and sriracha let each person customize their bowl.
The magic of pho lies in how these elements come together at the table. You build your bowl, pour the boiling broth over the raw ingredients, and watch them transform. The herbs wilt slightly, the beef turns from pink to tender, and the noodles loosen into silky strands. It is a hands-on eating experience that rewards every step of the preparation.
For beginners, the biggest hurdle is usually the broth. A traditional recipe asks for hours of simmering and careful skimming. The good news is that you do not need that level of commitment to achieve a satisfying result. With the right techniques and a few smart shortcuts, you can capture the essence of pho in a fraction of the time. The next section explains exactly why a simplified approach works without sacrificing flavor.
Why Make a Simple Version?
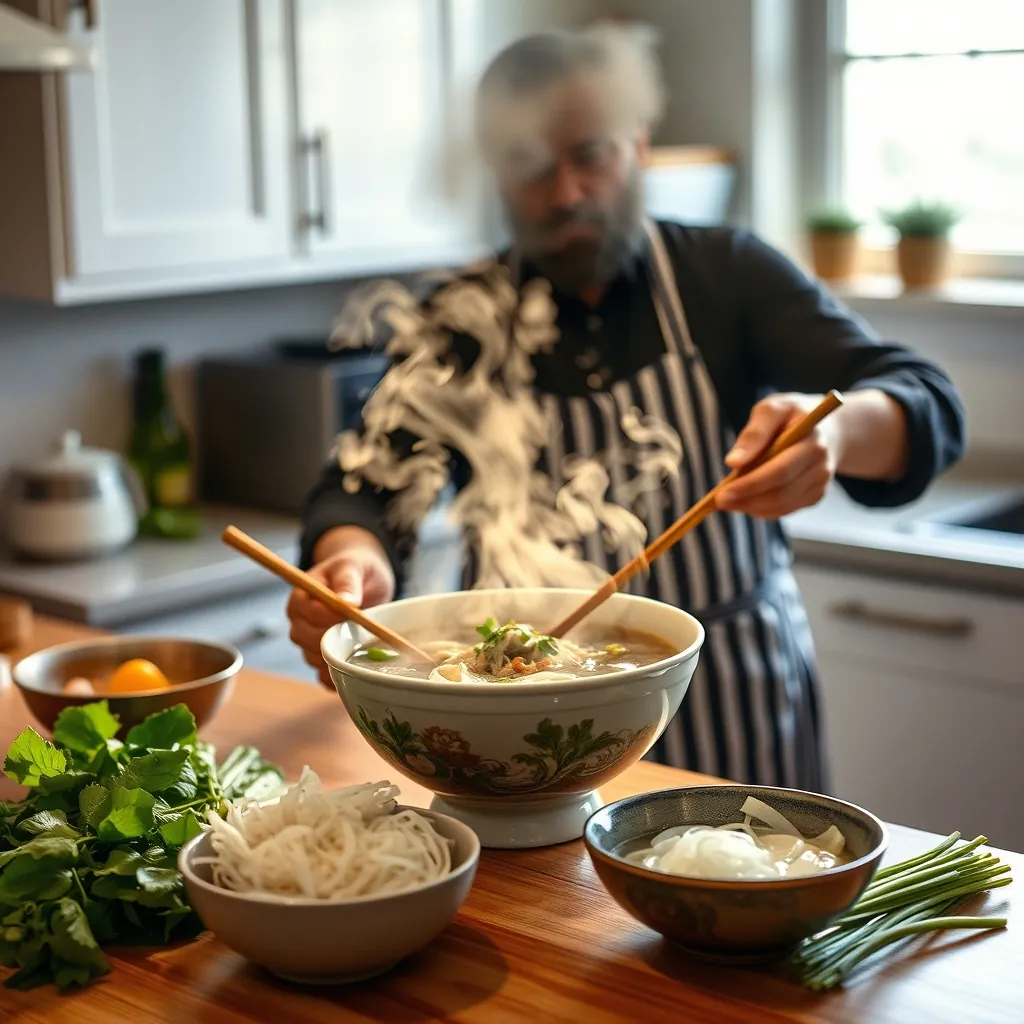
Traditional pho demands time. Hours of simmering bones, constant skimming, and careful attention to every layer of flavor. That level of dedication produces remarkable results, but it also keeps most home cooks from ever attempting the dish on a regular basis. A simplified approach changes that equation entirely.
The most obvious benefit is time. A streamlined recipe cuts the active cooking time down to roughly 45 minutes from start to finish. You skip the lengthy bone-roasting step and the extended simmer. Instead, you build flavor through charred aromatics, quality stock, and the right balance of spices. The result is a broth that tastes complex without requiring you to babysit a pot all afternoon.
Accessibility matters just as much. Traditional pho calls for beef knuckles, oxtail, and other cuts that can be hard to find at a standard grocery store. A simple version relies on ingredients you can pick up without a specialty market trip: pre-made stock, a handful of whole spices, fresh ginger, and a good bottle of fish sauce. Rice noodles are widely available in the international aisle of most supermarkets, and the protein can be any thinly sliced beef or chicken you have on hand.
Cost also plays a role. A traditional pho recipe might set you back twenty dollars or more in bones and specialty cuts. The simplified version costs a fraction of that, often using one pound of protein and a carton of stock to feed four people. That makes it a practical choice for feeding a family or meal-prepping for the week.
None of these shortcuts mean sacrificing character. The key techniques, charring the ginger and onion, blooming the spices, and finishing with fish sauce, do the heavy lifting. Those steps take minutes but deliver the same aromatic foundation that makes pho so distinctive. You get the essence of the dish without the hours of simmering.
This approach also lowers the barrier for experimentation. Once you understand the basic formula, you can adjust it to suit your taste. Prefer a spicier broth? Add more chili. Want it richer? Stir in a splash of soy sauce or a spoonful of hoisin. The simple version gives you a reliable base that you can customize freely.
Weeknight dinners are where this recipe truly shines. After a long day, you can have a steaming bowl of pho on the table faster than you could order takeout. The broth comes together while the noodles soak, and the toppings require nothing more than a quick rinse and slice. It is comfort food that fits into a busy schedule.
For those new to Vietnamese cooking, the simple version also serves as a gentle introduction. You learn the core techniques without feeling overwhelmed by a long ingredient list or complex procedures. Once you master the basics, you can always graduate to the traditional method or explore variations like chicken pho or vegetarian pho.
The bottom line is straightforward: a simplified pho recipe delivers the soul of the dish with a fraction of the effort. It makes a beloved restaurant favorite achievable at home, any night of the week. The next section breaks down the exact ingredients you need to get started.
Key Ingredients for Simple Pho
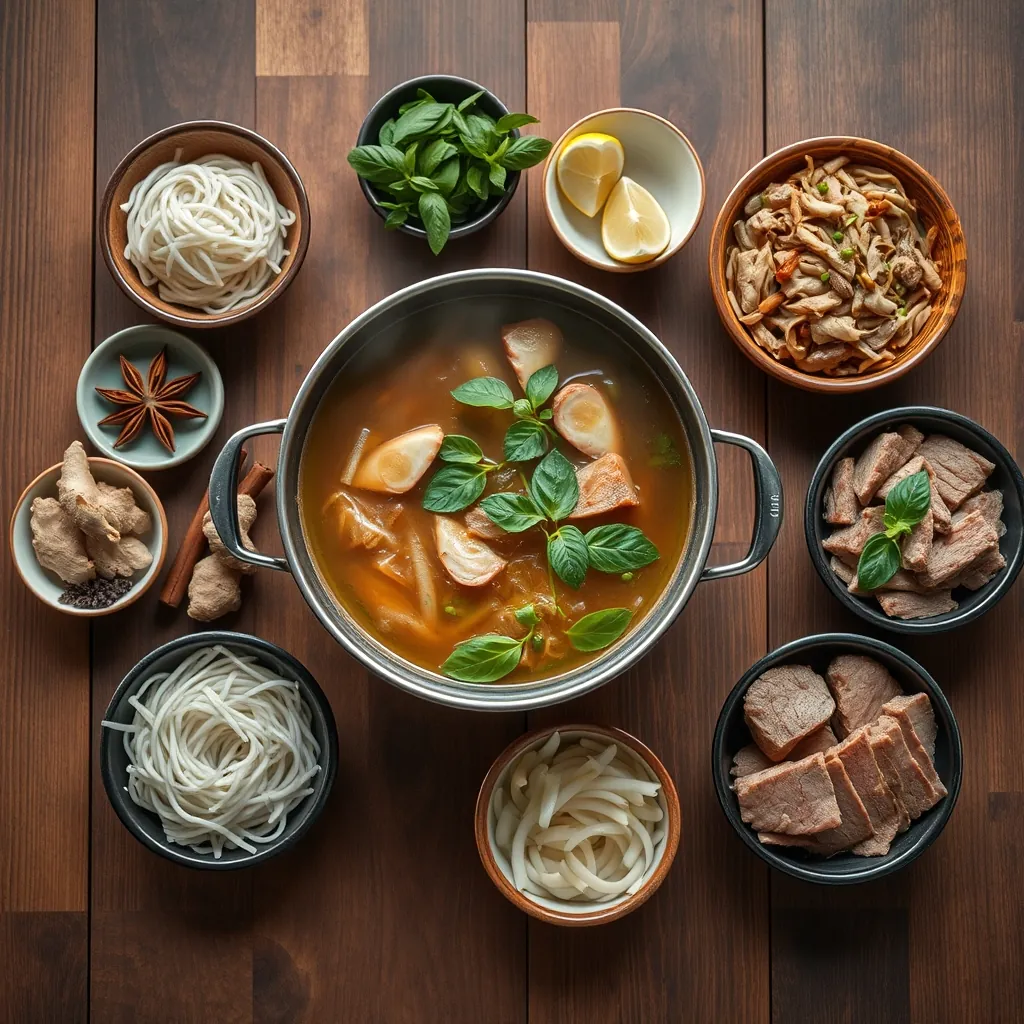
Every bowl of pho rests on a handful of essential components. Each one plays a specific role in building the final flavor. Understanding what each ingredient does helps you shop smarter and cook with confidence.
The Broth Base
The broth is the foundation. For a simple version, quality stock does the heavy lifting. Low-sodium chicken or beef stock works well, depending on the protein you choose. Beef stock pairs naturally with beef pho, while chicken stock suits chicken or vegetarian versions. Look for stock without added MSG or excessive salt so you control the seasoning yourself.
Homemade stock is always welcome, but a good store-bought carton saves time without sacrificing much. If you can find it, bone broth adds extra richness and body. The gelatin in bone broth gives the finished soup a satisfying mouthfeel that plain stock often lacks.
Rice Noodles
Rice noodles, known as bánh phở, are the traditional choice. They come in two forms: dried and fresh. Dried noodles are shelf-stable and easy to keep on hand. Fresh noodles, usually found in the refrigerated section of Asian markets, have a softer texture and cook in seconds. Both work well, but they require different handling.
Dried noodles need a soak in hot water before cooking. Fresh noodles only need a quick rinse or a brief dip in boiling water to warm through. The package instructions are your best guide, but a general rule is to cook them until tender but still slightly firm. Overcooked noodles turn mushy and fall apart in the bowl.
For the best texture, cook noodles separately from the broth. This prevents them from absorbing too much liquid and becoming soggy. Add them to the bowl just before serving, then pour the hot broth over the top.
The Protein
Thinly sliced beef is the classic choice. Sirloin, ribeye, or flank steak all work beautifully. The key is slicing it paper-thin, against the grain, so it cooks instantly when the hot broth hits it. Partially freezing the meat for 20 minutes makes slicing much easier. The cold firms up the meat, allowing for clean, even cuts.
Chicken is a lighter alternative. Use thinly sliced breast or thigh meat, cooked through before adding to the bowl. Shredded rotisserie chicken is a convenient shortcut that cuts prep time even further. For a vegetarian version, extra-firm tofu or mushrooms provide substance and soak up the broth’s flavor.
Aromatics: Ginger and Onion
Charred ginger and onion are the backbone of pho’s signature aroma. The charring process is simple but essential. Place halved ginger and onion cut-side down in a dry skillet over medium-high heat. Let them blacken for a few minutes until fragrant and slightly smoky. This step adds depth that raw aromatics simply cannot match.
Some recipes skip the charring to save time. Do not make that mistake. The smoky note from charring is what separates a memorable broth from a flat one. It takes five minutes and transforms the entire dish.
Whole Spices
Star anise and cinnamon are the two spices that define pho’s flavor profile. Star anise contributes a sweet, licorice-like note. Cinnamon adds warmth and complexity. Both are available in the spice aisle of most grocery stores. Whole spices are preferable to ground because they infuse gradually and are easy to remove before serving.
Toast the spices in a dry pan for a minute or two before adding them to the broth. This releases their essential oils and intensifies their fragrance. A single star anise pod and one cinnamon stick are enough for a pot of broth. More than that can overwhelm the other flavors.
Fish Sauce
Fish sauce provides the savory umami that makes pho taste authentic. It is a fermented condiment made from anchovies and salt, and a little goes a long way. Start with a tablespoon and adjust from there. The sauce should enhance the broth, not dominate it.
Quality matters. Look for a brand with a short ingredient list, ideally just fish and salt. Cheaper versions often contain additives that leave a harsh aftertaste. Red Boat and Three Crabs are reliable brands available online and in Asian markets.
Toppings and Garnishes
The toppings are where you personalize your bowl. Bean sprouts add crunch. Thai basil contributes a sweet, anise-like freshness. Lime wedges brighten the broth with acidity. Sliced chili brings heat for those who want it. Hoisin sauce and sriracha are served on the side so each person can adjust the flavor to their preference.
Fresh herbs are non-negotiable in a proper bowl of pho. Cilantro and green onions add color and a final layer of freshness. Prepare these ahead of time and arrange them on a platter so everyone can build their own bowl at the table.
Fresh vs. Dried Noodles: What to Choose
The choice between fresh and dried noodles comes down to availability and preference. Fresh noodles have a silkier texture and a more delicate bite. They are closer to what you find in Vietnamese restaurants. Dried noodles are more convenient and have a longer shelf life, making them a practical pantry staple.
If you use dried noodles, soak them in hot water for 15 to 20 minutes before cooking. This softens them and reduces the final cooking time. Fresh noodles need no soaking, just a quick blanch in boiling water for about 30 seconds. Either way, rinse the cooked noodles briefly to remove excess starch and prevent them from clumping together.
With these ingredients on hand, you are ready to start cooking. The next section covers the equipment you need and the step-by-step process for bringing everything together.
Essential Equipment
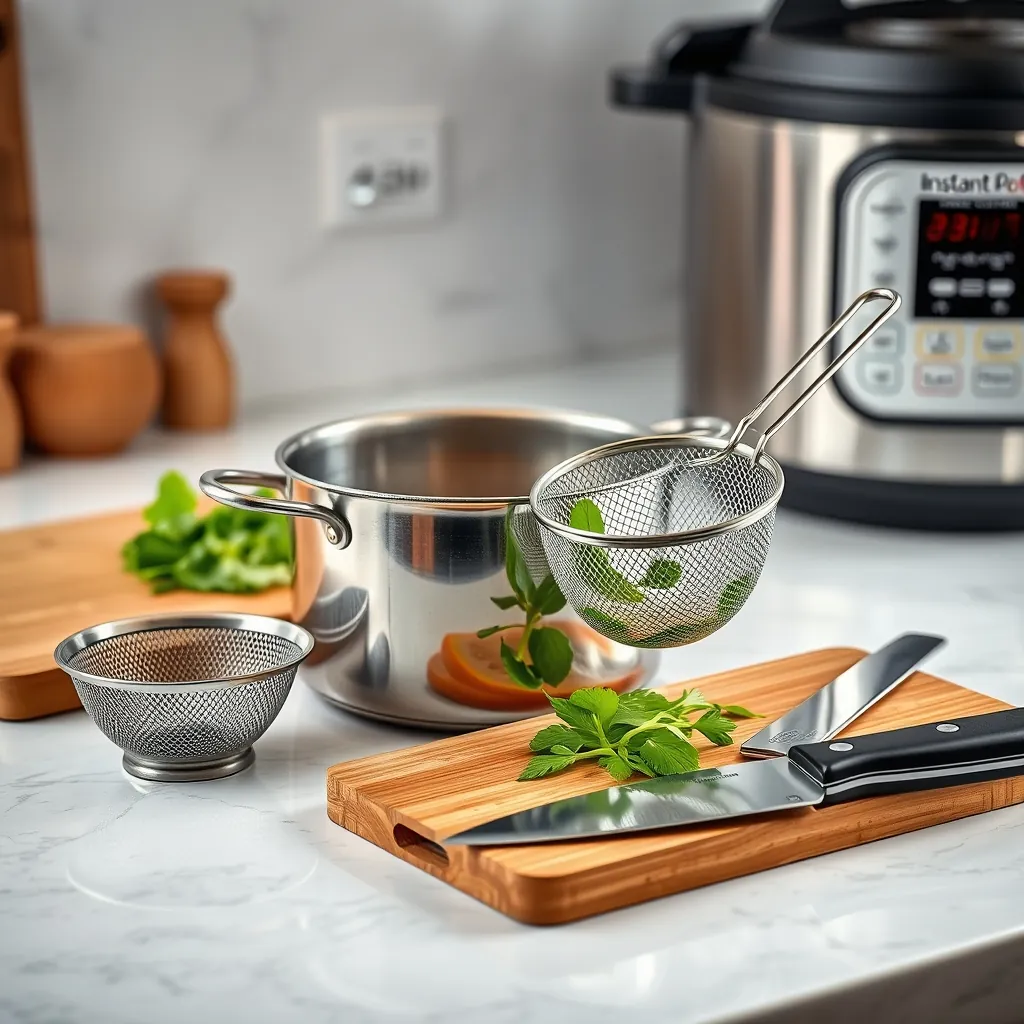
Simple pho does not demand a kitchen full of specialized gadgets. Most of the required tools are already sitting in your cabinets. A few key pieces make the process smoother and the results more consistent.
The Large Pot
A heavy-bottomed pot with a capacity of at least 6 quarts is your primary workhorse. This size accommodates the broth, bones, and aromatics without crowding. A Dutch oven or stainless steel stockpot both work well. The heavy base distributes heat evenly, preventing scorching on the bottom.
If you plan to make a double batch for freezing, go bigger. An 8-quart pot gives you room to scale up without overflow. Ensure the pot has a tight-fitting lid. This traps steam and keeps the broth at a steady simmer.
A Fine Mesh Strainer
A fine mesh strainer serves two critical functions. First, it removes the bones, spices, and aromatics from the finished broth. Second, it skims the foam and impurities that rise to the surface during simmering. A clean broth depends on this tool.
Choose a strainer with a long handle and a hook that rests on the pot’s rim. This keeps your hands away from the steam while you work. A ladle with built-in slots works for skimming, but a mesh strainer catches smaller particles that cloud the broth.
A Sharp Knife and Cutting Board
Precision slicing matters in pho. The beef must be cut paper-thin against the grain for it to cook properly in the hot broth. A dull knife tears the meat and produces uneven slices. A sharp chef’s knife or a slicing knife makes clean, controlled cuts.
Your cutting board should be stable and large enough to handle multiple ingredients. Wooden boards are gentle on knife edges and provide a solid surface. Plastic boards are easier to sanitize and work fine for raw meat. Whichever you choose, secure it with a damp towel underneath to prevent slipping.
Measuring Tools
Accuracy matters when balancing fish sauce, spices, and seasoning. A set of measuring spoons handles the small quantities of fish sauce and spices. A liquid measuring cup with clear markings is useful for measuring stock and water. These inexpensive tools prevent the guesswork that leads to overseasoned broth.
Optional: Pressure Cooker or Instant Pot
A pressure cooker transforms the timeline for making pho. What normally takes hours on the stovetop compresses into under an hour. The sealed environment forces flavor into the broth at high pressure, extracting richness from bones and aromatics quickly.
If you own an Instant Pot or similar electric pressure cooker, it is worth using. The sauté function handles the charring of ginger and onion in the same pot, reducing cleanup. The pressure cooking function then does the work of simmering. This is the single best tool for weeknight pho.
For those without a pressure cooker, a slow cooker also works. It takes longer, but the low, steady heat produces a gentle extraction. Both options are covered in detail in the step-by-step instructions that follow.
Small Tools That Make a Difference
A few small items round out your setup. Tongs help you remove bones and large spice pieces from the broth. A ladle serves the hot liquid into bowls without splashing. A slotted spoon retrieves noodles and cooked meat from their respective pots.
Have a small bowl of cold water nearby when slicing raw beef. Dipping the knife between cuts keeps the blade clean and prevents the meat from sticking. This simple habit produces cleaner slices and a better final texture.
With these tools assembled, you are ready to move into the cooking process. The next section walks through each step, from charring the aromatics to assembling the finished bowl.
Step-by-Step Instructions
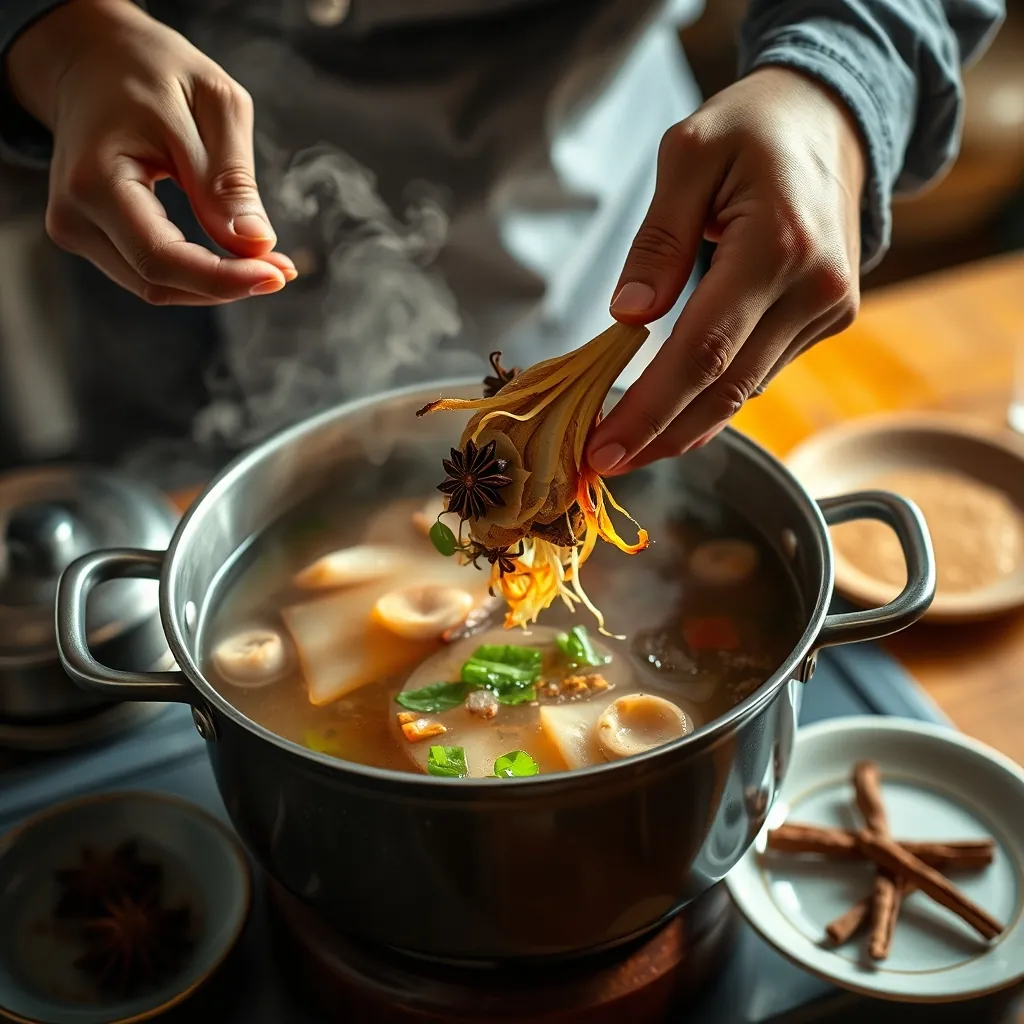
Now the tools are ready and the ingredients are measured. The process itself follows a logical sequence that builds flavor at each stage. Work through these steps in order, and the broth will come together without stress.
Step 1: Char the Aromatics
Start with the ginger and onion. Peel the ginger and cut it into thick slices. Halve the onion, leaving the skin on. Place both on a baking sheet and broil them for 5 to 7 minutes, turning once, until the edges blacken and a smoky aroma fills the kitchen.
Charring is not optional. The high heat caramelizes the natural sugars and adds a depth that simmering alone cannot produce. If you have a gas stove, hold the ginger and onion directly over the flame with tongs for faster results. The blackened spots are exactly what you want.
Once charred, rinse the onion under cool water and remove the burnt outer layers. The ginger can go into the pot as is. The goal is a smoky note, not an acrid, burnt flavor.
Step 2: Toast the Spices
Place the star anise, cinnamon stick, and cloves in a dry skillet over medium heat. Toast them for 1 to 2 minutes, shaking the pan frequently, until fragrant. Do not walk away. Spices burn quickly and turn bitter.
Toasting releases the essential oils locked inside the spices. This step takes less than two minutes but makes a measurable difference in the final aroma. Once toasted, transfer the spices to a spice bag or a piece of cheesecloth tied with kitchen twine. This makes removal from the broth effortless later.
Step 3: Build the Broth Base
Pour the stock into your large pot and bring it to a gentle boil over medium-high heat. Add the charred ginger, the spice bag, and the fish sauce. Stir once to combine.
Reduce the heat to low and let the broth simmer, uncovered, for 30 minutes. This is the minimum time for the aromatics to infuse the liquid. For a deeper flavor, let it go for 45 to 60 minutes. The broth should barely bubble, with small bubbles rising to the surface. A rolling boil will cloud the liquid.
During this time, skim the surface with your fine mesh strainer. Foam and impurities will rise. Removing them keeps the broth clear and clean-tasting.
Step 4: Cook the Noodles
While the broth simmers, prepare the rice noodles. Bring a separate pot of water to a boil. Add the noodles and cook according to the package directions, typically 4 to 6 minutes for dried noodles and 1 to 2 minutes for fresh.
Drain the noodles immediately and rinse them under cold water to stop the cooking process. Toss them with a small amount of oil to prevent sticking. The noodles should be tender but still firm to the bite. They will continue to soften slightly when the hot broth is poured over them.
Do not cook the noodles directly in the broth. The starch they release will cloud the liquid and alter the flavor balance.
Step 5: Slice the Beef Against the Grain
This step separates good pho from great pho. Place the beef in the freezer for 15 to 20 minutes before slicing. A partially frozen piece holds its shape and allows for thinner, more consistent cuts.
Identify the direction of the muscle fibers. Slice perpendicular to those fibers, against the grain. This shortens the muscle fibers and makes each bite tender. Slices should be thin enough to see through, roughly 1/8 inch or less.
Keep the slices in a single layer on a plate. If they pile up, they will warm and lose their firmness. Return the plate to the refrigerator until assembly time.
Step 6: Season and Adjust
After the broth has simmered, remove the spice bag and the ginger with tongs. Taste the broth. This is the moment to adjust the seasoning.
Add fish sauce in small increments, 1 teaspoon at a time, tasting after each addition. The broth should taste savory and slightly salty, with a subtle sweetness from the charred onion. If it tastes flat, a pinch of salt or an extra teaspoon of fish sauce usually fixes it.
Some cooks add a small piece of rock sugar at this stage to round out the flavors. A teaspoon of regular sugar works as a substitute. The sweetness should be barely perceptible, just enough to balance the salt and spice.
Step 7: Assemble the Bowl
Divide the cooked noodles among the serving bowls. Place a handful of raw beef slices on top of the noodles in each bowl. The heat from the broth will cook the thin slices on contact.
Ladle the hot broth directly over the beef and noodles. The broth should be at a rolling simmer when you pour it. If it has cooled, bring it back to a boil first. The beef needs that heat to cook through in about 30 seconds.
Finish each bowl with bean sprouts, Thai basil leaves, and a lime wedge on the side. Let everyone add their own garnishes at the table. This keeps the herbs bright and the lime juice fresh.
Step 8: Serve Immediately
Pho waits for no one. The noodles soften, the beef overcooks, and the broth cools if the bowl sits. Serve each bowl as soon as it is assembled.
Set out hoisin sauce and sriracha alongside the bowls. These condiments are personal additions, not mandatory components. Some prefer the clean, pure flavor of the broth without them. Let each diner decide.
The entire process, from charring to serving, takes about 45 minutes with a good stock. The broth alone carries most of the flavor, and the remaining steps are simple assembly. This is the beauty of the simple approach.
Quick Pho Using a Pressure Cooker or Instant Pot
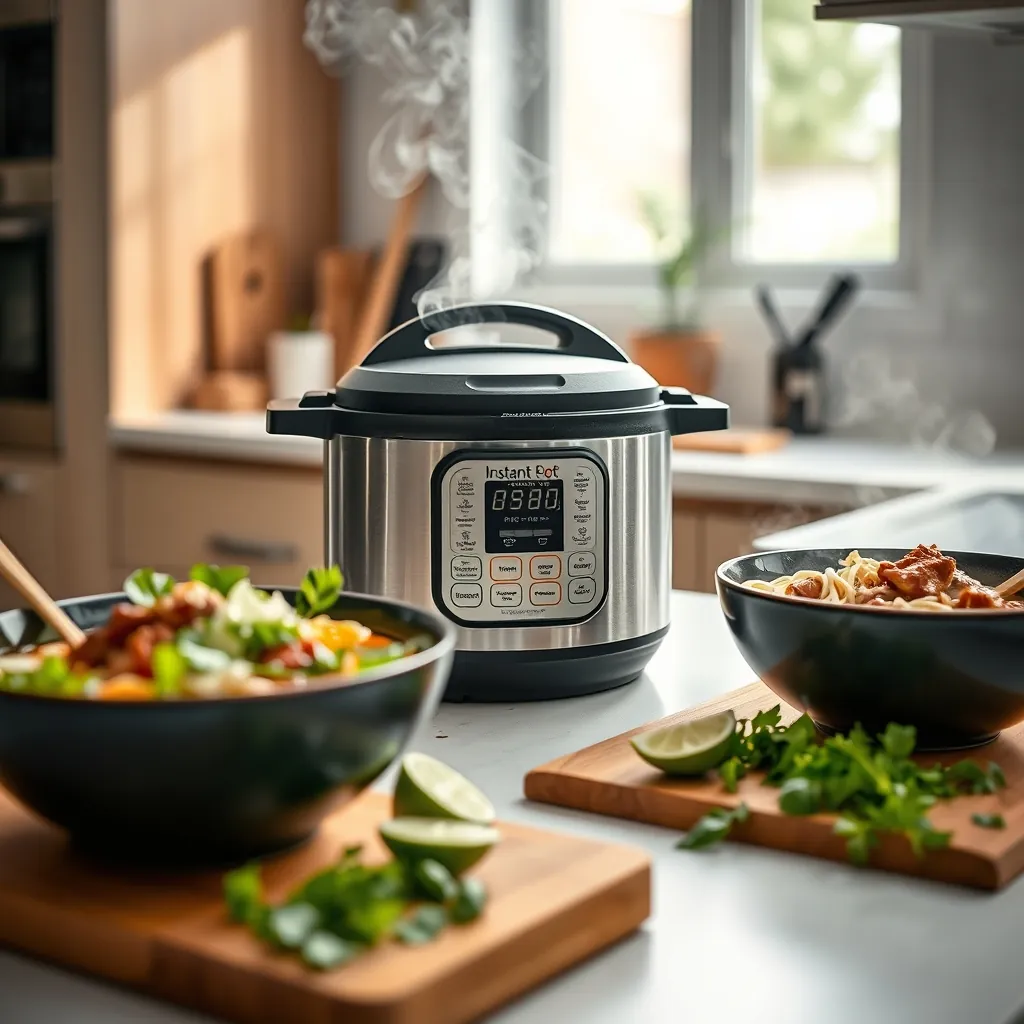
Not everyone has six hours to tend a simmering pot. The pressure cooker collapses that time dramatically while still extracting deep flavor from the same ingredients. The Instant Pot and similar electric pressure cookers work especially well for pho because they trap steam and build pressure, forcing flavor out of bones, spices, and aromatics in a fraction of the time.
Why Pressure Cooking Works for Pho
Traditional pho relies on long, gentle simmering to break down connective tissue and draw out gelatin from the bones. A pressure cooker achieves the same result through heat and pressure. The sealed environment raises the boiling point of the liquid, which accelerates extraction without the need for hours of stovetop time.
The trade-off is subtle. Pressure-cooked broth tends to be slightly less clear than a slow-simmered version, but the flavor intensity is comparable. For a weeknight dinner, this trade is worth making.
Adjusting the Method for the Instant Pot
The steps mirror the stovetop version, but the timing changes significantly. Charring and toasting still happen first. These steps cannot be skipped, even with a pressure cooker. The smoky depth from the charred ginger and onion is essential to the final flavor.
Once the aromatics are ready, follow this sequence:
- Add the stock, charred ginger, toasted spices, and fish sauce to the Instant Pot insert.
- Secure the lid and set the valve to sealing.
- Cook on high pressure for 20 minutes for a chicken-based broth, or 30 minutes for a beef-based broth.
- Allow a natural pressure release for 10 minutes, then carefully switch the valve to venting for any remaining steam.
The natural release matters. Releasing the pressure immediately can make the broth cloudy and can cause hot liquid to sputter through the valve. Patience during this phase pays off.
Speeding Up the Full Process
With the pressure cooker doing the heavy lifting, the entire pho process takes about 45 minutes from start to finish. Here is how the time breaks down:
- Charring and toasting: 10 minutes
- Pressure cooking: 20 to 30 minutes
- Natural pressure release: 10 minutes
- Noodle cooking and assembly: 10 minutes
That total is comparable to the stovetop version, but the active cooking time is much shorter. You can prep the noodles and toppings while the pressure cooker runs, which makes the whole process feel faster.
Tips for a Rich Broth in Under an Hour
Pressure cooking extracts flavor quickly, but you can push it further with a few adjustments. Use a stock with good body. A thin, watery stock produces a thin, watery broth, regardless of the cooking method. Look for a stock with visible gelatin when cold, or add a split beef shank bone to the pressure cooker for extra richness.
Do not skimp on the fish sauce. The pressure cooker intensifies the other flavors, but fish sauce provides the savory backbone that makes pho taste like pho. Start with the amount in the recipe and adjust after cooking.
For a deeper color and more complex flavor, add the charred onion and ginger directly to the pot without peeling off every burnt layer. The charred bits contribute color and a subtle smokiness that a stovetop simmer would develop over hours.
What to Avoid in the Pressure Cooker
Some ingredients do not belong in the pressure cooker. Do not add the noodles to the pot. They will turn to mush under pressure. Cook them separately on the stovetop while the broth cooks.
Do not add the raw beef slices either. They should go directly into the serving bowl and cook from the heat of the broth. Pressure cooking them would make them tough and gray.
Do not add the fresh herbs or lime juice to the pot. Their bright, volatile flavors degrade with heat. Add them at the table, just before serving.
The pressure cooker method delivers a respectable bowl of pho in under an hour. It is not identical to the slow-simmered version, but it is close enough for a busy weeknight. The broth is rich, aromatic, and deeply satisfying, and the technique is forgiving enough for beginners.
How to Build the Perfect Pho Bowl
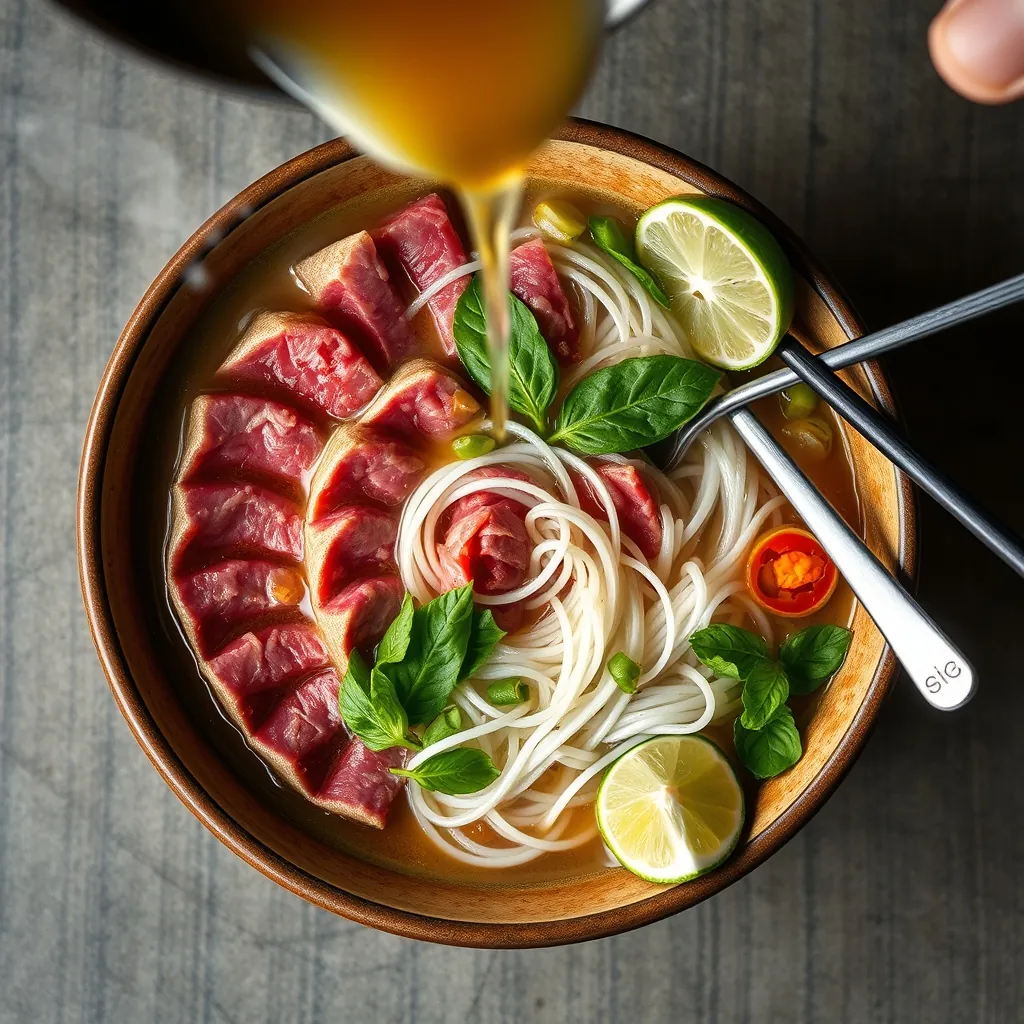
Assembly matters more than most recipes admit. The order in which ingredients enter the bowl determines whether the beef cooks properly, whether the noodles stay springy, and whether the herbs retain their brightness. A well-built bowl is a study in temperature and texture, and each layer has a job to do.
The Assembly Order
Follow this sequence for a balanced bowl every time:
- Place the cooked noodles at the bottom of the bowl.
- Arrange the protein on top of the noodles.
- Ladle the boiling broth over the protein and noodles.
- Add the crunchy and fresh toppings last.
- Serve with sauces and lime on the side.
The hot broth does the cooking. When it hits the raw beef, it should be at a rolling boil. If the broth has cooled even slightly, the beef will not cook through and will remain chewy and pink. Reheat the broth to a full boil before assembling each bowl.
How Raw Beef Cooks in the Broth
Thin slices of raw beef are the classic choice for pho. The heat of the broth cooks them in seconds, producing a silky, tender texture that is impossible to achieve with pre-cooked meat. The key is the thickness of the slice. Aim for slices no thicker than 1/8 inch, about the thickness of a coin.
To slice raw beef that thin at home, place the meat in the freezer for 30 to 45 minutes until it is firm but not frozen solid. Then slice against the grain. Cutting against the grain shortens the muscle fibers, which makes the meat more tender. Slicing with the grain leaves long, tough strands that are difficult to chew.
If slicing raw beef feels intimidating, use leftover cooked protein instead. Shredded rotisserie chicken, sliced steak from last night’s dinner, or even seared tofu work well. The broth will not cook these proteins, but it will warm them through, and the bowl will still be satisfying.
Noodles: The Foundation
Rice noodles should be cooked until just tender but still firm to the bite. They will continue to soften slightly in the hot broth, so pulling them off the heat a minute early is better than overcooking them. Drain them well and rinse briefly with warm water to remove excess starch, which prevents them from clumping together.
Place the noodles in the bowl first, creating a bed for the protein and broth. The noodles should fill about one-third of the bowl. Too many noodles crowd out the other ingredients and dilute the broth’s impact. Too few leave the bowl feeling sparse.
Toppings and Garnishes
The toppings are where pho becomes personal. Set out a platter of garnishes so everyone can build their own bowl. The standard spread includes:
- Bean sprouts, which add crunch and a mild, fresh flavor.
- Thai basil leaves, which have a hint of anise and a peppery finish.
- Lime wedges for brightness and acidity.
- Sliced red chilies for heat.
- Cilantro and thinly sliced green onions for freshness.
Add these toppings after the broth has been poured. The residual heat will wilt the herbs slightly, releasing their oils, but they will not cook into the broth. This keeps each bite bright and aromatic.
Sauces: Hoisin and Sriracha
Hoisin sauce and sriracha are the traditional condiments served alongside pho. They are not stirred into the entire bowl. Instead, a small amount is added to a side dish or directly onto the meat and noodles, then each spoonful of broth is dipped into the mixture for a customized flavor.
Hoisin adds sweetness and depth. Sriracha adds heat and garlic. The balance is personal. Some prefer a heavy hand with both, while others use them sparingly to preserve the broth’s clarity. Start with a small amount and adjust with each bite.
Customizing Your Bowl
The beauty of pho is its adaptability. A bowl can be built to suit any preference:
- For extra richness, add a soft-boiled egg or a few drops of sesame oil.
- For more vegetables, pile on extra bean sprouts and fresh herbs.
- For a spicier bowl, slice the chilies directly into the broth rather than serving them on the side.
- For a lighter meal, use half the noodles and double the bean sprouts.
The broth remains the anchor, but the bowl around it is entirely yours to shape. That flexibility is what makes pho a dish you can eat weekly without tiring of it.
Tips for a Clear and Flavorful Broth
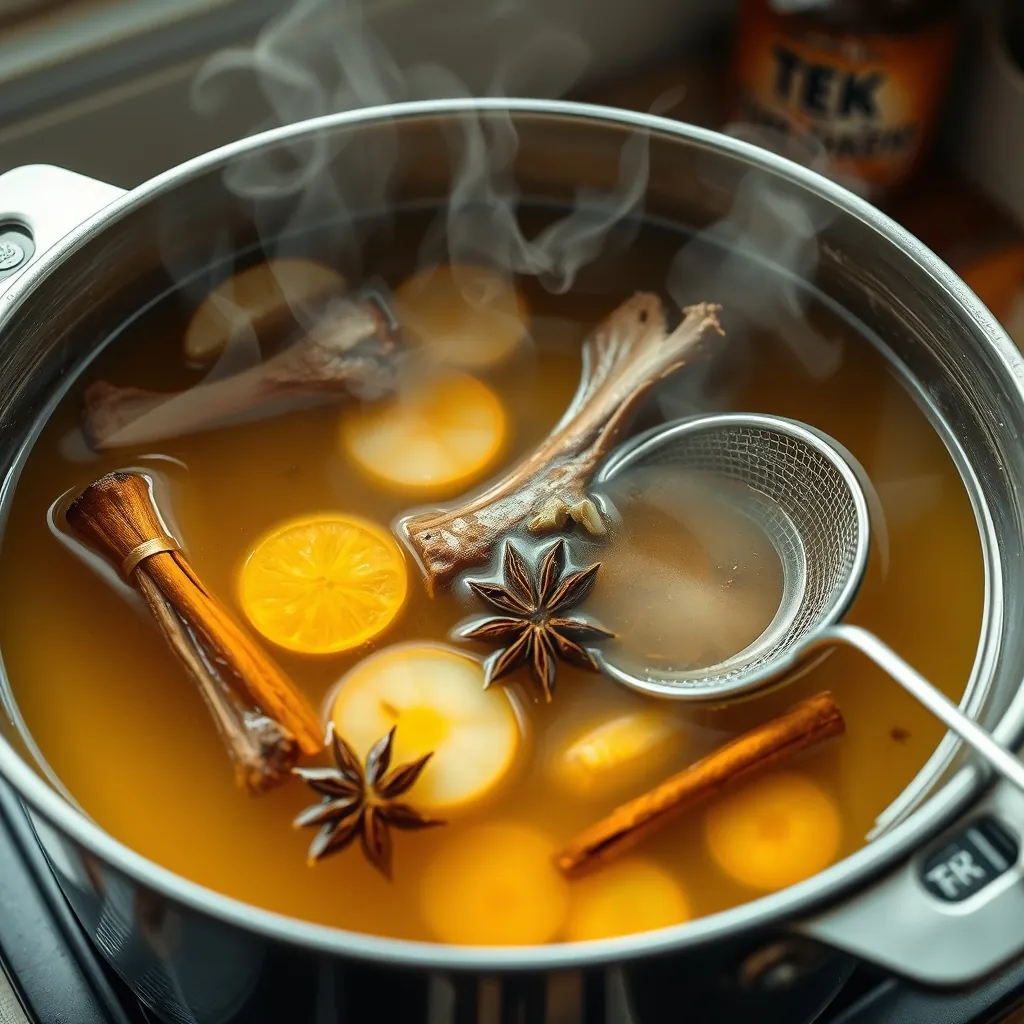
The difference between a good bowl of pho and a great one comes down to the broth. It should be clear enough to see the noodles through, yet rich enough to coat the back of a spoon. Achieving that balance requires attention to a few key details. None of them are difficult, but each one matters.
Why Cloudy Broth Happens
A cloudy broth is the most common disappointment for home cooks. The culprit is usually one of three things: boiling too vigorously, skipping the initial rinse of the bones, or failing to skim the surface. Each of these allows impurities to emulsify into the liquid, turning it murky and dull.
The fix starts before the pot even goes on the stove. Blanch the bones first. Place them in a pot of cold water, bring it to a boil, and let them bubble for 5 minutes. Drain the bones, discard the water, and rinse them clean. This single step removes most of the blood and marrow residue that causes cloudiness.
The Art of Skimming
During the first 30 minutes of simmering, foam and scum will rise to the surface. This is the remaining protein and impurities being released from the bones. Skim it off with a fine mesh spoon or ladle. Do not stir it back into the broth. If you leave it, the foam will break down and cloud the liquid.
Skim patiently. The foam stops forming after the initial phase, so the effort is concentrated at the start. Once the surface is clean, the broth will stay clear for the remainder of the cooking time.
Simmer, Do Not Boil
A rolling boil is the enemy of clear broth. It churns the liquid, emulsifying fats and impurities into the stock. The goal is a gentle simmer, where small bubbles break the surface occasionally but the liquid does not move aggressively.
Maintain the heat so the broth stays between 185°F and 200°F. If you see vigorous bubbling, lower the heat immediately. A slow, patient simmer extracts flavor from the bones and aromatics without disturbing the clarity of the liquid.
Charring the Aromatics
Charred ginger and onion are the backbone of pho’s signature depth. The char adds a smoky, slightly bitter note that balances the sweetness of the spices. Without it, the broth tastes flat and one-dimensional.
To char them properly, place halved onions and thick slices of ginger directly over a gas flame, under a broiler, or on a dry skillet. Let them blacken in spots, not burn completely through. The goal is a deep golden brown with charred edges. This takes about 5 to 7 minutes under a broiler or 3 to 4 minutes per side in a hot skillet.
Balancing the Spices
Star anise, cinnamon, and cloves are the primary spices in pho broth. They should complement the meat, not overpower it. A common mistake is adding too much star anise, which can make the broth taste like licorice and turn bitter.
For a simple pho, start with 3 to 4 whole star anise pods and 1 cinnamon stick for every 8 cups of broth. Toast them in a dry pan for 1 to 2 minutes before adding them to the pot. Toasting releases their oils and intensifies their aroma without making them harsh.
Fish Sauce: The Umami Anchor
Fish sauce is what makes pho taste like pho. It provides the salty, savory depth that ties the broth together. Add it near the end of cooking, not at the beginning. Fish sauce loses its complexity with prolonged heat, so stirring it in during the last 10 to 15 minutes preserves its character.
Start with 2 to 3 tablespoons per 8 cups of broth, then taste. The broth should be slightly saltier than you want the final soup to be, because the noodles and toppings will dilute it. If the broth tastes flat, the fix is usually more fish sauce, not more salt.
Common Flavor Mistakes to Avoid
- Overseasoning with salt before the broth has reduced. The flavors concentrate as the liquid simmers, so salt early and adjust at the end.
- Adding too many spices. The broth should taste balanced, not like a spice rack exploded.
- Using low-quality fish sauce. Cheap brands taste harsh and overly salty. Look for a sauce made with just anchovies, salt, and water.
- Skipping the sugar. A small amount of sugar or a piece of rock sugar rounds out the savory flavors and softens the acidity of the fish sauce.
Fixing a Flat Broth
If the broth tastes thin or lacks richness, a few quick fixes can rescue it. Add a splash more fish sauce for salt and umami. A teaspoon of sugar can brighten the flavors. A pinch of MSG, if you keep it on hand, amplifies the savory depth without adding saltiness. And if the broth still tastes weak, simmer it longer to concentrate the flavors.
A clear, flavorful broth is the result of small, consistent habits. Blanch the bones, skim the foam, keep the heat low, and season with intention. The payoff is a bowl of pho that tastes like it simmered all day, even when it did not.
Dietary Adjustments and Substitutions
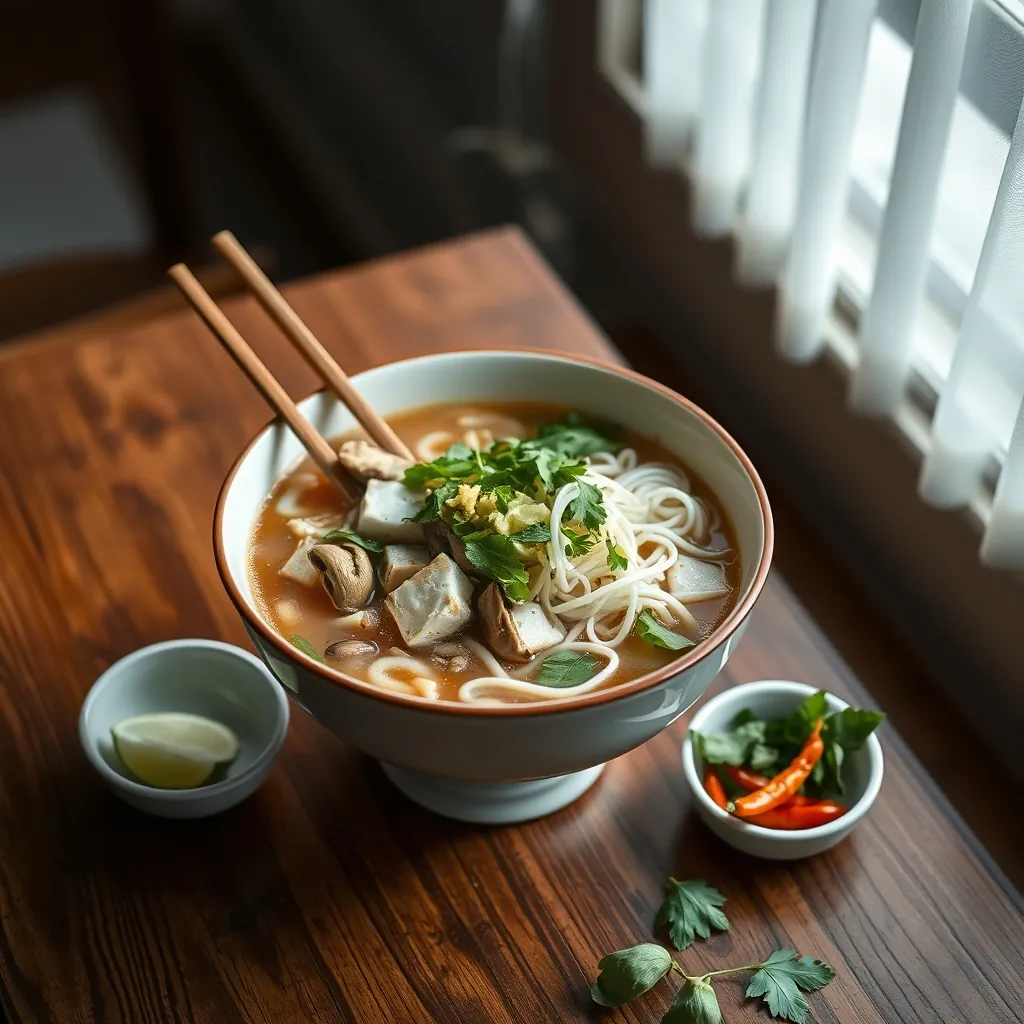
Pho adapts well to different dietary needs without losing its identity. The broth carries the flavor, and the toppings offer flexibility. Whether you are avoiding gluten, watching sodium, or skipping meat entirely, a satisfying bowl is within reach. The key is knowing which ingredients to swap and which to keep.
Gluten-Free Pho
Traditional pho is nearly gluten-free by default. Rice noodles contain no wheat, and the core aromatics are naturally safe. The hidden risks come from sauces and seasonings. Soy sauce, hoisin sauce, and some fish sauces contain wheat or barley derivatives.
Check the label on your fish sauce. Many premium brands use only anchovies, salt, and water, which makes them gluten-free. Others add wheat as a thickener or fermenting aid. If you are unsure, look for a brand that explicitly states gluten-free on the label.
For hoisin sauce, swap it for a gluten-free version or use a blend of tamari and a touch of sugar and vinegar to mimic the sweet-savory profile. Sriracha is typically gluten-free, but verify the brand, as some varieties include wheat-based thickeners.
Low-Sodium Adjustments
Pho broth relies on salt to balance the sweetness of the spices and the funk of the fish sauce. Reducing sodium does not mean sacrificing flavor, but it does require a more deliberate approach.
Start with a low-sodium broth as your base. If you are using store-bought stock, the regular version can pack 800 to 1,000 milligrams of sodium per cup. The low-sodium version cuts that roughly in half. From there, control the seasoning yourself instead of letting the stock dictate the salt level.
Use fish sauce sparingly and taste as you go. You can also use a reduced-sodium fish sauce, though these are less common and can taste thinner. A squeeze of lime at the end brightens the broth and makes it taste saltier than it is, which helps compensate for the reduction.
Vegetarian and Vegan Pho
A meatless pho is more than a watered-down version of the original. It is a distinct bowl with its own character, built on a broth that gets its depth from vegetables and umami-rich ingredients.
For the base, use a good vegetable broth or make your own by simmering onions, carrots, celery, and mushrooms. Dried shiitake mushrooms are the secret weapon. They add a meaty, savory depth that mimics the richness of bone broth. Rehydrate them in the broth itself and slice them for the bowl.
For protein, use extra-firm tofu that has been pressed and pan-seared until golden. The browning adds flavor and gives the tofu a pleasant chew. You can also add more mushrooms, such as king oyster or portobello, sliced thin and simmered in the broth.
To keep the broth savory without fish sauce, use soy sauce or tamari plus a small amount of miso paste. The miso adds fermented depth that approximates the complexity of fish sauce. Add it at the end of cooking and do not let it boil, as high heat kills its flavor.
Substitutes for Hard-to-Find Ingredients
Not every pantry has star anise or fish sauce on hand. If you are missing a key ingredient, a few smart swaps can keep the dish on track.
Star anise is the most distinctive spice in pho. If you do not have it, the closest substitute is a combination of fennel seeds and a pinch of cloves, which together mimic the sweet, licorice-like notes. Toast them with the other spices to release their oils. The flavor will not be identical, but it will be in the same family.
Fish sauce is harder to replace because it is both salty and deeply savory. Soy sauce or tamari works in a pinch, but you will lose some of the fermented complexity. A splash of Worcestershire sauce can help, though it contains anchovies, so it is not vegetarian. For a vegan option, mix soy sauce with a small amount of miso paste or a drop of liquid smoke to add depth.
Cinnamon can be swapped for cassia bark, which is the more common form sold in most grocery stores. If you only have ground cinnamon, use half the amount and add it near the end of cooking to avoid clouding the broth.
Adjusting the Noodles
Rice noodles are naturally gluten-free, but they come in different forms. Dried noodles are the most common and work well in simple pho. Fresh noodles, often found in the refrigerated section of Asian markets, have a softer texture and cook in seconds. If you cannot find either, thin rice vermicelli is an acceptable substitute, though the texture is slightly different.
For a low-carb option, use zucchini noodles or shirataki noodles. They will not absorb the broth the way rice noodles do, so the soup will taste slightly saltier. Adjust the seasoning accordingly.
Making It Work for Your Table
The beauty of pho is that each bowl is assembled to order. Keep the broth and noodles separate, and let everyone choose their own toppings. This makes it easy to accommodate different dietary needs at the same meal. One pot of broth, a pile of noodles, and a spread of toppings can serve a gluten-free eater, a vegetarian, and a traditionalist all at once.
With a few thoughtful swaps, pho becomes a dish that fits almost any diet. The broth remains the anchor, and the adjustments are just variations on a theme. A bowl of pho is personal, and it should be made to match the person eating it.
Troubleshooting Common Pho Problems
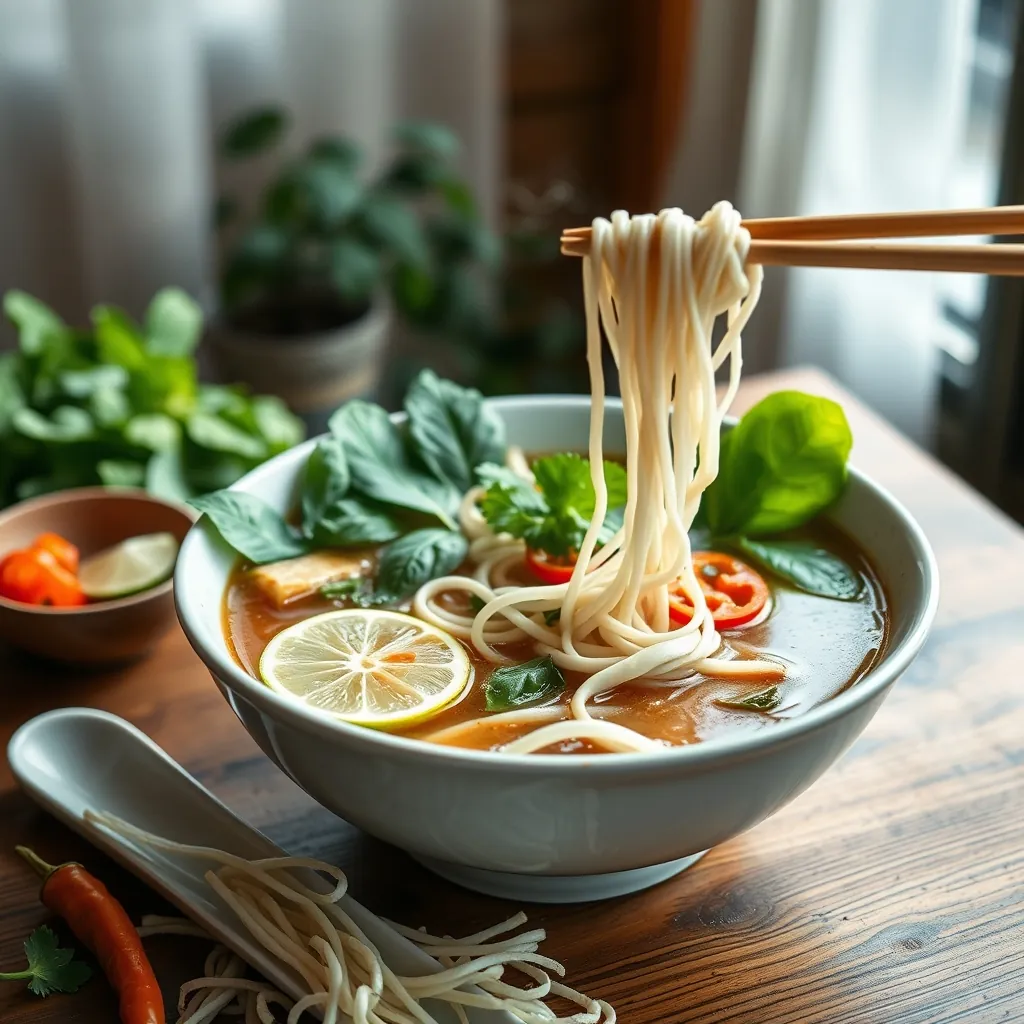
Even experienced cooks hit snags when making pho. The broth tastes flat. The noodles turn to mush. The meat comes out chewy. These problems are common, but they are also preventable. Here is how to diagnose and fix the most frequent issues.
Flat-Tasting Broth
A broth that tastes thin or one-dimensional is the most common complaint. The fix usually comes down to seasoning and extraction. If your broth lacks depth, it likely did not extract enough flavor from the bones or aromatics, or it needs more salt and umami.
Start by tasting the broth and adding salt in small increments. Pho broth needs more salt than you might expect because the noodles and toppings dilute it. If salt does not solve the problem, add more fish sauce. This ingredient provides the fermented, savory backbone that makes pho taste like pho.
Another common cause is underseasoned aromatics. If you skipped charring the ginger and onions, the broth will miss that smoky, sweet note. You can salvage this by charring them now and simmering them in the broth for another 20 minutes. If the broth still tastes flat, add a splash of soy sauce or a small piece of rock sugar to round out the flavor.
Cloudy Broth
A crystal-clear broth is a hallmark of good pho, but cloudiness happens to everyone at some point. The main culprits are boiling too vigorously, not skimming the foam, and adding ingredients that release starch or impurities.
Prevention starts with the bones. Blanch them in boiling water for a few minutes, then discard the water and rinse the bones. This removes the blood and impurities that cause cloudiness. During simmering, keep the heat low enough that the broth barely bubbles. A gentle simmer, not a rolling boil, keeps the proteins from emulsifying into the liquid.
Skim the surface regularly during the first hour of cooking. The foam that rises to the top is packed with impurities. Removing it keeps the broth clear and clean-tasting. If your broth is already cloudy, strain it through a fine-mesh sieve lined with cheesecloth. This will not fully restore clarity, but it will remove the larger particles and improve the texture.
Mushy or Overcooked Noodles
Rice noodles are forgiving, but they have a narrow window between perfectly tender and mushy. The most common mistake is cooking them too long or leaving them in hot broth for too long before serving.
Cook dried rice noodles according to the package instructions, but subtract a minute from the recommended time. They will continue to soften when the hot broth hits them in the bowl. For fresh noodles, the cooking time is even shorter, often just 30 seconds in boiling water. Rinse them under cold water after cooking to stop the cooking process and remove excess starch.
If your noodles are already mushy, the damage is done. To prevent it next time, keep the noodles separate from the broth until assembly. Add them to the bowl just before pouring the broth over. This way, they stay firm and springy instead of turning to paste.
Tough or Chewy Meat
Pho typically features two types of meat: slow-cooked cuts that go into the broth and thinly sliced raw beef that cooks in the hot liquid. Each requires different handling.
For the slow-cooked meat, such as brisket or chuck, the issue is usually insufficient cooking time. These cuts need hours of simmering to break down their connective tissue. If the meat is still tough, return it to the broth and simmer for another hour. The collagen will eventually soften, and the meat will become tender and shreddable.
For the raw beef slices, the problem is often thickness. If the slices are too thick, the hot broth cannot cook them through quickly, leaving them chewy. Freeze the beef for 30 minutes before slicing. This firms it up and allows you to cut paper-thin slices. Slice against the grain to shorten the muscle fibers, which makes the meat easier to chew.
If the beef is already in the bowl and tough, you can remove it and slice it thinner, then return it to the broth for a few seconds. This is not ideal, but it is better than eating a chewy piece of meat.
Broth That Is Too Salty or Too Sweet
Seasoning imbalances are easy to create and hard to fix, but they are not fatal. If the broth is too salty, you have a few options. Add more water or unsalted broth to dilute it. You can also add a peeled potato or a piece of daikon radish and simmer for 15 minutes. These vegetables absorb some of the salt, though they will also add a mild sweetness.
If the broth is too sweet, the likely culprit is too much sugar or too many sweet aromatics like cinnamon or star anise. Balance the sweetness with more fish sauce or a squeeze of lime. The acidity cuts through the sugar and brings the flavors back into alignment. If the sweetness is extreme, add a splash of vinegar or a small amount of soy sauce to shift the balance.
Broth Lacks Richness
Richness in pho comes from gelatin and fat extracted from bones. If your broth tastes thin and watery, the bones likely did not release enough collagen. This happens when you use too few bones, cook them for too short a time, or use bones that are too clean.
For a richer broth, use a mix of meaty bones and marrow bones. The marrow adds fat and depth, while the meaty bones contribute gelatin. Simmer for at least four hours, preferably six to eight. If you are short on time, a pressure cooker can extract the same richness in about an hour.
Another trick is to add a small amount of gelatin or a collagen-rich cut like oxtail. These ingredients dissolve into the broth and give it a silky, full-bodied mouthfeel. You can also reduce the broth by simmering it uncovered for an extra 30 minutes. This concentrates the flavors and thickens the liquid slightly.
Prevention Is the Best Fix
Most pho problems are avoidable with a few simple habits. Keep the simmer gentle, skim the foam, and taste the broth as you go. Cook the noodles separately and add them at the last minute. Slice the beef thin and against the grain. These small steps prevent the most common pitfalls and ensure a bowl that tastes clean, balanced, and deeply satisfying.
When something does go wrong, remember that pho is forgiving. A flat broth can be seasoned. A cloudy broth can be strained. Tough meat can be simmered longer. The dish is built on patience and adjustment, and even a flawed bowl can be rescued with a little attention and a few smart fixes.
How to Store and Reheat Pho
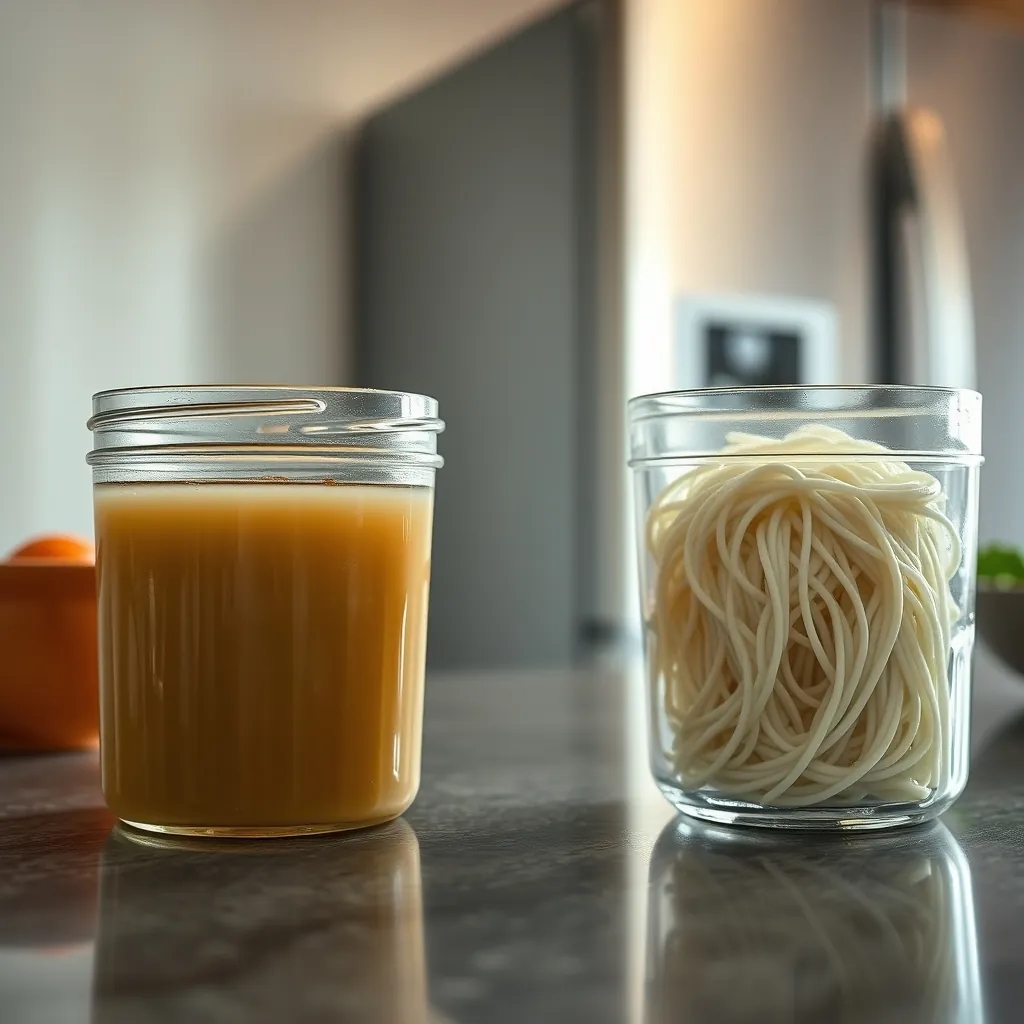
Pho stores surprisingly well, but only if you handle the components correctly. The broth, noodles, and toppings each have different shelf lives and reheating requirements. Storing them together guarantees a sad, mushy mess. Storing them separately means you can enjoy a second bowl that tastes nearly as good as the first.
Separate the Components First
The golden rule of pho storage is separation. Broth keeps for days. Noodles turn to paste within hours if left soaking. Meat and herbs have their own timelines. Before you put anything away, break the bowl down into its parts.
Strain the broth to remove the bones, aromatics, and any loose bits. Let it cool to room temperature before refrigerating. The noodles should be drained, rinsed under cold water to stop the cooking process, and tossed with a tiny bit of oil to prevent sticking. Slice the meat and store it separately. Herbs like Thai basil and cilantro should be wrapped in a damp paper towel and kept in the crisper drawer.
Refrigeration Guidelines
The broth is the most durable component. Stored in an airtight container, it will stay good for three to four days in the refrigerator. The fat will solidify on top, forming a white layer. This is normal and actually helpful. The fat cap protects the broth from air and keeps it fresher longer. You can scrape it off before reheating or stir it back in for extra richness.
Cooked rice noodles last two to three days in the fridge. They will firm up and clump together, but they rehydrate beautifully when reheated. Raw beef slices should be used within one to two days. Cooked meat from the broth will keep for three to four days. Bean sprouts and fresh herbs are best consumed within a day or two, as they lose their crunch and brightness quickly.
Freezing Pho for Later
Pho freezes exceptionally well, especially the broth. In fact, many cooks make a double batch just to freeze half for busy weeknights. The broth will keep for up to three months in the freezer without significant loss of flavor.
Use freezer-safe containers or heavy-duty zip-top bags. Leave about an inch of headspace in containers, as the liquid expands when frozen. For bags, lay them flat in the freezer. This saves space and speeds up thawing. Label each container with the date so you know how long it has been stored.
Do not freeze the noodles. Rice noodles become mushy and break apart after freezing and thawing. The texture is ruined beyond repair. If you want to freeze a complete meal, freeze the broth and meat together, then cook fresh noodles when you are ready to eat.
Reheating the Broth
The best way to reheat pho broth is on the stovetop. Pour the broth into a pot and warm it over medium heat until it is piping hot. You want it at a full rolling boil before you assemble the bowl. The broth needs to be hot enough to cook the raw beef slices and warm the noodles through.
If you are in a hurry, the microwave works in a pinch. Heat the broth in a microwave-safe bowl for two to three minutes, stirring halfway through. The flavor will be the same, though the broth may not reach the same temperature as stovetop reheating. Ensure it is bubbling before you pour it over the noodles.
Do not reheat the broth more than once. Each cycle degrades the flavor and texture. If you have a large batch, portion it into smaller containers before storing. This way, you only reheat what you plan to eat.
Reheating the Noodles
Noodles require a gentler touch. The fastest method is to dunk them in boiling water for 20 to 30 seconds. This rehydrates them and warms them through without overcooking. Drain them well before adding to the bowl.
You can also reheat noodles in the microwave with a splash of water. Cover the bowl with a damp paper towel and heat for 30 to 60 seconds. The steam will soften the noodles and bring back some of their original texture. Toss them with a little broth or water to keep them from drying out.
If the noodles are already soft and you are worried about mushiness, skip reheating them entirely. Add them cold to the bowl and pour the boiling broth over. The heat from the broth will warm them through without further cooking.
Assembling a Stored Bowl
Reheating the components is only half the battle. The assembly matters just as much. Start with the noodles at the bottom of the bowl. Add the cooked meat on top. If you are using raw beef slices, arrange them over the noodles so the hot broth can cook them. Pour the boiling broth over everything, then add the fresh toppings.
Bean sprouts, Thai basil, lime wedges, and sliced chili should always be added fresh. They lose their texture and brightness in storage. If you stored them, they will still work, but they will not have the same crunch or aroma. For the best experience, buy fresh herbs and sprouts when you are ready to eat the leftovers.
How Long Does Pho Last?
The answer depends on how you store it. Broth in the refrigerator lasts three to four days. In the freezer, it lasts up to three months. Noodles last two to three days in the fridge. Cooked meat lasts three to four days. Raw beef slices should be eaten within two days.
When in doubt, trust your senses. If the broth smells sour or develops an off odor, discard it. If the noodles have a slimy texture, throw them out. If the meat looks gray or feels sticky, it is past its prime. Pho is forgiving, but food safety should always come first.
Frequently Asked Questions
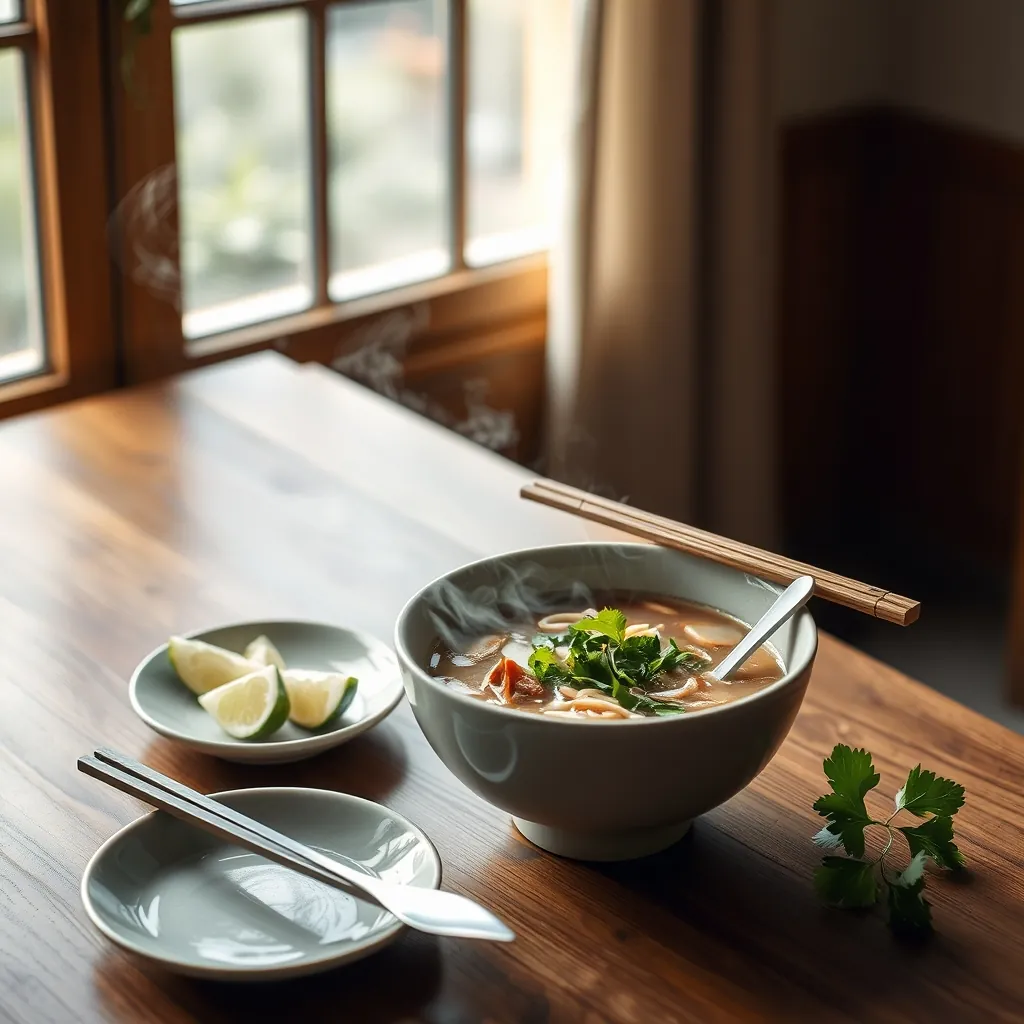
Can I use chicken instead of beef?
Absolutely. Chicken pho, known as pho ga, is a beloved variation throughout Vietnam. Swap the beef bones for a whole chicken or chicken carcasses. The cooking time drops significantly, usually to about 90 minutes instead of hours. Use the same aromatics: charred ginger, onions, star anise, and cinnamon. The broth will be lighter and more delicate than beef pho, but just as fragrant. You can also use a rotisserie chicken to save even more time. Shred the meat and add it to the bowl at the end.
How long do the noodles take to cook?
It depends on whether you are using fresh or dried rice noodles. Dried noodles, which are the most common in supermarkets, take about 8 to 10 minutes in boiling water. Fresh noodles, found in the refrigerated section of Asian markets, need only 30 to 60 seconds. The key is to cook them until they are tender but still have a slight chew. Overcooked rice noodles turn mushy and fall apart in the broth. Always cook them separately from the broth and rinse with cold water to stop the cooking process.
Can I make pho ahead of time?
Yes, and in many ways, pho tastes better the next day. The broth continues to develop flavor as it sits, allowing the spices to meld and deepen. Make the broth up to three days ahead and store it in the refrigerator. The fat will solidify on top, which you can skim off or stir back in. The noodles should be cooked fresh when you are ready to serve. The broth also freezes beautifully for up to three months. Just portion it into containers before freezing so you only thaw what you need.
What if I cannot find star anise or fish sauce?
Both ingredients are worth seeking out at an Asian grocery store or online. They are inexpensive and keep for months. If you are truly stuck, star anise can be replaced with Chinese five-spice powder, using about half a teaspoon for every two star anise pods. For fish sauce, soy sauce mixed with a pinch of sugar is the closest substitute, though it will not have the same depth. Worcestershire sauce also works in a pinch, but use it sparingly.
Why is my broth cloudy?
A cloudy broth usually means the bones were boiled too vigorously or the foam was not skimmed. The fix is simple. Start with cold water and bring it to a gentle simmer, not a rolling boil. Skim the foam and impurities from the surface during the first 30 minutes of cooking. If your broth is already cloudy, strain it through a fine-mesh sieve lined with cheesecloth. This will catch the tiny particles that cause cloudiness.
How do I make the broth richer without more bones?
If your broth tastes thin or flat, there are several quick fixes. Add a splash of fish sauce and a pinch of sugar to boost umami. Charring the ginger and onions more aggressively adds a deeper smoky note. Simmering the broth longer, even an extra 30 minutes, concentrates the flavors. Some cooks add a teaspoon of soy sauce for extra depth. Taste and adjust gradually. It is easier to add seasoning than to fix an overseasoned broth.
Can I make pho vegetarian?
Yes, with a few adjustments. Skip the bones entirely and build the broth with mushrooms, especially shiitake, which provide a meaty umami flavor. Add the same aromatics: charred ginger, onions, star anise, and cinnamon. Use vegetable stock as the base and simmer for 30 to 45 minutes. For extra richness, add a sheet of kombu seaweed or a splash of soy sauce. The toppings change too. Use tofu, mushrooms, or extra vegetables in place of the meat.
What is the best cut of beef for pho?
For the broth, use marrow bones and knuckle bones. They are rich in collagen, which gives the broth body and a silky mouthfeel. For the raw beef slices that cook in the hot broth, use a tender cut like sirloin, ribeye, or filet mignon. Freeze the beef for 30 minutes before slicing. This firms it up and makes it much easier to cut into thin, even slices. Always slice against the grain for maximum tenderness.
Do I have to char the ginger and onions?
You can skip this step, but you will lose a significant layer of flavor. Charring the ginger and onions over an open flame or under a broiler caramelizes their natural sugars and adds a subtle smokiness that defines authentic pho. If you are short on time, you can roast them in a dry skillet over high heat for a few minutes per side. The charred bits are what give the broth its signature depth.
How do I know when the broth is done?
The broth is ready when it tastes rich, aromatic, and slightly sweet with a savory backbone. The color should be deep amber, not pale or watery. The aroma should hit you with star anise and cinnamon before you even take a sip. If the broth tastes flat, it needs more time or more seasoning. Trust your palate. The best pho broth is one that tastes balanced and leaves you wanting another spoonful.
Conclusion
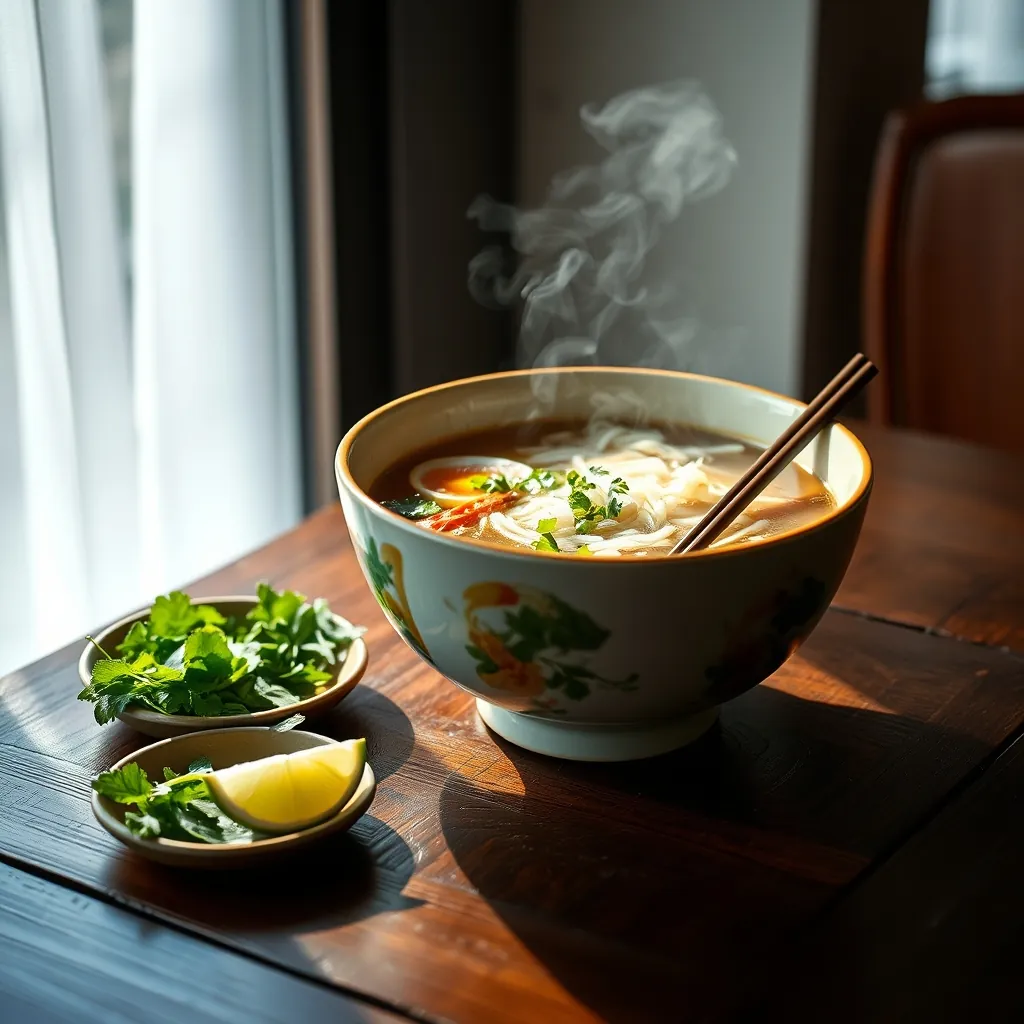
Homemade pho is not as intimidating as it sounds. The process comes down to a few core steps: build a fragrant broth, cook the noodles properly, and pile on fresh toppings. Once you understand those fundamentals, you can adapt the recipe to your taste, your schedule, and whatever is in your pantry.
The beauty of this dish is its flexibility. A traditional version asks for hours of simmering, but you have now seen how a pressure cooker, a rotisserie chicken, or a quality store-bought stock can deliver a satisfying bowl in under an hour. You also know how to adjust for dietary needs, substitute missing ingredients, and fix a broth that falls short of expectations.
Start with the simple version. Master the broth and the assembly. Then experiment. Char the ginger a little longer, add an extra star anise pod, or swap the beef for mushrooms and tofu. Each batch teaches you something new about balancing sweet, salty, sour, and savory.
The reward is a warm, aromatic bowl that rivals your local Vietnamese restaurant. The smell of cinnamon and star anise filling your kitchen is its own kind of satisfaction. And when you sit down to that first spoonful, you will know exactly why pho has earned its place as one of the world’s most beloved comfort foods.
Try the recipe this week. Adjust it to your liking. Then come back and share what worked for you, what you changed, and how your version turned out. Your perfect bowl of pho is waiting to be discovered.
Simple Pho Recipe: Easy Step-by-Step Guide
Learn how to make simple pho at home with this easy step-by-step guide. Discover tips for a rich broth, perfect noodles, and tasty toppings.
Ingredients
- 8 cups low-sodium beef or chicken stock
- 1 pound thinly sliced beef (sirloin, ribeye, or flank steak)
- 8 ounces dried rice noodles (bánh phở)
- 1 large onion, halved
- 2 inches fresh ginger, sliced
- 3-4 whole star anise pods
- 1 cinnamon stick
- 3 whole cloves
- 2-3 tablespoons fish sauce
- 1 teaspoon sugar (optional)
- For serving: bean sprouts, Thai basil, lime wedges, sliced chili, hoisin sauce, sriracha, cilantro, green onions
Instructions
- Char the ginger and onion under a broiler or in a dry skillet until blackened in spots, about 5-7 minutes. Rinse the onion and remove burnt layers.
- Toast star anise, cinnamon, and cloves in a dry pan for 1-2 minutes until fragrant. Tie in a spice bag or cheesecloth.
- Bring stock to a gentle boil in a large pot. Add charred ginger, spice bag, and fish sauce. Reduce heat and simmer uncovered for 30 minutes.
- Meanwhile, cook rice noodles according to package directions. Drain, rinse with cold water, and toss with a little oil to prevent sticking.
- Partially freeze the beef for 15-20 minutes, then slice paper-thin against the grain.
- After simmering, remove spice bag and ginger. Taste broth and adjust seasoning with more fish sauce or sugar as needed.
- Divide noodles among bowls. Top with raw beef slices. Ladle boiling hot broth over the beef and noodles to cook the meat.
- Serve immediately with bean sprouts, Thai basil, lime wedges, chili, hoisin sauce, and sriracha on the side.
Leave a Reply