Your cart is currently empty!
Classic Beef Wellington Recipe: The Ultimate Guide
Introduction: Why This Classic Beef Wellington Recipe is Worth the Effort
Beef Wellington commands respect. This centerpiece dish, with its golden puff pastry encasing a perfectly cooked beef fillet and earthy mushroom duxelles, is the ultimate test of kitchen skill. It is the meal you serve when you want to impress without a word.
Many home cooks avoid it. They fear a soggy pastry, an overcooked steak, or a structural collapse when slicing. Those fears are valid. But they are also solvable. This guide strips away the mystery and delivers a foolproof method for a showstopping Beef Wellington every time.
You will learn the precise internal temperature for a medium-rare center, the secret to a bone-dry duxelles that protects the pastry, and the simple assembly tricks that prevent a soggy bottom. We cover the common pitfalls most recipes ignore, from handling a cracked pastry to adjusting your oven for perfect browning. This is not just a recipe. It is a masterclass in technique.
The effort is real. The reward is a dish that looks like it belongs in a Michelin-starred kitchen. Let us build it together, one controlled step at a time.
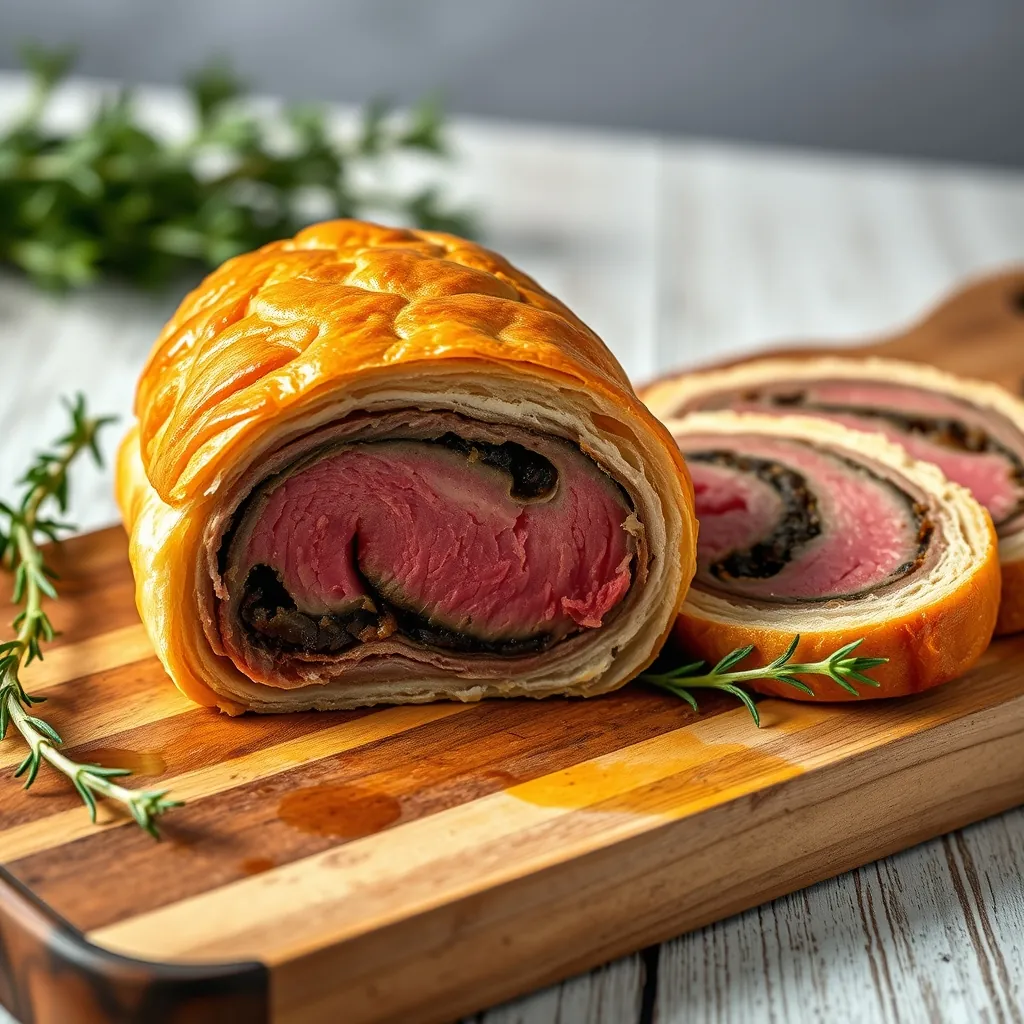
The Anatomy of a Perfect Beef Wellington
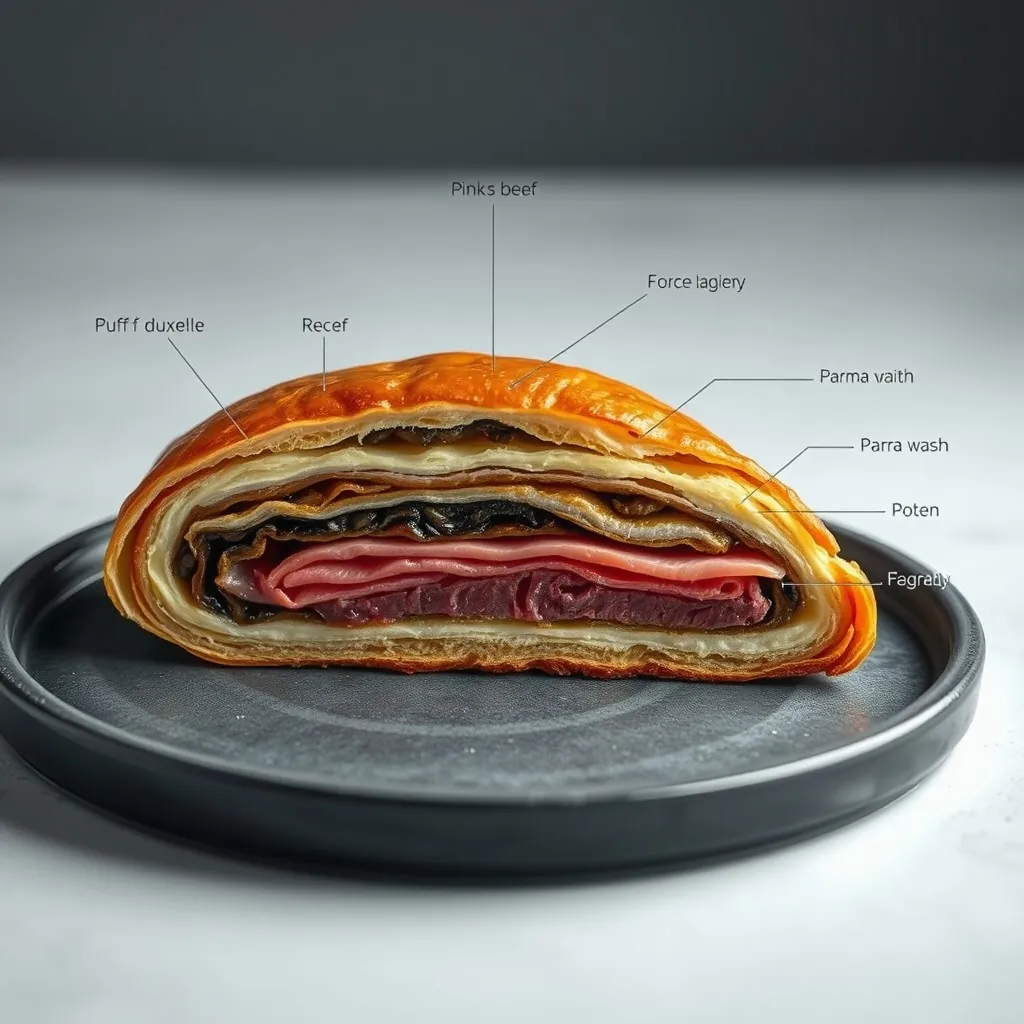
Understanding the structure of a Beef Wellington is the first step to mastering it. Each layer serves a specific purpose, working together to create a dish that is both visually stunning and texturally complex. A failure in any one layer compromises the whole.
The Beef Tenderloin: The Heart of the Dish
The centerpiece is a high-quality beef fillet, ideally a center-cut tenderloin weighing 1 to 1.5 kilograms (2 to 3 pounds) for a 4 to 6 person serving. This cut is prized for its tenderness and even shape. A consistent thickness ensures uniform cooking. The beef must be seared to a deep brown crust on all sides, locking in juices and building the foundational flavor. The internal target after resting is 125°F (52°C) for a perfect medium-rare.
The Mushroom Duxelles: The Flavor Anchor
Finely chopped mushrooms, typically a mix of cremini and shiitake, are cooked down with shallots, garlic, and thyme until they form a dry, concentrated paste. This duxelles is not just a flavor layer. It is a moisture barrier. If the duxelles retains any water, it will steam the pastry from the inside, creating a soggy mess. Cooking it until it is completely dry, almost like a coarse pâté, is non-negotiable.
The Parma Ham: The Moisture Shield
A thin layer of Parma ham or prosciutto wraps around the duxelles-coated beef. This salty, cured meat serves two critical functions. First, it provides a secondary barrier against moisture migrating from the beef into the pastry. Second, it adds a savory, umami punch that complements the mushrooms and beef. The ham must be laid in overlapping sheets to create a continuous, leak-proof seal.
The Puff Pastry: The Golden Casing
The final layer is a sheet of high-quality all-butter puff pastry. This is the structural envelope. It must be rolled thin enough to cook through but thick enough to hold its shape. The pastry is brushed with egg wash for a glossy, golden finish. A properly baked pastry is crisp, flaky, and shatters with a gentle tap of a knife. A preheated baking sheet placed under the Wellington as it bakes helps ensure the bottom crust stays crisp, avoiding the dreaded soggy base.
Key Ingredients for Success
Every component in a Beef Wellington must earn its place. There is no room for shortcuts or substitutes that compromise texture or flavor. The following ingredients form the backbone of a flawless result.
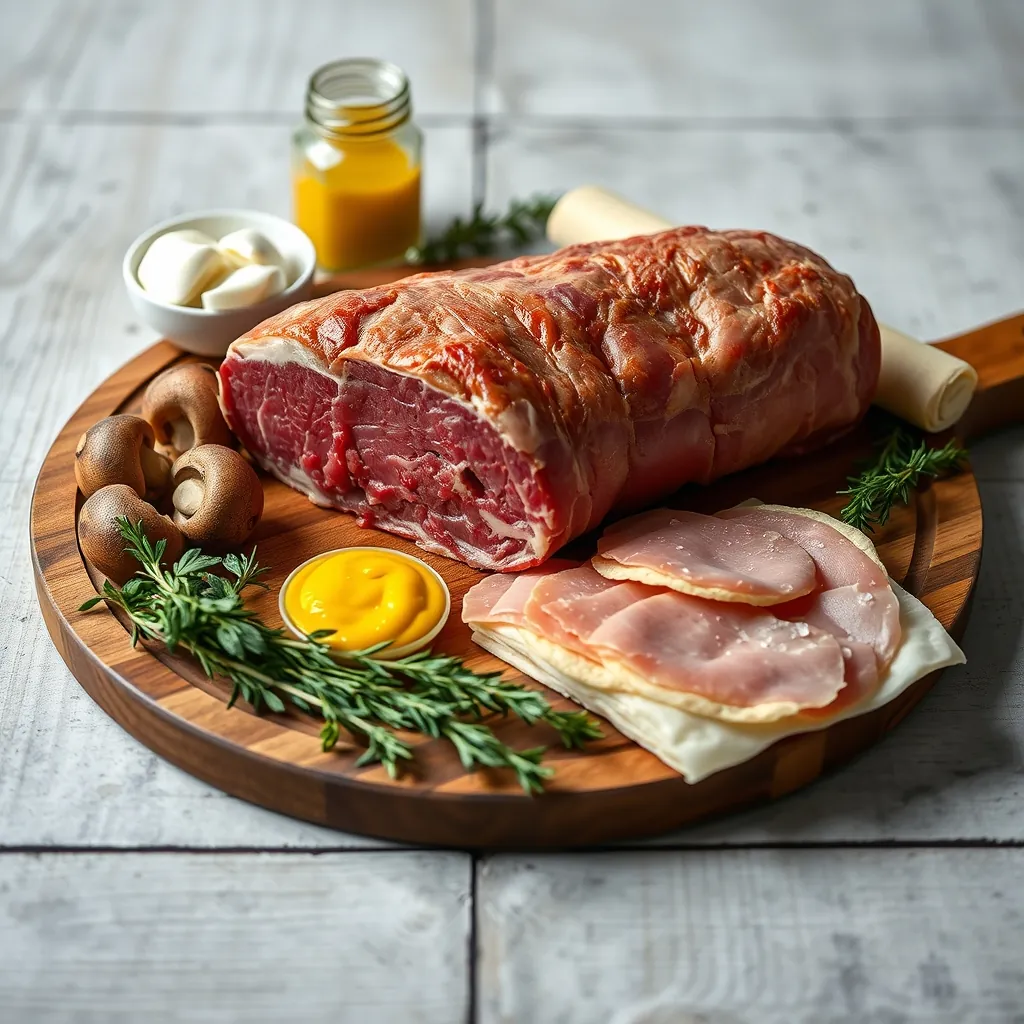
Beef Tenderloin: The Center Cut
Choose a center-cut beef tenderloin weighing 1 to 1.5 kilograms (2 to 3 pounds). This ensures a uniform thickness for even cooking. Look for deep red color and fine marbling. Trim away any silverskin or excess fat. A well-trimmed fillet prevents the pastry from becoming greasy. For a smaller gathering, a 500-gram fillet works, but reduce cooking time accordingly.
Mushrooms: Cremini and Shiitake Mix
Use a combination of cremini and shiitake mushrooms for depth of flavor. Cremini provide earthy richness. Shiitake add a smoky, umami punch. You need about 500 grams (1 pound) total. Finely chop them by hand or pulse in a food processor until they resemble coarse sand. Avoid over-processing into a paste. The duxelles must be cooked until all moisture evaporates, concentrating the flavor into a dense, spreadable paste.
Parma Ham: The Moisture Barrier
Thinly sliced Parma ham or prosciutto creates a waterproof seal around the duxelles. Use 8 to 10 slices, overlapping them slightly on a sheet of plastic wrap. The salt content also seasons the beef from the outside. For a vegetarian version, substitute with a thin layer of roasted eggplant slices or a plant-based ham alternative. Both options provide a similar barrier and savory profile.
Puff Pastry: All-Butter Only
All-butter puff pastry produces the flakiest, most golden crust. Avoid margarine-based varieties; they lack flavor and crispness. You need one 400-gram (14-ounce) sheet, rolled to about 3 millimeters (1/8 inch) thick. If using store-bought, thaw it in the refrigerator overnight. Do not microwave to speed thawing, as this creates uneven layers.
Dijon Mustard: The Flavor Bridge
Dijon mustard is brushed directly onto the seared beef. It adds a sharp, tangy note that cuts through the richness of the beef and duxelles. It also helps the duxelles adhere to the meat. Use a generous tablespoon, spreading it evenly. English mustard or whole-grain mustard are acceptable substitutes, each offering a different heat profile.
Egg Wash: The Golden Finish
One egg beaten with a tablespoon of milk or water creates the glossy, golden crust. Apply it evenly with a pastry brush, covering all exposed pastry. Avoid pooling in the folds, which can create a tough, leathery texture. For extra shine, apply a second coat after the first dries slightly.
Step 1: Preparing and Searing the Beef
This step sets the foundation for the entire dish. Proper preparation and searing lock in flavor and create the ideal internal temperature gradient. Rushing this stage leads to uneven cooking and a less impressive final result.
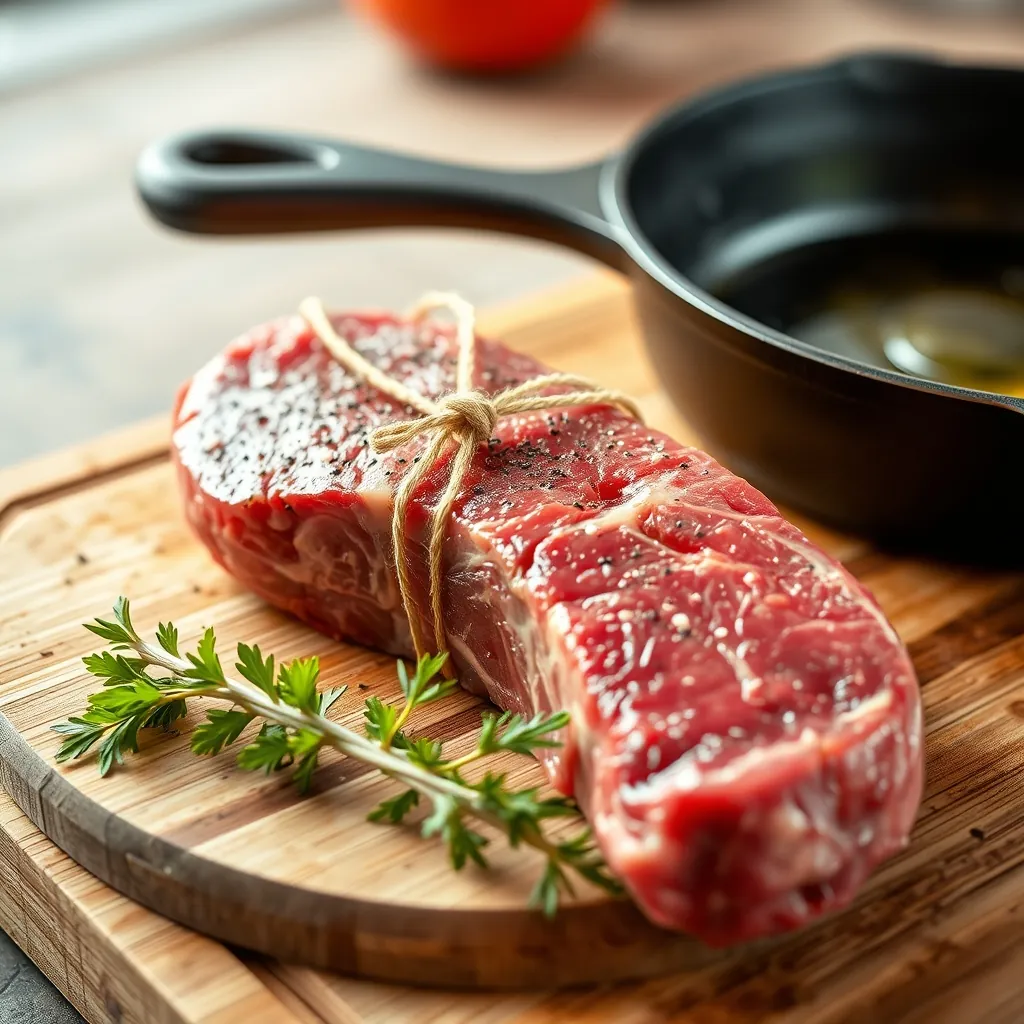
Trimming and Tying the Tenderloin
Start with your center-cut beef tenderloin. Remove any silverskin—the tough, silvery membrane on the surface. Use a sharp boning knife, sliding the blade just under the membrane and cutting away from the meat. Trim excess fat, leaving a thin layer for moisture. Pat the meat dry with paper towels. This step is non-negotiable; moisture prevents browning.
Tie the tenderloin with kitchen twine at 2-inch intervals. This creates a uniform cylindrical shape. Even thickness ensures the center cooks at the same rate as the ends. Without tying, the tapered tail cooks faster than the thick center.
Seasoning and Searing
Season the tied tenderloin generously with kosher salt and freshly ground black pepper. Salt draws out moisture, so season just before searing. Heat a heavy-bottomed skillet or cast iron pan over high heat. Add a tablespoon of high-smoke-point oil—canola, avocado, or grapeseed work well.
When the oil shimmers and a wisp of smoke appears, place the tenderloin in the pan. Sear for 2 to 3 minutes per side, turning with tongs. Aim for a deep brown crust on all four sides and the ends. Do not crowd the pan; the meat needs direct contact with the hot surface. If the pan smokes excessively, reduce heat slightly.
Resting After Searing
Transfer the seared tenderloin to a plate or wire rack. Let it rest for 10 to 15 minutes. This step is critical. Resting allows the juices to redistribute from the surface back into the center. It also cools the exterior slightly, preventing the duxelles and pastry from overcooking during assembly and baking.
During resting, the internal temperature will rise by 5 to 10 degrees Fahrenheit (3 to 5 degrees Celsius). For a perfectly medium-rare result, remove the beef from the pan when the internal temperature reads 115°F (46°C). After resting, it will climb to 125°F (52°C). Use an instant-read thermometer inserted into the thickest part of the fillet to monitor progress.
Brushing with Mustard
Once rested, remove the twine. Brush the entire surface of the beef with a generous layer of Dijon mustard. The mustard adds acidity and depth. It also creates a tacky surface that helps the mushroom duxelles stick to the meat. Let the mustard-coated beef sit for 2 minutes before moving to the next step.
Step 2: Making the Mushroom Duxelles
Mushroom duxelles is the savory paste that sits between the beef and the pastry. Its purpose is twofold: it adds deep umami flavor, and it creates a moisture barrier that protects the puff pastry from the meat’s juices. Getting the duxelles right is the single most important factor in avoiding a soggy Wellington.
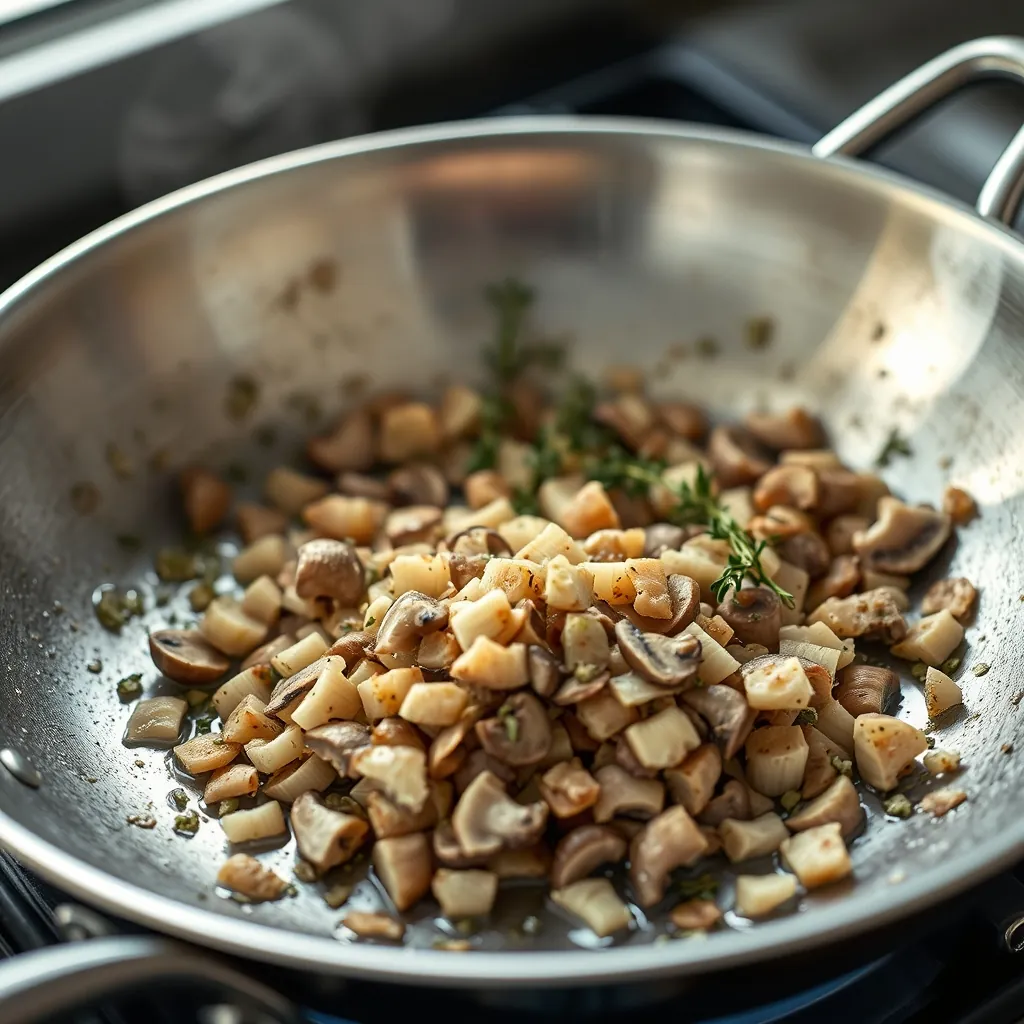
Choosing and Preparing the Mushrooms
Use cremini or white button mushrooms for the best balance of flavor and moisture content. Avoid portobello caps, which contain too much water and produce a bitter taste when reduced. For a 2-pound (1 kg) beef fillet, you need 1 pound (450 grams) of mushrooms.
Wipe the mushrooms clean with a damp paper towel. Do not rinse them under running water. Mushrooms act like sponges. Washing them introduces excess moisture that extends cooking time and dilutes flavor. Trim the woody stem ends, then roughly chop the caps and stems into 1-inch pieces.
Finely Chopping for Consistency
A food processor is your best tool for achieving the right texture. Pulse the mushroom pieces in batches until they resemble coarse sand. Do not over-process. A paste-like consistency makes the duxelles dense and difficult to spread. You want small, uniform pieces that release their moisture evenly during cooking.
If you do not have a food processor, hand-chop the mushrooms with a sharp chef’s knife. Work in a rocking motion, keeping the tip of the blade on the cutting board. Chop until no piece is larger than a grain of rice. This takes 5 to 7 minutes of steady work.
Cooking Out the Moisture
Heat a large, wide skillet over medium-high heat. Add 2 tablespoons of unsalted butter and 1 tablespoon of olive oil. The oil prevents the butter from burning. When the butter foams, add 2 finely chopped shallots and 2 minced garlic cloves. Cook for 2 minutes until the shallots soften.
Add the chopped mushrooms to the pan. Spread them into an even layer. Do not stir for the first 2 minutes. Let the mushrooms sit and release their moisture. After 2 minutes, stir and spread again. The mushrooms will release a significant amount of liquid. This is normal and expected.
Continue cooking, stirring every 2 to 3 minutes, until the liquid evaporates completely. This takes 10 to 15 minutes. You will see the texture change from wet and soupy to dry and paste-like. The mushrooms will start to stick to the pan and brown slightly.
Seasoning and Finishing
Once the moisture is gone, add 1 teaspoon of fresh thyme leaves, 1 tablespoon of finely chopped fresh parsley, and salt and pepper to taste. Stir for 1 minute to incorporate the herbs. Taste and adjust seasoning. The duxelles should be intensely savory, with a concentrated mushroom flavor.
Remove the pan from the heat. Spread the duxelles onto a plate or baking sheet to cool completely. Do not skip this step. Warm duxelles will melt the butter in the puff pastry and create steam pockets during baking. Cool duxelles ensures a crisp, flaky crust.
You can prepare the duxelles up to 3 days in advance. Store it in an airtight container in the refrigerator. Bring it to room temperature before assembling the Wellington. Cold duxelles straight from the fridge will not spread evenly over the beef.
Step 3: Assembling the Layers (Mustard, Duxelles, Parma Ham)
Proper assembly transforms individual components into a cohesive whole. Each layer serves a specific purpose. The mustard adds acidity and helps the duxelles stick. The duxelles provides flavor and absorbs moisture. The Parma ham creates a waterproof barrier that keeps the pastry crisp.
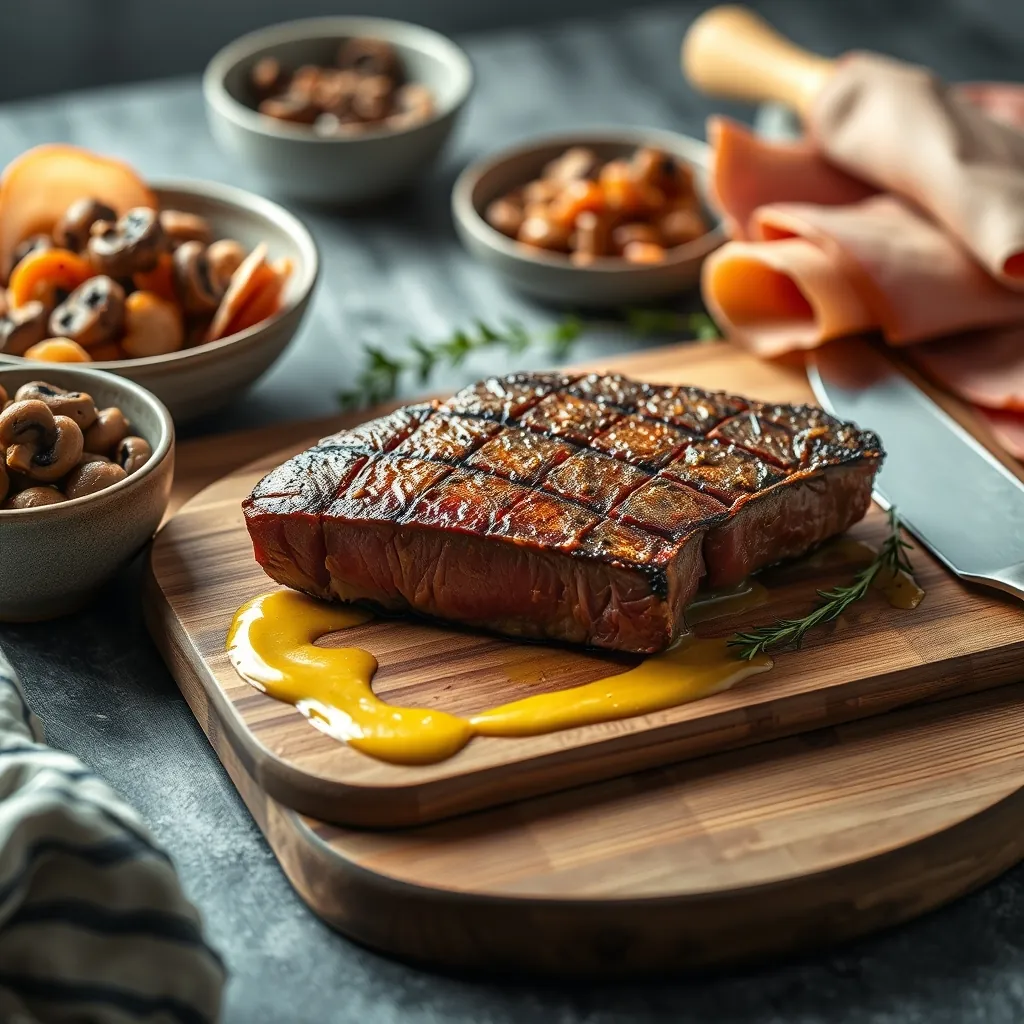
Brushing with Mustard
Start with the seared and cooled beef fillet. Pat it dry with paper towels to remove any surface moisture. Use a pastry brush to coat the entire surface of the beef with a thin layer of Dijon mustard. Do not use whole-grain mustard. The seeds create an uneven surface that prevents the duxelles from adhering properly.
English mustard works as an alternative. It provides a sharper, more pungent flavor that cuts through the richness of the beef and pastry. Apply the mustard evenly, covering all sides and ends. Let the mustard sit for 2 minutes. This allows the acidity to penetrate the surface of the meat and enhance the beef’s natural flavor.
Spreading the Duxelles
Place the mustard-coated beef on a sheet of plastic wrap. Use a small offset spatula or the back of a spoon to spread the cooled duxelles over the entire surface of the beef. Apply a layer that is 1/8 to 1/4 inch thick. Do not pile the duxelles in one spot. Even coverage ensures consistent flavor and moisture control.
Work from the center outward. Cover the top, sides, and ends of the fillet. The duxelles should form a uniform coating that sticks to the mustard layer. If the duxelles slides off, the beef is too wet. Pat it dry and start again. A stable duxelles layer prevents gaps that allow moisture to reach the pastry.
Wrapping in Parma Ham
Lay a large piece of plastic wrap on your work surface. Arrange 6 to 8 slices of Parma ham or prosciutto in a rectangle. Overlap each slice by about 1 inch. The rectangle should be wide enough to wrap around the beef with a 2-inch overhang on each side. The overhang ensures complete coverage.
Place the duxelles-coated beef at the bottom edge of the ham rectangle. Use the plastic wrap to lift the ham over the beef. Roll the beef forward, wrapping the ham tightly around it. Tuck the ends of the ham under the beef as you roll. The goal is a smooth, tight cylinder with no exposed beef or duxelles.
Twist the ends of the plastic wrap to seal the Wellington. Refrigerate the wrapped beef for 15 minutes. This firms up the ham and duxelles, making the next step easier. A chilled Wellington holds its shape when you roll it in puff pastry. Skipping this step leads to misshapen layers and uneven baking.
Step 4: Wrapping in Puff Pastry
The final layer before baking requires precision and patience. Puff pastry acts as the insulating shell that traps steam and creates those coveted flaky layers. A sloppy wrap leads to uneven cooking and a dense, doughy crust. Take your time with this step.
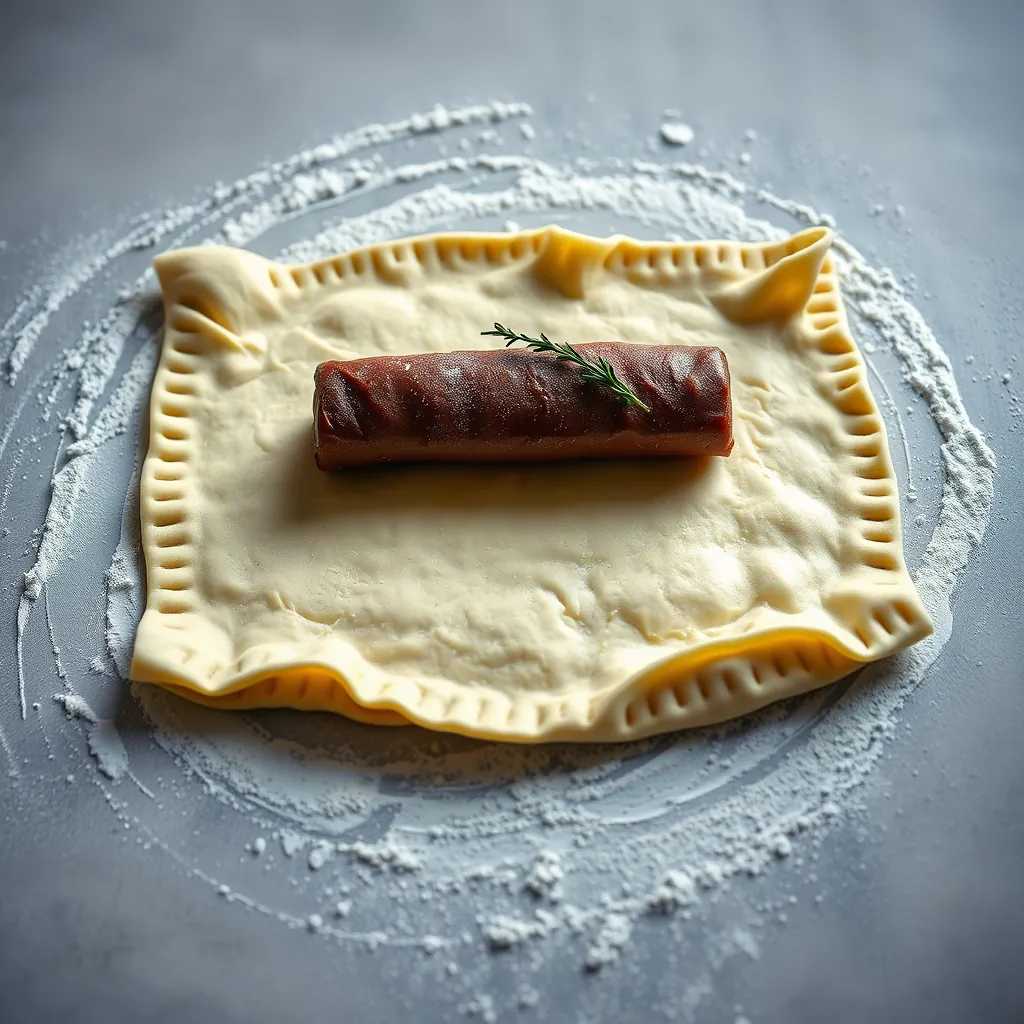
Rolling the Pastry to the Right Size
Start with a high-quality all-butter puff pastry sheet. Thaw it in the refrigerator overnight if frozen. Never use room-temperature puff pastry. Cold pastry handles better and bakes with more defined layers.
Lightly flour your work surface and rolling pin. Roll the pastry into a rectangle that is at least 12 inches wide and 16 inches long. The exact dimensions depend on your beef fillet. The pastry must be large enough to wrap the beef completely with a 2-inch overlap on all sides. Measure the chilled Wellington log and add 4 inches to both length and width.
Roll evenly from the center outward. Rotate the pastry 90 degrees every few rolls to maintain a uniform thickness of 1/8 inch. Uneven thickness causes thin spots that tear during baking and thick spots that remain doughy. Check the thickness by lifting the pastry. You should see light through it without the pastry tearing.
Folding Like a Parcel
Remove the chilled Wellington log from the refrigerator. Unwrap the plastic wrap carefully. The ham and duxelles should be firm and hold their shape. Place the log in the center of the rolled pastry, seam side down. The seam from the ham wrap should face the pastry.
Brush the exposed pastry edges with egg wash. Use a pastry brush to apply a thin, even coat along all four edges. The egg wash acts as glue that seals the pastry layers together. Without it, the pastry opens during baking and exposes the filling.
Fold the top flap of pastry over the beef. Press gently to adhere. Fold the bottom flap up and over the top flap. Press to seal. Fold the side flaps inward like wrapping a gift. Tuck the corners neatly to create a smooth, tight package. The goal is a clean rectangle with no air pockets or loose pastry.
Press the seams firmly with your fingers. Use the back of a fork to crimp the edges for a decorative seal. This also reinforces the bond between pastry layers. Trim any excess pastry with a sharp knife, leaving a 1/2-inch border for the crimp.
Chilling to Prevent Shrinkage
Place the wrapped Wellington on a parchment-lined baking sheet. Refrigerate uncovered for at least 30 minutes. This step is non-negotiable. Chilling firms the butter in the puff pastry. Cold pastry holds its shape during the initial oven heat. Warm pastry melts before it sets, causing the pastry to shrink and pull away from the filling.
For best results, chill the assembled Wellington for 2 to 4 hours. Overnight chilling works well. The pastry becomes fully set and the flavors meld. If you chill overnight, cover the Wellington loosely with plastic wrap after 1 hour to prevent the surface from drying out.
A properly chilled Wellington feels firm to the touch. The pastry does not feel soft or sticky. Press the surface gently. It should spring back without leaving an indentation. This indicates the butter is solid and ready for baking. Skipping this step leads to a Wellington that spreads out on the baking sheet and bakes into a misshapen, uneven mess.
Step 5: Egg Wash, Scoring, and Baking
This final step transforms a wrapped pastry log into a golden, show-stopping centerpiece. Egg wash provides the glossy sheen. Scoring creates an elegant pattern. Baking converts raw dough into crisp, flaky layers. Each action requires precision. Rushing any of them compromises the final result.
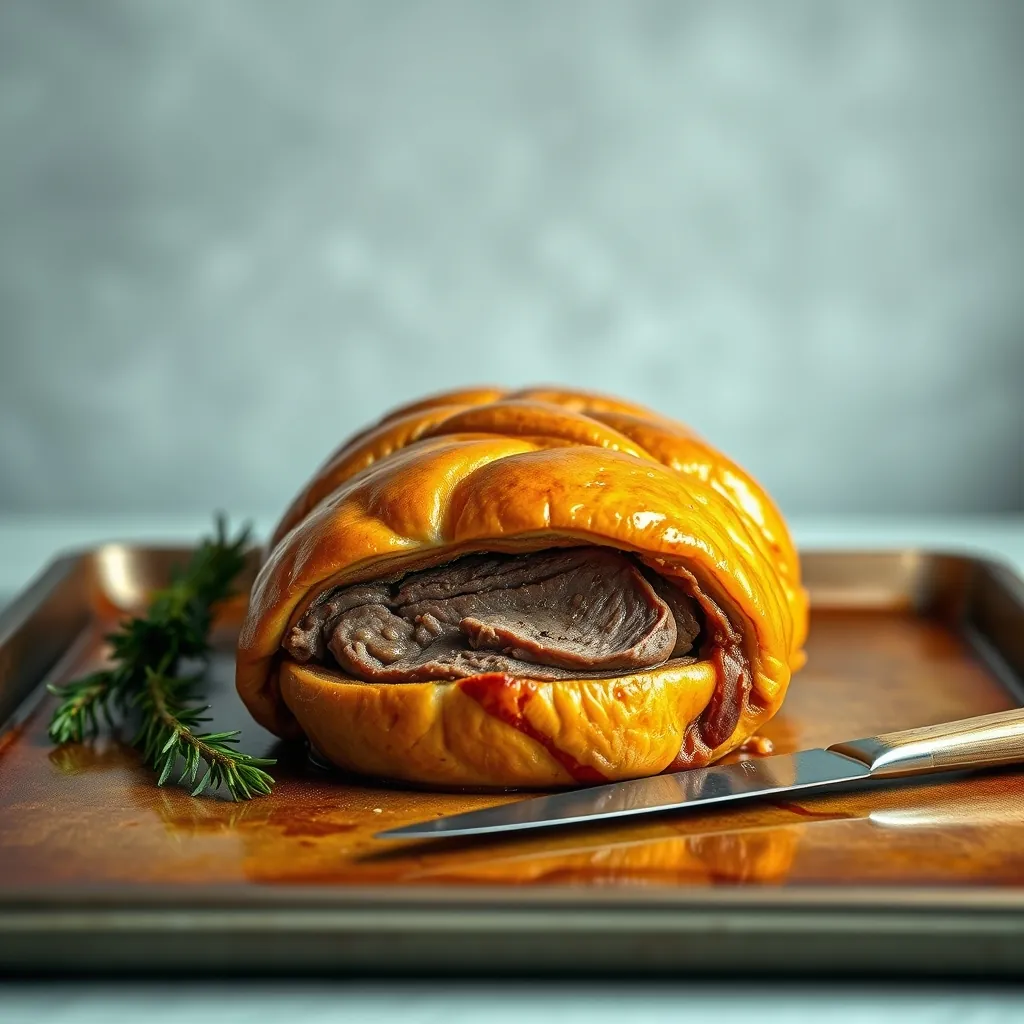
Applying the Egg Wash
Prepare the egg wash by whisking one large egg with one tablespoon of whole milk or water. The milk adds deeper browning due to its lactose content. Water creates a slightly less glossy but still acceptable finish. A pinch of salt helps break down the egg proteins for a smoother application.
Remove the chilled Wellington from the refrigerator. Use a pastry brush to apply a thin, even coat of egg wash over the entire surface. Cover the top, sides, and ends. Do not let the egg wash pool in crevices or drip onto the baking sheet. Pooled egg wash burns in the oven and creates dark, bitter spots on the pastry.
Apply the first coat and let it dry for 2 minutes. Apply a second coat for maximum gloss. The double-coat technique produces a mirror-like sheen that photographs beautifully. Avoid brushing the cut edges of the pastry. The exposed layers should remain dry to allow proper puffing during baking.
Scoring the Pastry
Scoring serves both decorative and functional purposes. Decorative scores create a professional appearance. Functional scores allow steam to escape during baking, preventing the pastry from bursting open. Use a sharp knife or a clean razor blade. Dull blades drag through the pastry and ruin the clean lines.
Hold the blade at a 45-degree angle. Cut shallow lines across the top of the pastry, spaced 1 inch apart. Cut only through the first layer of pastry. Do not cut deep enough to reach the ham or duxelles. Deep cuts expose the filling to direct heat, causing it to dry out or burn.
Common scoring patterns include diagonal lines, crosshatch diamonds, or simple straight lines. A classic herringbone pattern involves making parallel diagonal cuts in one direction, then rotating the Wellington and making cuts in the opposite direction. The result resembles a fish skeleton. This pattern looks impressive but requires steady hands and a clear vision before cutting.
After scoring, brush a thin third coat of egg wash over the scores. This ensures the cut edges also brown evenly. Place the Wellington back in the refrigerator for 10 minutes. This final chill sets the egg wash and prevents the pastry from sliding during the first moments of baking.
Baking Temperature and Time
Preheat your oven to 400°F (200°C) with a rack positioned in the center. Place a heavy baking sheet or a pizza stone on the rack while preheating. A preheated baking sheet delivers immediate heat to the bottom of the Wellington. This prevents the dreaded soggy bottom by crisping the pastry base from the moment the Wellington hits the oven.
Transfer the chilled Wellington onto the preheated baking sheet. Bake for 35 to 45 minutes for a 2-pound fillet. The exact time depends on the thickness of your beef and the accuracy of your oven. Start checking the internal temperature at the 30-minute mark using an instant-read thermometer inserted through the end of the pastry into the center of the beef.
For medium-rare, remove the Wellington when the internal temperature reaches 120°F (49°C). The temperature will rise another 5 to 8 degrees during resting, bringing it to a perfect 125°F to 128°F (52°C to 53°C). For medium, pull at 130°F (54°C) for a final temperature of 135°F (57°C). Rare eaters should pull at 115°F (46°C).
Adjustments for Fan-Assisted Ovens
Fan-assisted ovens circulate hot air more efficiently than conventional ovens. This means food cooks faster and browns more aggressively. Reduce the baking temperature by 25°F (15°C) to 375°F (190°C) for fan-assisted models. Start checking the internal temperature 5 to 10 minutes earlier than the recipe states. The pastry may brown deeply before the beef reaches the target temperature. If the pastry looks golden brown but the beef is still undercooked, tent the Wellington loosely with aluminum foil and continue baking until the beef reaches the desired temperature.
Checking Doneness Without a Thermometer
An instant-read thermometer is the only reliable method for perfect doneness. However, if you lack one, use the touch test. Press the center of the Wellington through the pastry. A medium-rare Wellington feels springy with slight resistance, similar to the fleshy part of your palm when you touch your thumb to your pinky finger. A rare Wellington feels soft and squishy. A well-done Wellington feels firm and hard.
This method is less precise than a thermometer. Experienced cooks develop a feel for it over time. For a first attempt, invest in a reliable instant-read thermometer. The cost is minimal compared to the price of a ruined beef fillet.
Step 6: Resting and Slicing Without Smashing the Pastry
The oven door opens. A golden, fragrant Wellington emerges. The temptation to slice immediately is strong. Resist it. Resting is not optional. It is the difference between a juicy, intact masterpiece and a soggy, bleeding disaster. Ten to fifteen minutes of patience saves hours of work.
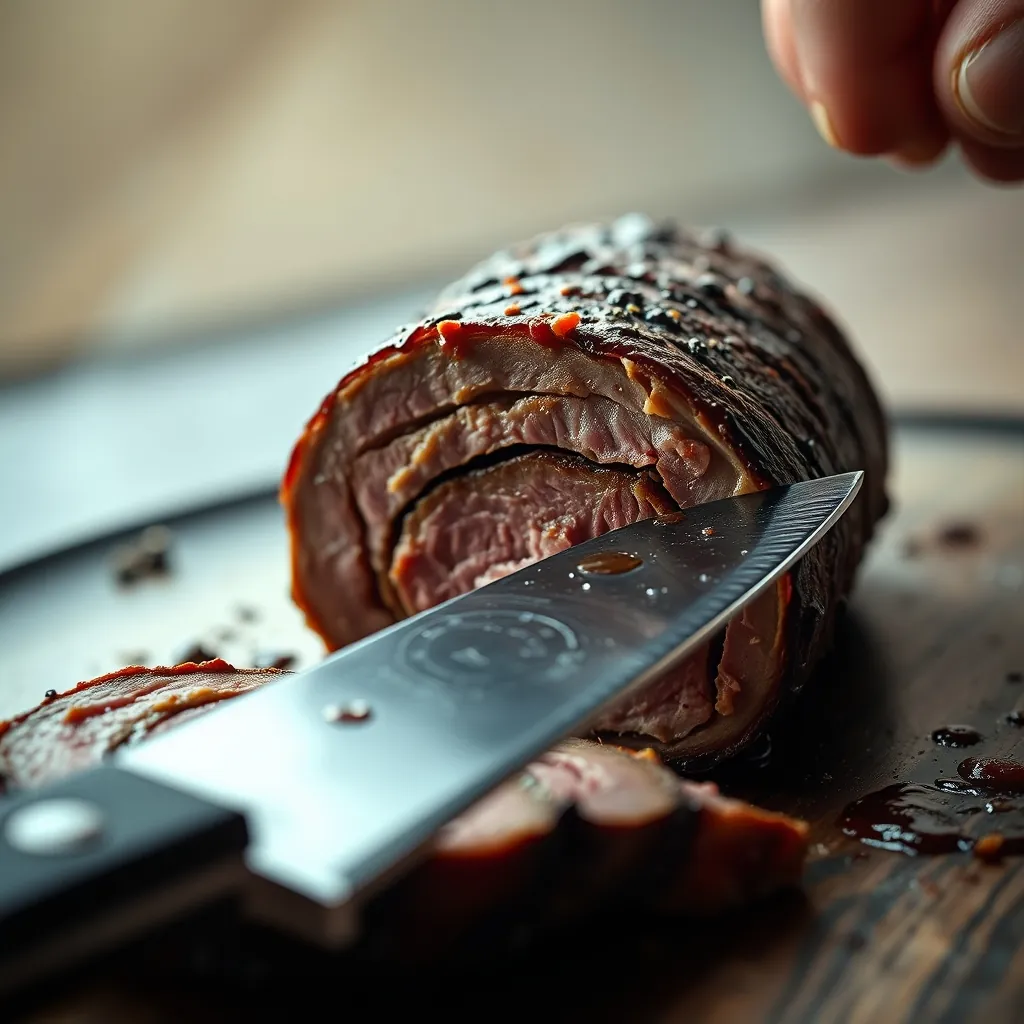
Why Resting Matters
Heat forces moisture toward the center of the beef. Cutting immediately releases those juices onto the cutting board. The result is dry meat and a wet pastry base. Resting allows the muscle fibers to relax and reabsorb the juices. The internal temperature continues to rise by 5 to 8 degrees Fahrenheit, finishing the cooking process gently.
Resting also stabilizes the pastry structure. The steam inside the puff pastry needs time to settle. Cutting too early releases steam that collapses the flaky layers. The pastry becomes flat and chewy rather than crisp and airy. A proper rest ensures each bite delivers a distinct crunch followed by tender beef.
The Ideal Resting Setup
Transfer the Wellington from the baking sheet to a wire rack set over a clean baking sheet. The wire rack allows air to circulate underneath the pastry. This prevents condensation from forming on the bottom. A soggy bottom cannot be fixed after baking. The wire rack is your insurance policy against this common failure.
Cover the Wellington loosely with a sheet of aluminum foil. Do not wrap it tightly. Tight wrapping traps steam and softens the pastry. A loose tent keeps the surface warm without creating moisture. Let it rest for a full 15 minutes. Set a timer. Do not rush this step.
Choosing the Right Knife
A serrated knife is the only tool for slicing Beef Wellington. A chef’s knife or carving knife crushes the delicate pastry layers. The serrations grip the crust and cut through without compression. The blade should be at least 10 inches long to slice through the entire width of the Wellington in one smooth pass.
Test the sharpness of your knife on a tomato. If it squishes the tomato rather than slicing cleanly, sharpen the knife before touching the Wellington. A dull serrated knife tears the pastry and creates ragged edges. Invest in a quality bread knife or a dedicated slicing knife with serrated teeth.
The Slicing Technique
Place the rested Wellington on a clean cutting board. Position the board on a damp kitchen towel to prevent slipping. Hold the knife at a 90-degree angle to the Wellington. Use a gentle sawing motion. Do not press down hard. Let the serrations do the work. Pressing down compresses the pastry and pushes the filling outward.
Slice the first piece from the end. This piece is often uneven and serves as a test slice. Examine the cross-section. Check the doneness of the beef. Assess the layering of the ham and duxelles. Adjust your slicing angle if the layers look compressed. The first slice reveals any issues before you serve the main portions.
For the remaining slices, aim for 1.5-inch thick portions. Thicker slices hold their shape better. Thinner slices collapse under their own weight. Use a single smooth sawing motion for each cut. Do not rock the knife back and forth. Rocking motion creates uneven surfaces and tears the pastry.
Wiping the Blade Between Cuts
Each slice leaves residue on the blade. Mushroom duxelles, ham fat, and beef juices accumulate quickly. A dirty blade drags through the next slice, smearing the pastry and creating a messy presentation. Keep a damp paper towel or a clean kitchen cloth next to the cutting board. Wipe the blade clean after every single cut.
This habit takes seconds but transforms the final platter. Each slice emerges with clean, defined edges. The layers remain distinct. The pastry stays intact. Your guests see a professional presentation rather than a crushed, smeared mess. Wipe the blade. Slice. Repeat. This rhythm produces consistent results.
Handling a Broken Pastry During Slicing
Even with perfect technique, pastry can crack or crumble. This happens when the pastry was too dry, too cold, or overbaked. Do not panic. A cracked slice still tastes excellent. Focus on damage control for the remaining slices.
If a crack appears, stop slicing. Use a wide spatula to support the cracked section. Transfer the cracked slice to a serving plate immediately. The less you handle it, the less it breaks apart. For the remaining slices, adjust your cutting angle slightly. A different angle distributes pressure differently and may avoid the weak spot in the pastry.
If multiple slices crack, consider serving the Wellington as a whole piece on a platter. Let guests slice their own portions at the table. This shifts the responsibility and turns a potential failure into a communal dining experience. Provide a sharp knife and let your guests manage their own slices.
Plating the Slices
Arrange the slices on warmed plates. A cold plate cools the beef rapidly and dulls the flavor. Warm plates in a low oven (200°F) for five minutes before plating. Place one or two slices per plate depending on the portion size. Angle the slices slightly to show the cross-section. The visible layers of pastry, ham, duxelles, and pink beef are the visual payoff for all the effort.
Serve immediately after plating. Beef Wellington waits for no one. The pastry begins to soften within minutes of slicing. The beef starts to cool. The magic window for perfect texture is short. Have your sides, sauces, and garnishes ready before you slice. Then execute the slicing sequence and serve without delay.
Troubleshooting Common Problems
Even experienced cooks face setbacks with Beef Wellington. The complexity of layering raw pastry around seared beef creates multiple failure points. Most problems fall into three categories: pastry issues, temperature problems, and assembly errors. Each has a specific fix.
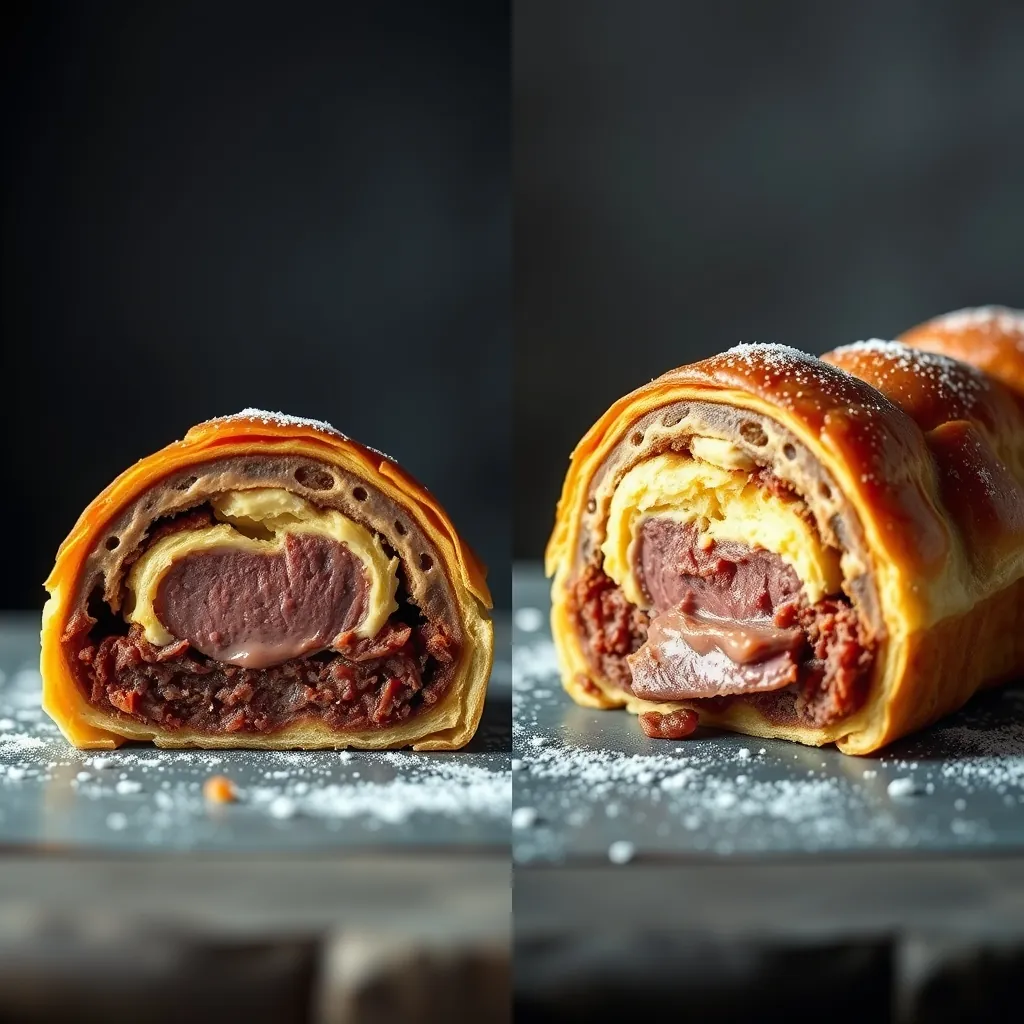
Fixing a Broken or Cracked Puff Pastry
Puff pastry cracks during rolling, wrapping, or baking. The cause is usually dry pastry, uneven thickness, or cold spots. A cracked pastry leaks steam and filling. The result is a misshapen Wellington with exposed beef.
Patch cracks immediately after you notice them. Cut a small piece of leftover puff pastry. Brush the crack with egg wash. Press the patch firmly into place. Smooth the edges with your fingers. The egg wash acts as glue. This patch bakes into the surface and becomes nearly invisible.
For larger tears, use a full strip of pastry. Roll out a thin rectangle of leftover dough. Brush the entire torn area with egg wash. Lay the strip over the tear. Press the edges to seal. Trim any excess with a sharp knife. Chill the patched Wellington for 15 minutes before baking. This sets the patch and prevents it from peeling away during baking.
Prevent cracks by keeping the pastry cold and moist. If the pastry feels dry during rolling, mist it lightly with water from a spray bottle. Do not soak it. A light mist restores flexibility without making the dough sticky. Work quickly. Warm pastry becomes soft and tears easily.
Preventing and Fixing a Soggy Bottom
A soggy bottom is the most common Beef Wellington failure. The pastry base absorbs moisture from the duxelles, ham, and beef juices. The result is a wet, doughy layer that ruins the texture. Prevention starts before the Wellington enters the oven.
Preheat a heavy baking sheet in the oven for 20 minutes before baking. Place the cold Wellington directly onto the hot sheet. The intense bottom heat crisps the pastry immediately. This creates a barrier that resists moisture penetration. A preheated sheet is the single most effective tool against a soggy bottom.
If you cannot preheat the sheet, use a wire rack set inside a baking sheet. The rack lifts the Wellington off the flat surface. Air circulates underneath the pastry. This prevents steam from pooling and softening the base. The rack method works well but produces slightly less bottom crispness than the preheated sheet method.
For a Wellington that is already baked with a soggy bottom, salvage it by slicing immediately. Remove the soggy portion from each slice. Serve the remaining intact sections. The flavor is still excellent. The texture is compromised but not ruined. Learn from the experience and apply the preheated sheet method next time.
Adjusting for Convection Ovens
Convection ovens circulate hot air with a fan. This cooks food faster and more evenly than standard ovens. The same recipe times produce overcooked beef and burnt pastry in a convection oven. Adjustments are essential.
Reduce the oven temperature by 25 degrees Fahrenheit. If the recipe calls for 400°F, set the convection oven to 375°F. This slows the cooking rate and prevents the pastry from browning too quickly. Check the Wellington 10 minutes earlier than the recipe suggests. Convection ovens can cut total baking time by 15 to 20 percent.
Monitor the internal temperature of the beef closely. Insert a probe thermometer through the pastry into the center of the fillet. Set the alarm for 118°F for medium-rare. The carryover cooking during resting will raise the temperature to 125°F. Remove the Wellington from the oven when the probe reads 118°F. Do not rely on visual cues alone. Convection heat browns the pastry faster than the beef cooks internally.
If the pastry browns too quickly, tent it loosely with aluminum foil. Fold a sheet of foil into a loose dome. Place it over the Wellington for the last 15 minutes of baking. The foil reflects heat and slows browning. Remove the foil for the final 5 minutes to re-crisp the surface.
Undercooked Pastry Layers
Raw or undercooked pastry between the ham and beef is a common issue. The inner layers of puff
Leave a Reply